Quantcast
Channel: Network – Lester Chan's Website
Viewing all 62 articles
Browse latest View live

Synology Router RT2600ac Review

$
0
0

Synology Router RT2600ac was officially launched in Singapore on the 12th January 2017. It is retailing for S$365.

The RT2600ac is Synology second router. The first being the RT1900ac.

Some difference between the RT2600ac and RT1900ac:

  • A more powerful dual-core 1.7GHz processor with 512MB of RAM.
  • 4×4 802.11ac wave 2 Wi-Fi radios with MU-MIMO and beamforming (combined throughout of up to 2.53Gbps).
  • Radios and chassis are redesigned for better wireless and thermal performance.
  • Dual WAN for load balancing and failover support (combined bandwidth of up to 2Gbps).
  • Hardware accelerated Layer 7 traffic control and monitoring.

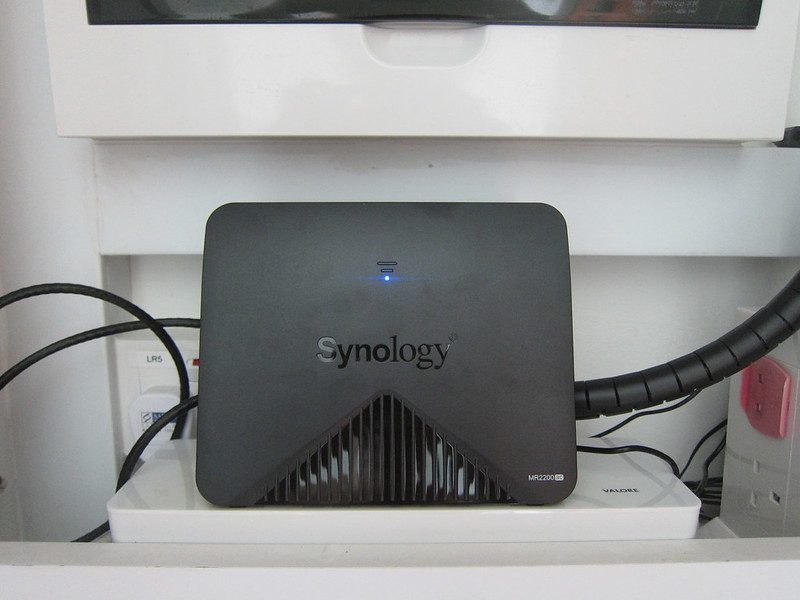
Similar to RT1900ac, RT2600ac is powered by Synology Router Manager (SRM). Out of the box, RT2600ac comes with SRM 1.1.

Unboxing

Synology Router RT2600ac - Box Front
Synology Router RT2600ac – Box Front

Synology Router RT2600ac - Box Back
Synology Router RT2600ac – Box Back

Synology Router RT2600ac - Box
Synology Router RT2600ac – Box

Synology Router RT2600ac - Box Open
Synology Router RT2600ac – Box Open

Synology Router RT2600ac - Box Contents
Synology Router RT2600ac – Box Contents

Design
The RT2600ac is larger and heavier than the RT1900ac. The RT2600ac measures 77 x 280 x 169 (mm) and weighs 700g whereas the RT1900ac measures 206 x 146 x 38 (mm) and weighs 510g.

There are now ventilation holes at the top of the router for better thermal performance.

Synology Router RT2600ac - Top
Synology Router RT2600ac – Top

The removable stand that comes with the RT1900ac is now gone. The stand allows you to place the RT1900ac vertically.

Hence, for the RT2600ac, it can no longer be placed vertically. You still can mount it on the wall using the two wall-mount screw slots at the back of the router.

Synology Router RT2600ac - Bottom
Synology Router RT2600ac – Bottom

There are two USB ports (1x USB 3.0 and 1x USB 2.0) in the RT2600ac while the RT1900ac only has one (1x USB 3.0). The USB 3.0 port on the RT2600ac is located at the left side of the router while the USB 2.0 port is located at the back.

Synology Router RT2600ac - Left
Synology Router RT2600ac – Left

Synology Router RT2600ac - Right
Synology Router RT2600ac – Right

Similar to the RT1900ac, the RT2600ac also comes with one SD card slot. The SD card slot is located in front of the router and is compatible with SDXC cards up to 2TB.

Synology Router RT2600ac - Front
Synology Router RT2600ac – Front

The number of buttons also remains the same for both routers. WPS, USB/SD eject, Power, Reset and Wi-Fi On/Off.

Dual WAN support, the secondary WAN is the first LAN port.

Synology Router RT2600ac - Back
Synology Router RT2600ac – Back

Synology Router RT2600ac

Admin UI
The admin UI of the router can be accessed via http://router.synology.com.

Synology SRM - Home
Synology SRM – Home

Since both the RT1900ac and the RT2600ac is powered by Synology Router Manager (SRM), the UI and setup steps are exactly the same. I will not be going through the setup in this post. If you are interested in reading more, check out my Synology Router RT1900ac Review.

Synology SRM - Menu
Synology SRM – Menu

Synology SRM - Control Panel
Synology SRM – Control Panel

I will be highlighting a few new features to the UI which at that point of writing is not found in SRM 1.0. RT1900ac was shipped with SRM 1.0.

Synology SRM - Network Center
Synology SRM – Network Center

Synology SRM - Network Center - Wireless
Synology SRM – Network Center – Wireless

Synology SRM - Network Center - Connection
Synology SRM – Network Center – Connection

Under “Network Center > Internet > Smart WAN”, if you have two high-speed fiber Internet connection, you can use the first LAN port as a secondary WAN for load balancing and failover. You can also use a 3g/4G dongle as a secondary WAN.

Synology SRM - Network Center - Secondary WAN
Synology SRM – Network Center – Secondary WAN

VLAN tagging is supported every since version 1.0.1-6007. It is under “Network Center > Internet > Connection” and look for the “ISP Settings(IPTV & VoIP)” button. By default, you can choose any preloaded Singapore/Malaysia ISP profiles.

If you want to set the VLAN tags manually, under “Mode”, you have to choose “Manual” instead of “IPTV/VoIP Profile”.

Synology SRM - Network Center - Internet - VLAN Tagging
Synology SRM – Network Center – Internet – VLAN Tagging

Synology SRM - Network Center - Internet - VLAN Tagging - Manual
Synology SRM – Network Center – Internet – VLAN Tagging – Manual

There are now more packages in the Package Center with the addition of three new packages: VPN Plus Server, Intrusion Prevention, and Cloud Station Server.

Synology SRM - Package Center
Synology SRM – Package Center

VPN Plus Server provides client-free WebVPN, Synology SSL VPN and SSTP VPN capabilities.

The Intrusion Prevention package brings intrusion detection system (IDS) and intrusion prevention system (IPS) features to actively protect your network and devices from malicious parties.

Cloud Station Server allows you to run your own private Dropbox on your router that you have full control of.

Speed
The speed test is done using iPerf. Since I am using different computers now to do the test, I decided to start from scratch.

The iPerf Client is my MacBook Pro 13″ (Mid 2014) and the iPerf Server is Li Xiang’s MacBook Pro 13″ (Mid 2015).

Going forward I am hoping to use this combination for future routers speed test.

Type RT2600ac
LAN to LAN 940Mbps
LAN to Wireless 559Mbps
Wireless to Wireless 180Mbps

Conclusion
The Synology Router Manager (SRM) is probably the best router UI in the market, I would totally use the RT2600ac as a wired router to replace my Asus RT-AC88U if it had 8 LAN ports instead of 4. I don’t use the wireless features of either router because I am already on eero.

Priced at S$365, it is pretty expensive for a router that is only on AC2600. AC2600 has been around since 2015 and AC5400 was in 2016. For 2017, we are moving towards wireless mesh. TP-Link has Deco, D-Link has Covr, Linksys has Velop and Asus as HiveSpot/HiveDot.

I would say Synology is too late to the party. If you ask me, I think they should skip the RT2600ac and go straight into wireless mesh routers.

The possible saving grace for this router is the good wireless speed, excellent SRM admin UI and the useful Package Center in SRM.

I am really hoping the next router from Synology would have 8 LAN ports. Even if it is not capable of wireless mesh, I would still use it as a wired router.

Synology Router RT2600ac

This post Synology Router RT2600ac Review appeared first on lesterchan.net.

Linksys Velop Review

$
0
0

Linksys Velop is Linksys’s first wi-fi mesh system, and it was launched in Singapore on 12th April 2017. They are the second company to launch wi-fi mesh system in Singapore. The first being Netgear Orbi.

I have been using eero since January 2017 and eero is a wi-fi mesh system as well.

Wi-fi mesh system allows your home to truly share a single SSID regardless the size of your home. You can expand the wireless coverage by just increasing the number of nodes in your house. A typical three-node wi-fi mesh system can cover between 2,000sqft to 4,000sqft.

Since wi-fi mesh system is new to the market, they are not cheap. They typically come in 1-pack, 2-pack or 3-pack.

Linksys Velop retails their 1-pack for S$349, 2-pack for S$599 and 3-pack for S$749.

The pricing is almost the same as that of eero and Netgear Orbi.

I would recommend you to get the 3-pack because it is more value for money. Even if your house is smaller than 2,000sqft, you also need to take into consideration concrete walls, Internet port, and power point locations within your home. It is better to have more than fewer nodes.

Specifications
Velop has better specs than eero and Google Home.

Each Velop node is a Tri-Band AC 2×2 802.11ac Wave 2 with MU-MIMO Radio (2x 5.0 GHz and 1x 2.4 GHz). Theoretically, you can get a combined speed of 2,220Mbps. Whereas for eero and Google Home, they are only on dual-band without MU-MIMO.

Inside each Velop node is a 716MHz quad-core ARM Cortex-A7 processor with 512MB DDR3 RAM and 4GB flash memory. It has Bluetooth 4.0/LE which is mainly used for setup and two auto-sensing LAN/WAN Gigabit Ethernet ports.

There are six antennas and high powered amplifiers inside each Velop node.

Unboxing
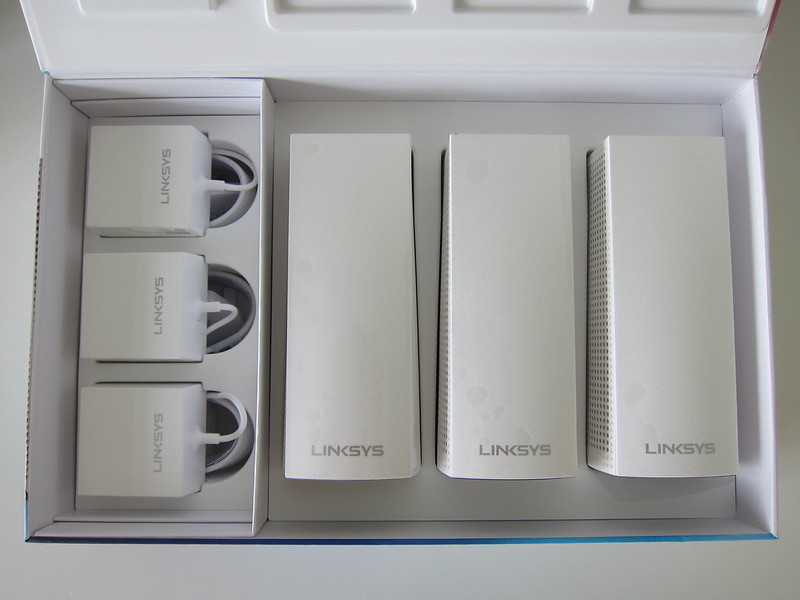
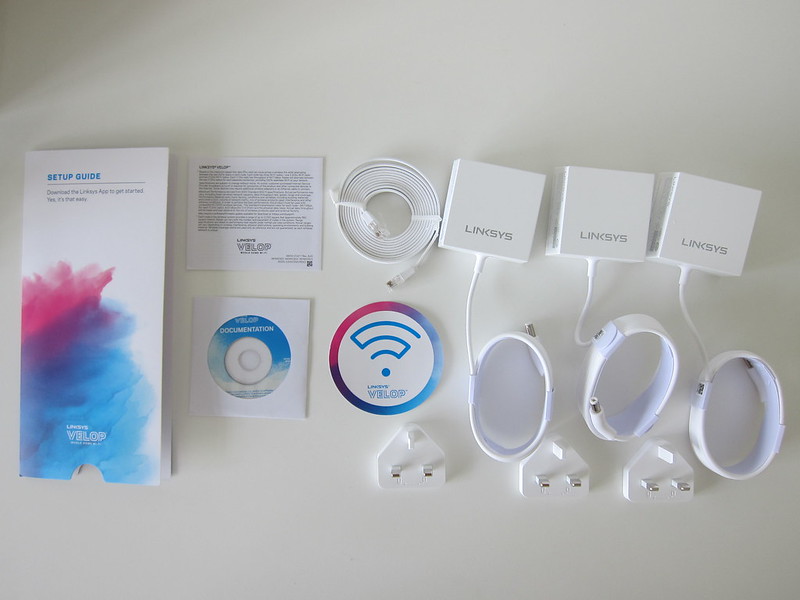
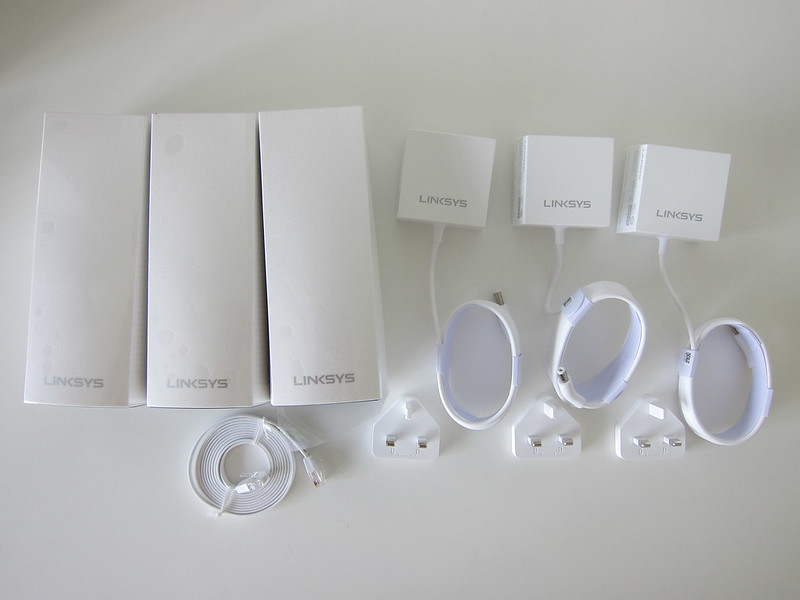
The packaging contents is pretty simple:

  • 3x Velop Nodes
  • 3x Power Adapter with UK Plug
  • 1x Ethernet Cable
  • Quick Start Guide
  • Velop Sticker
  • Warrenty Information
  • Documentation Mini CD

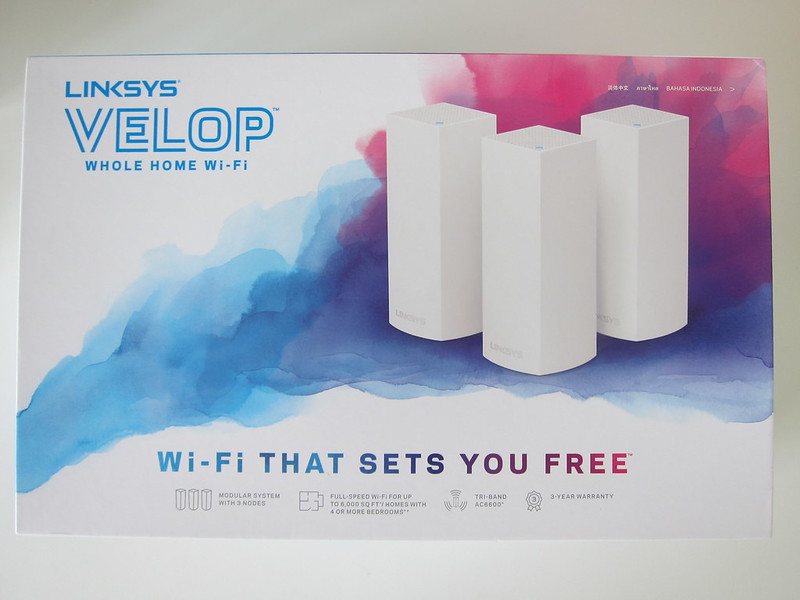
Linksys Velop - Box Front
Linksys Velop – Box Front

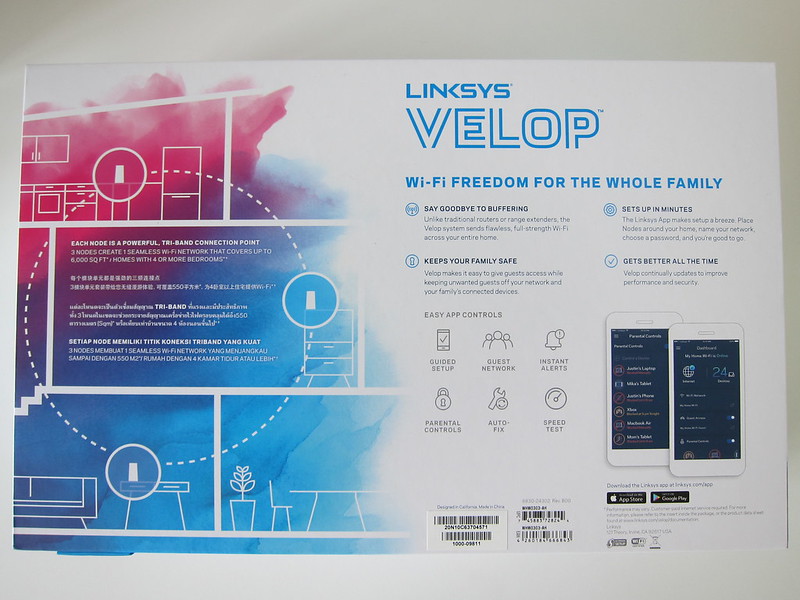
Linksys Velop - Box Back
Linksys Velop – Box Back

Linksys Velop - Box
Linksys Velop – Box

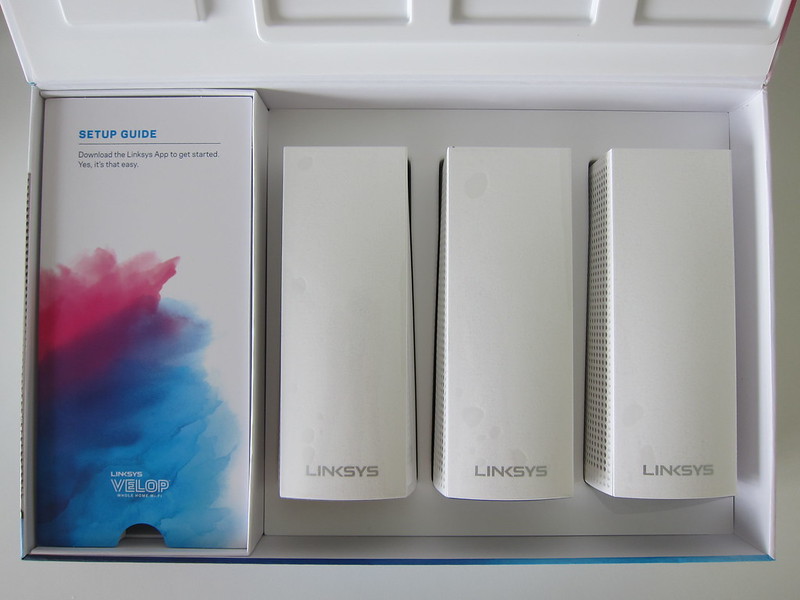
Linksys Velop - Box Open
Linksys Velop – Box Open

Linksys Velop - Box Open
Linksys Velop – Box Open

Linksys Velop - Box Open
Linksys Velop – Box Open

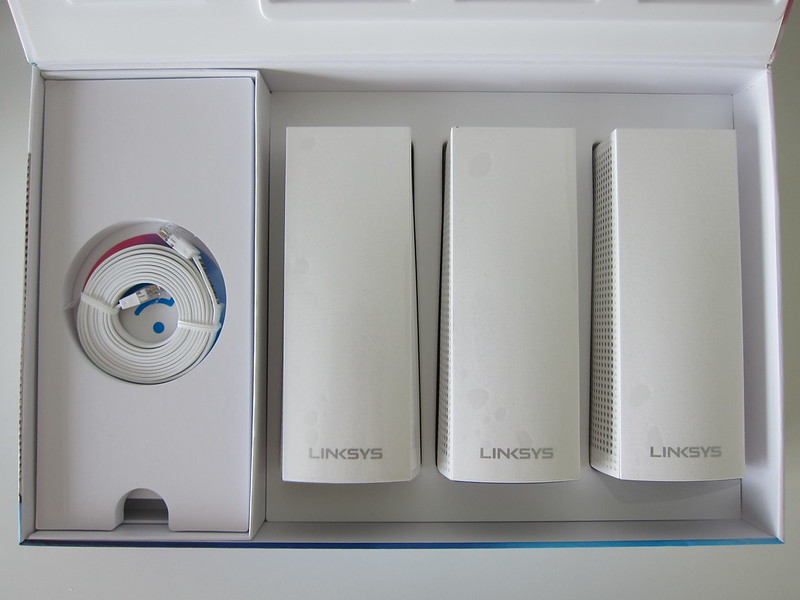
Linksys Velop - Box Contents
Linksys Velop – Box Contents

There is even a mini CD inside.

Linksys Velop - Box Contents
Linksys Velop – Box Contents

They should have included three Ethernet cables instead of just one. Each node should have an ethernet cable of its own.

Linksys Velop - Instructions
Linksys Velop – Instructions

Linksys Velop - Power Adapter
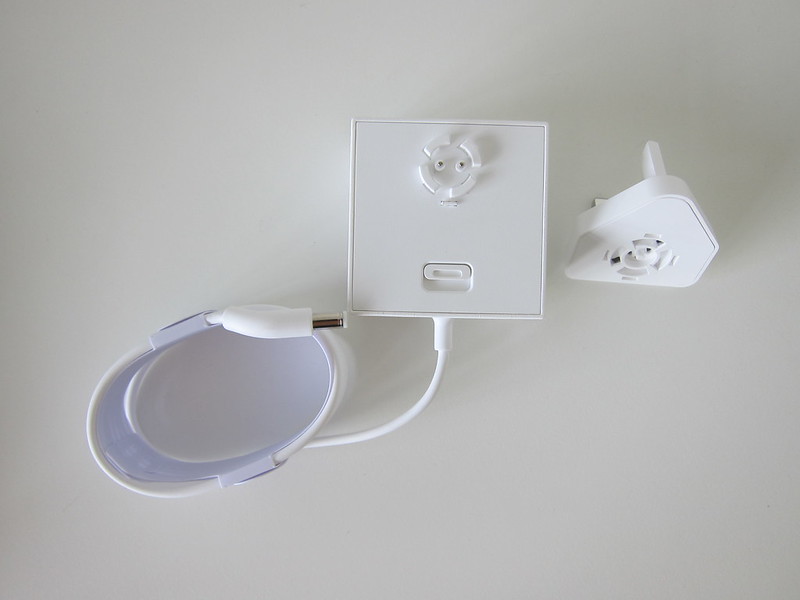
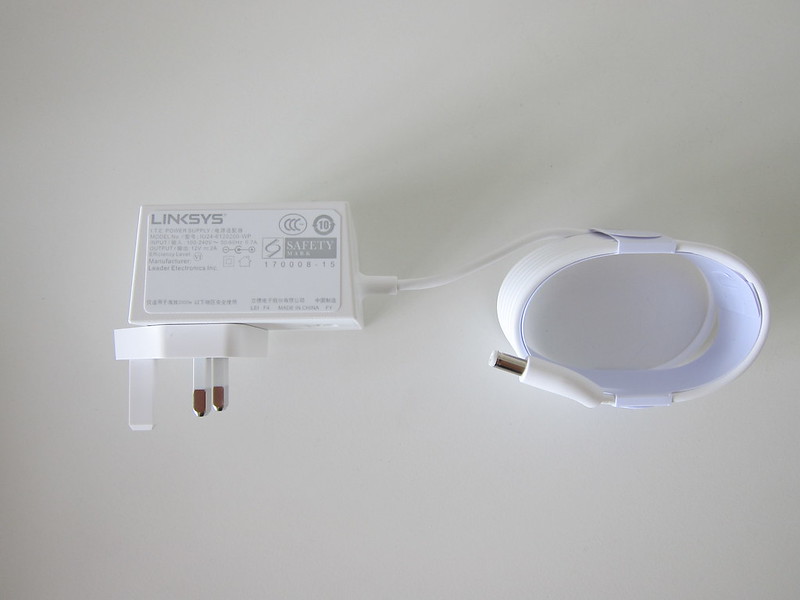
Linksys Velop – Power Adapter

Linksys Velop - Power Adapter
Linksys Velop – Power Adapter

Design
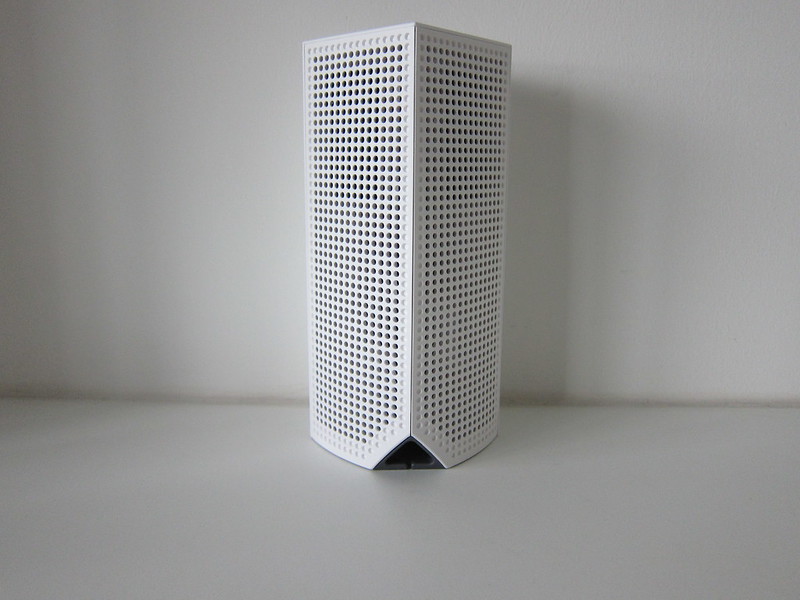
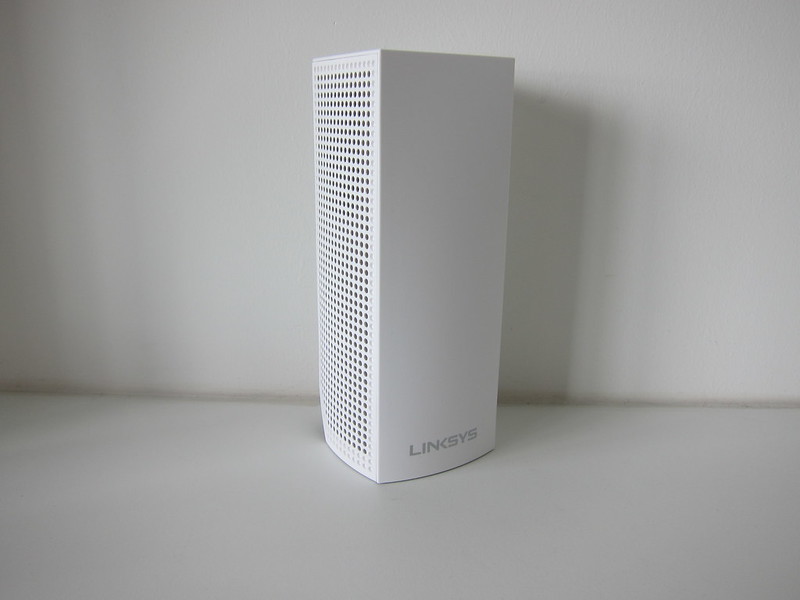
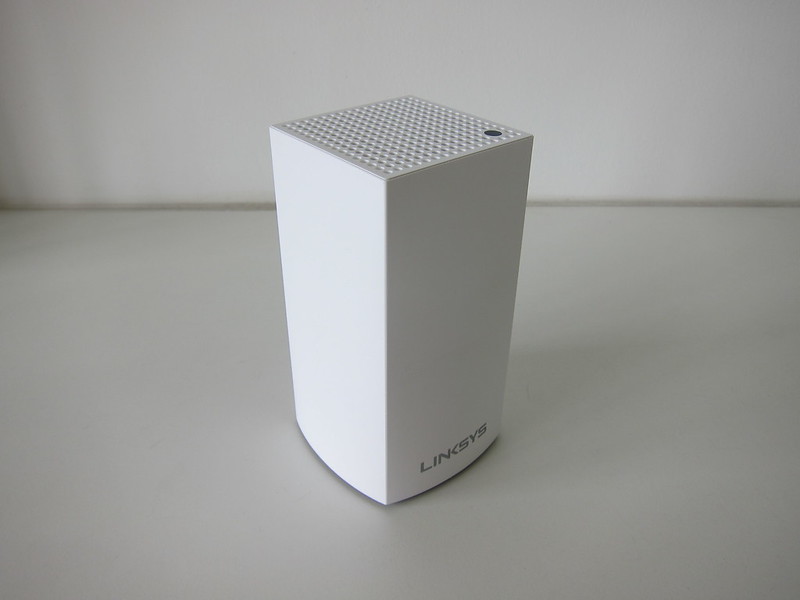
Linksys opted to make the Velop tall (19cm) with a square base (8cm x 8cm).

Accordingly, to Linksys, the vertical design brings about performance benefits. The six antennas are placed at the top and middle of the node. The placement allows some signals to be pushed up and down while others left and right.

Linksys Velop - Front
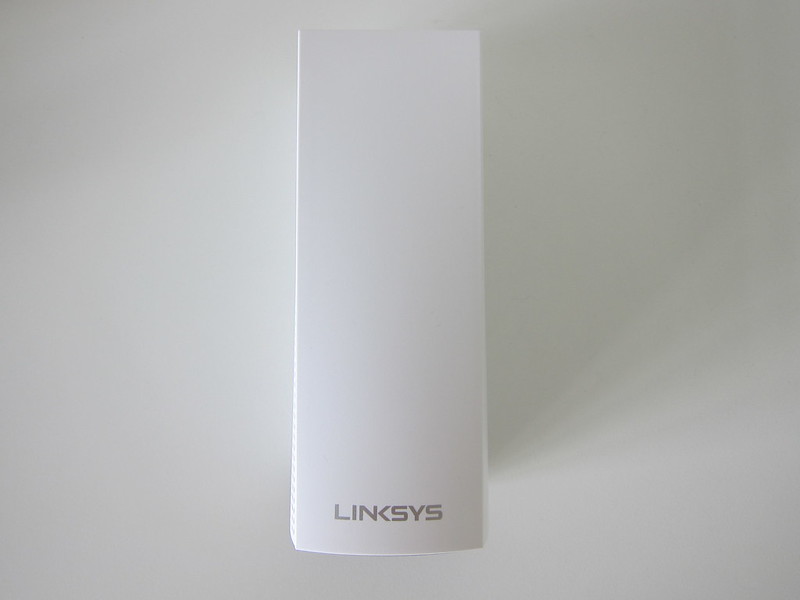
Linksys Velop – Front

Linksys Velop - Back
Linksys Velop – Back

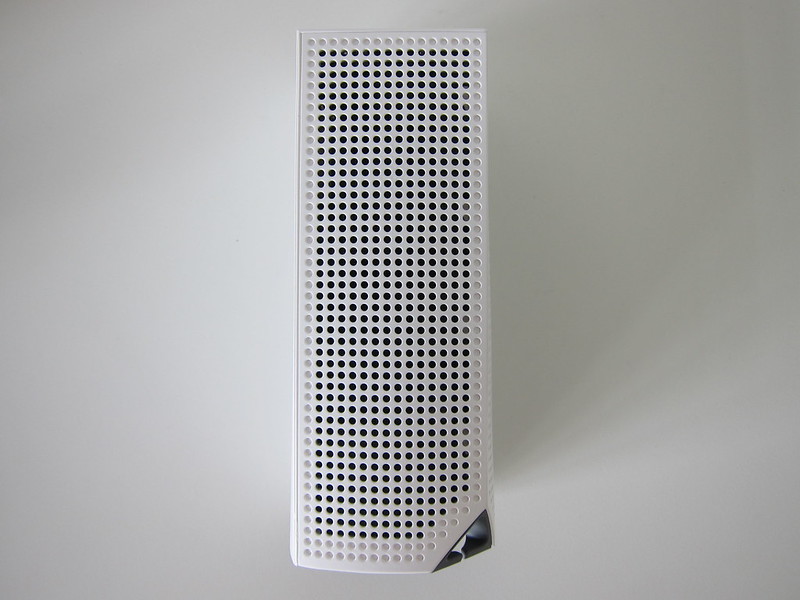
There are ventilation holes on two of the back panels and at the top which gives it better cooling.

Linksys Velop - Ventilation Holes
Linksys Velop – Ventilation Holes

I don’t find the Velop hot. In fact, it is cooler than my eero because my eero which doesn’t have ventilation holes.

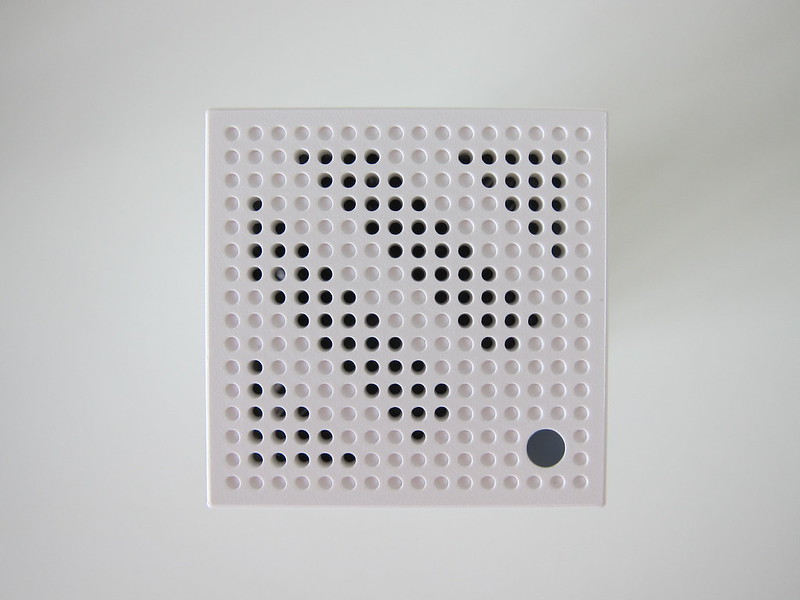
There is only one light indicator on the Velop which is at the top.

Linksys Velop - Top
Linksys Velop – Top

There are four possible colors to it: blue, purple, red or yellow.

  • Blinking blue – Node is starting up
  • Solid blue – Node is working great
  • Blinking purple – Node is paired with phone for setup
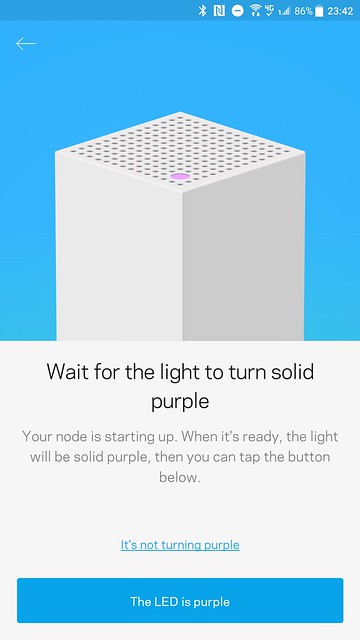
  • Solid purple – Node is ready for setup
  • Blinking red – Node has lost connection to primary node
  • Solid red – Node has lost connection to the Internet
  • Solid yellow – Node is too far from another node connected to your Velop system

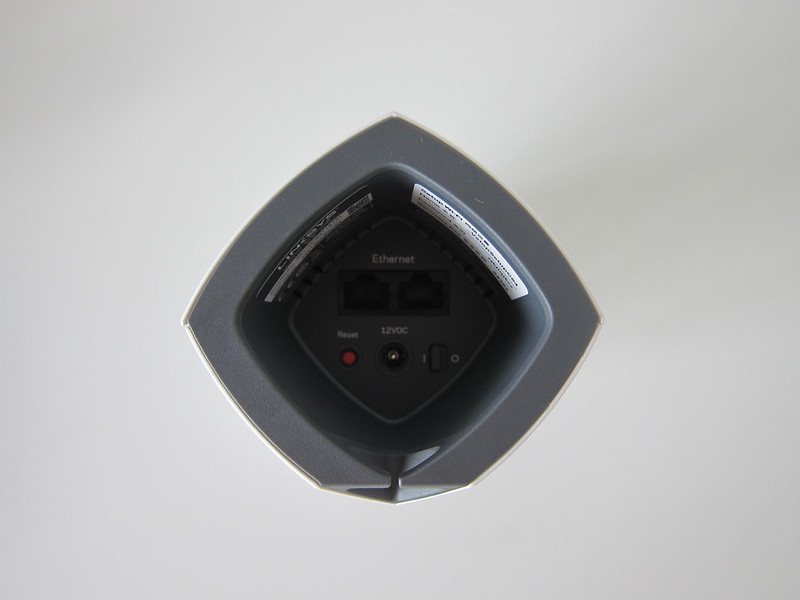
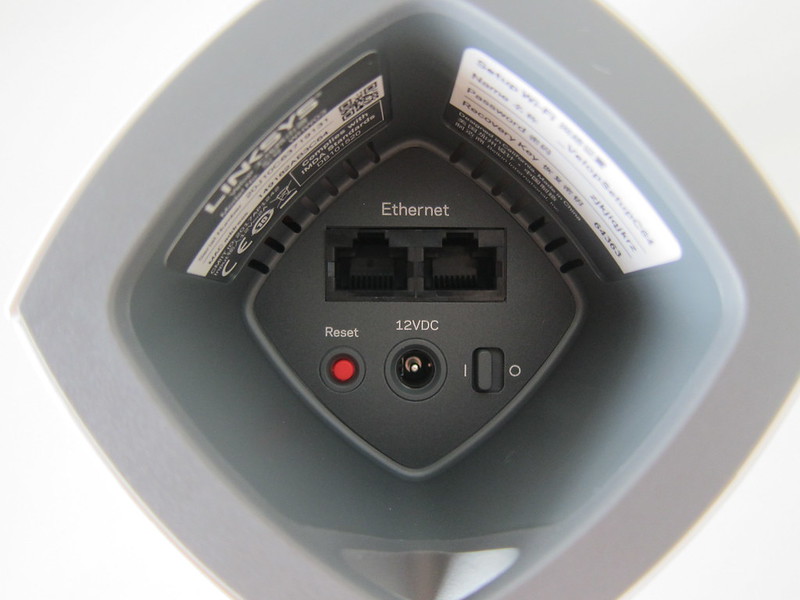
At the bottom consists of only five items. Two auto-sensing LAN/WAN Gigabit Ethernet ports, one power switch, one reset button and one power port.

Linksys Velop - Bottom
Linksys Velop – Bottom

Linksys Velop - Ports
Linksys Velop – Ports

Each node is built to connect with each other over wi-fi or wired ethernet. I would always recommend you to connect it via wired ethernet as much as possible because of better speeds.

If you are using one of the Ethernet port to connect to other nodes within your network, you can use the other ethernet port for LAN connection. Velop will automatically detect the connection on the Ethernet port and assign accordingly.

Bridge Mode
Before we go into setup, I need to emphasize that Velop DOES NOT support Bridge Mode. This means that you have to replace your existing router with Velop and let Velop control your network.

eero, on the other hand, supports Bridge Mode, and hence I can use my existing Asus router to control my network while the eero just focus on wireless access.

There are many reasons why Bridge Mode is better for semi-advanced users. For a start, your router is more powerful than a node.

If you have LAN devices at home, your bottleneck will be the single Gigabit of your node as compared to eight Gigabit Ethernet ports found in high-end routers.

VLAN tagging is not supported in Velop. However, if you are using Bridge Mode, you can use the VLAN tagging feature in your router instead.

Probably the most important reason is that using bridge mode you can control your network using a browser. For most wi-fi mesh systems, you have to use an app to manage your network which is very cumbersome.

Rest assured Linksys heard us and Bridge Mode support for Velop would be coming soon in Q3 2017.

Setup
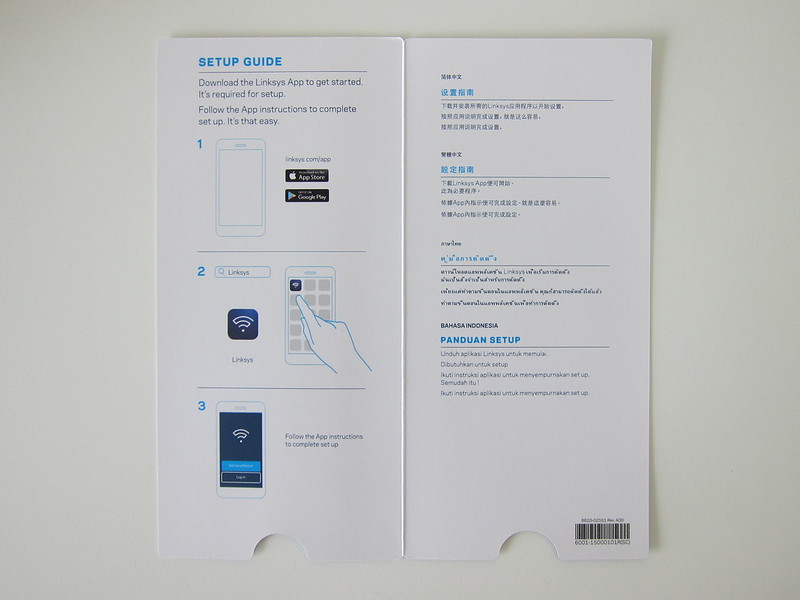
To begin Velop setup, you have to use either the Linksys iOS app or Linksys Android app. There is no browser based setup.

The setup process is very similar to eero. It requires your phone’s Bluetooth connection to connect to the Velop to start the process.

Because the app maintains a Bluetooth connection to Velop, it does not force the user to exit the app, reconnect or change wi-fi settings on the mobile device

Even if your Velop is restarting, your phone is still able to maintain the connection, and hence the app knows exactly which part of the setup process you are in at any given time.

I love the setup screens, the instructions are clear, and the visual animations on the screen is a nice touch.

For some weird reason, I can’t use my iPhone 7 Plus to set up the Velop. It always got stuck at “looking for your node” screen. Tried restarting my phone, toggling my Bluetooth connection, and it still doesn’t go past that screen. I even tried another node, and the same thing happens. It was a frustrating start.

I guess it might be due to a Bluetooth issue with my phone, but I have no problems connecting to other Bluetooth devices (even my door lock). It is weird.

I decided to try using an Android phone which is my HTC U Ultra. It works all the way till saving my network settings where it keeps saying that it failed to save my wi-fi settings. I have to repeat the saving process many times for it to work.

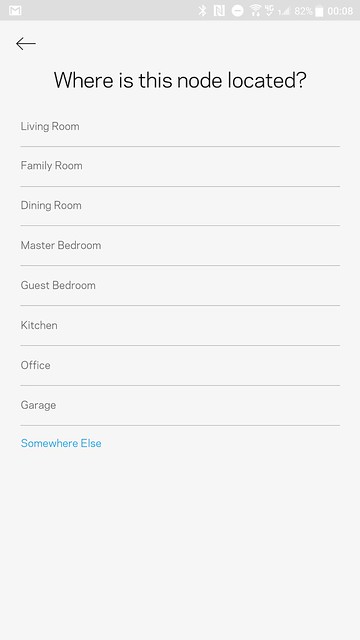
After getting past the wi-fi settings screen, it asks me to indicate where this node is located. Again, I have the same problem saving this setting, and I have to repeat the saving process many times.

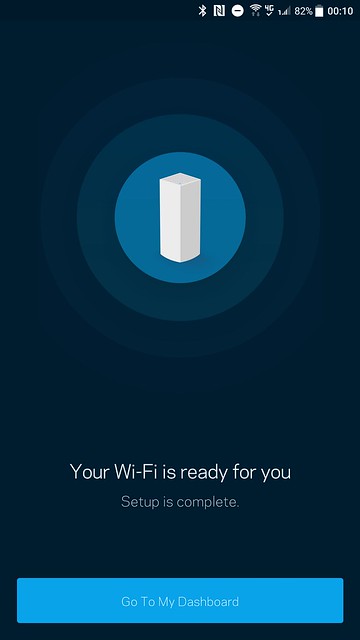
Finally, the setup is done. A frustrating process for me.

Velop App - Setup #1Velop App - Setup #2
Velop App – Setup

Velop App - Setup #3Velop App - Setup #4
Velop App – Setup

Velop App - Setup #5Velop App - Setup #6
Velop App – Setup

Velop App - Setup #7Velop App - Setup #8
Velop App – Setup

Velop App - Setup #9Velop App - Setup #10
Velop App – Setup

Velop App - Setup #11Velop App - Setup #12
Velop App – Setup

Velop App - Setup #13Velop App - Setup #14
Velop App – Setup

Velop App - Setup #15Velop App - Setup #16
Velop App – Setup

Velop App - Setup #17Velop App - Setup Done
Velop App – Setup Done

After setting up the primary node, I tried using my iPhone 7 Plus again to setup the secondary node and surprisingly, it works!

Though, I encountered the same problem when I tried to indicate my node location. I have to repeat that save process a few times.

So was it a problem with my phone’s Bluetooth? I am not sure.

Linksys App
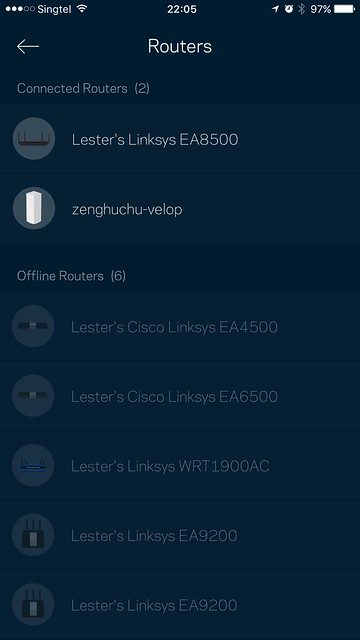
I find the app very slow especially networking performance. When I launch the app, it takes 10 seconds to log in and about 30 seconds to load the next screen that lists down all my Linksys Smart Wi-Fi routers.

Because I have reviewed about seven Linksys Smart Wi-Fi routers, it tries to get the status of each of them although most of them are no longer in used. There is also no way to remove those routers from my Linksys account.

Velop App - Routers Listing
Velop App – Routers Listing

My case might be an edge case, but I want to highlight to Linksys that they should provide us a way to remove routers that we are no longer using.

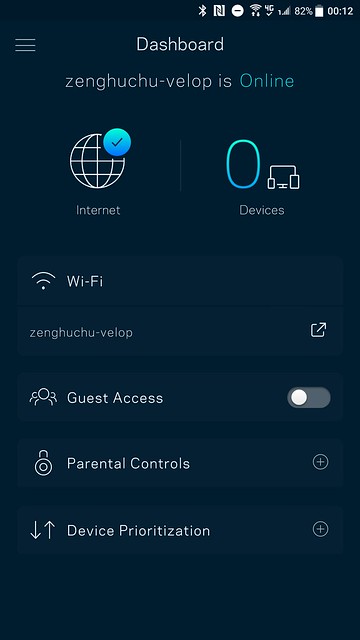
Apart from the initial slow loading, the app is pretty straightforward to use, and the UI is visually appealing.

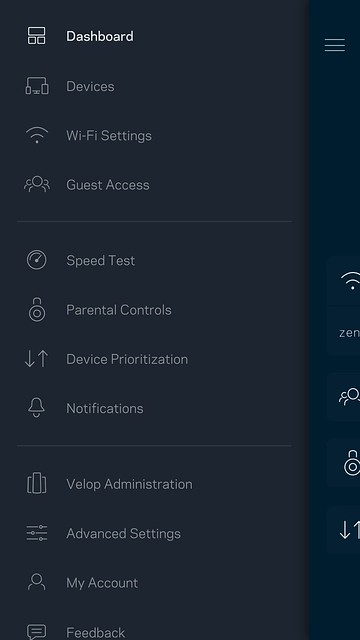
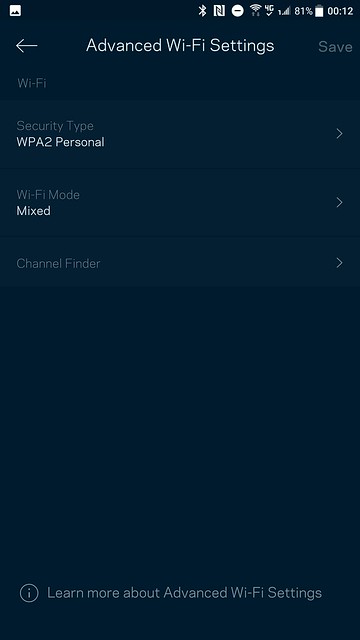
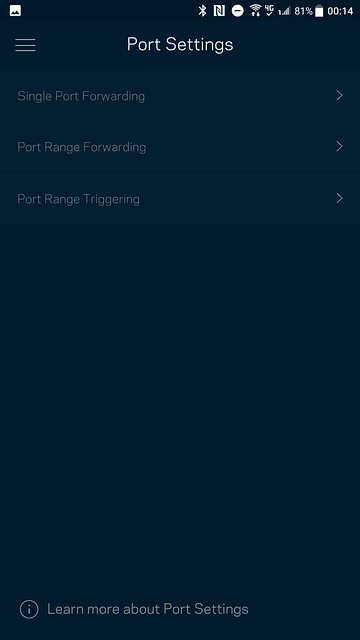
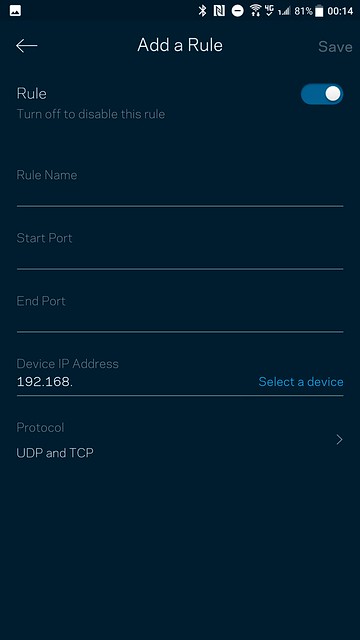
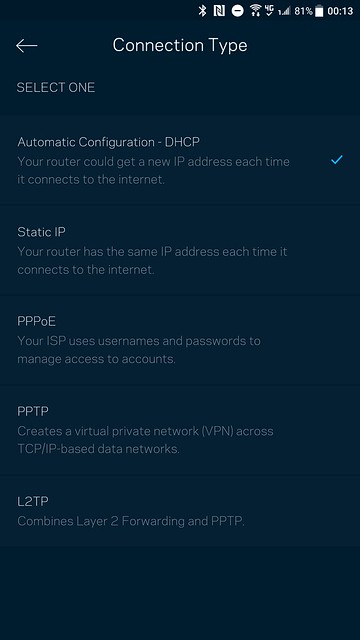
You can configure the following features in the app itself as there is no web based administration.

  • Wi-Fi
  • Guest Wi-Fi
  • Speed Test
  • Parental Controls
  • Device Prioritization (up to three devices)
  • Port Forwarding (Single Port Forwarding, Port Range Forwarding, Port Range Triggering)
  • MAC Filters
  • Internet Settings (DHCP, Static, PPPoE, PPTP, L2TP)

Velop App - DashboardVelop App - Menu
Velop App – Dashboard / Menu

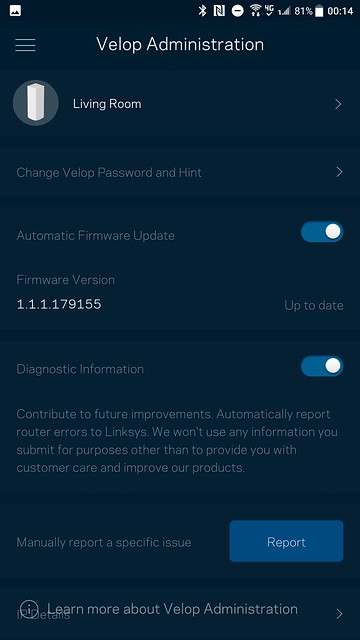
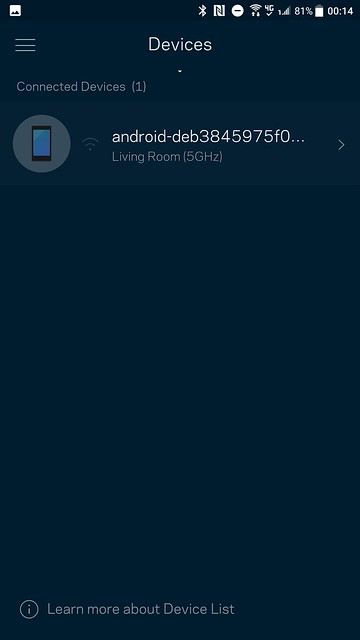
Velop App - AdminVelop App - Devices
Velop App – Admin / Devices

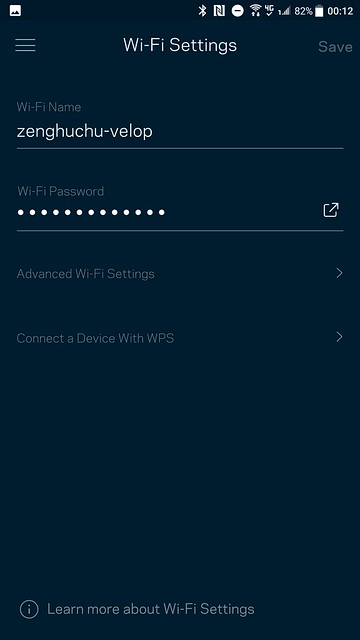
Velop App - Wi-Fi SettingsVelop App - Advanced Wi-Fi Settings
Velop App – Wi-Fi Settings

Velop App - Port SettingsVelop App - Add A Rule To Port Forwarding
Velop App – Port Settings

Velop App - Internet Connection TypeVelop App - Internet Connection Additional Settings
Velop App – Internet Connection Type

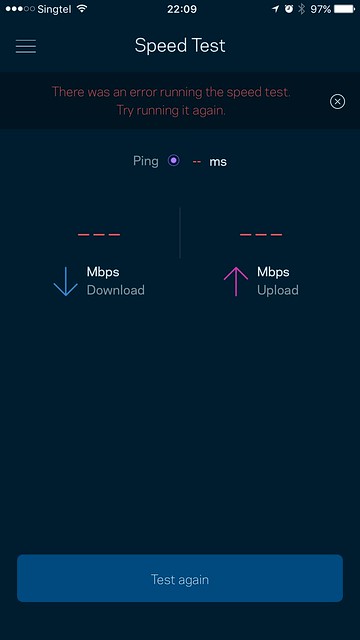
I can’t get the Speed Test to work no matter how many times I tried. It always says “There was an error running the speed test.”

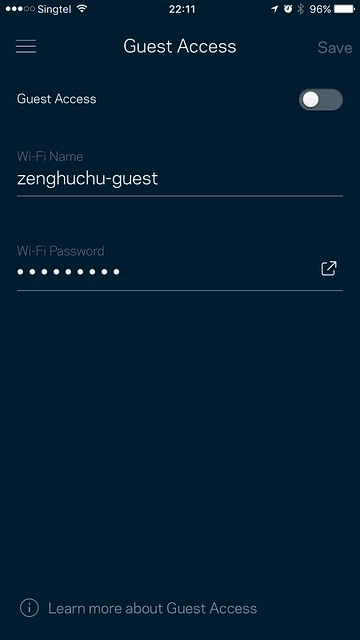
Velop App - Speed TestVelop App - Guest Wi-Fi
Velop App – Speed Test / Guest Wi-Fi

Coverage
Linksys did mention that each Velop node can cover up to 2,000sqft, so a 3-pack Velop can cover up to 6,000sqft. But as with network specs, all those are just theoretical and will never happen in real life.

As mentioned earlier, a more realistic coverage for a 3-pack Velop is between 2,000sqft to 4,000sqft. That is because you have to take into consideration concrete walls, locations of power sockets and your primary Internet port.

My house is a new 5-room BTO flat which is 113sqm or 1,216sqft in size.

Like all homes in Singapore, we have a lot of concrete walls which interferes with wi-fi signals. And because of that, I think a 3-pack Velop is good for 4 (90sqm/969sqft) or 5-room BTOs (113sqm/1,216sqft). A 2-pack Velop is good for 3-room BTOs (65sqm/700sqft). And any size below that, it is better to get a high-end router as you don’t get any benefits from using wi-fi mesh system.

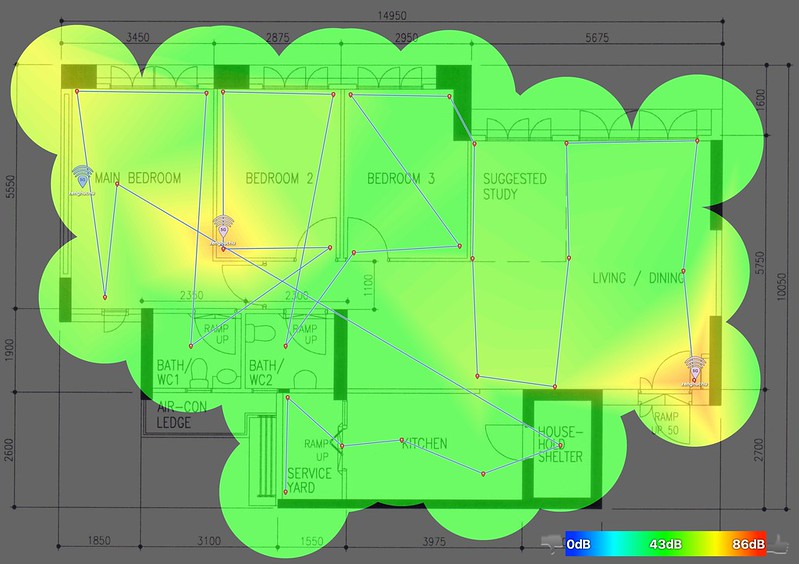
I placed one Velop at the Internet point (near the Ramp), one in Bedroom 2 and the last one in Main Bedroom.

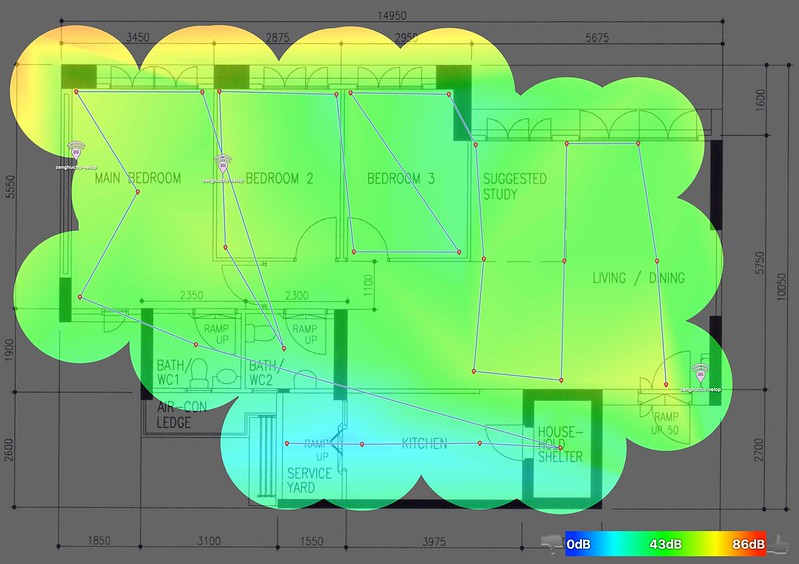
Here is Velop heat map for the 2.4GHz and 5.0GHz band:

Velop - 2.4GHz - Heatmap
Velop – 2.4GHz – Heatmap

From the 2.4GHz heat map, you can see a bluish area from the service yard all the way to the household shelter.

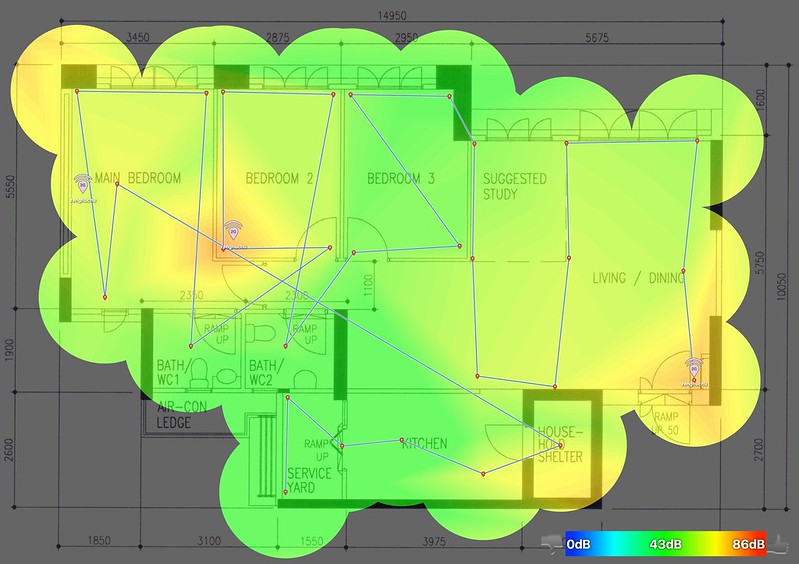
Velop - 5.0GHz - Heatmap
Velop – 5.0GHz – Heatmap

From the 5.0GHz heat map, you can see bluish areas around both washrooms (WC1 and WC2) and the service yard.

Here is eero heat map for the 2.4GHz and 5.0GHz band in comparison:

eero - 2.4GHz- Heatmap
eero – 2.4GHz- Heatmap

eero - 5.0GHz- Heatmap
eero – 5.0GHz- Heatmap

I find the coverage not as good as eero. From both eero heat maps, you can see there is no bluish area.

At first, I thought it might be due to beamforming, but both eero and Velop supports beamforming.

I can find better locations to place the nodes, but my nodes are placed in areas where there is a wired Ethernet connection, so the choices are limited.

Speed
Before I did the speed test, I was already expecting the Velop to outperform my eero since regarding specs the Velop is much better.

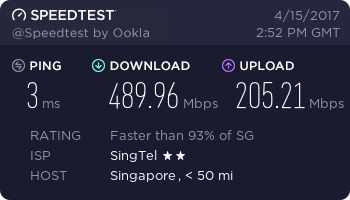
So no surprises here, Velop did beat eero by a huge margin when it comes to downloading speed. 490Mbps vs. 350Mbps on the eero. For uploading speed, Velop obtains 205Mbps vs. 164Mbps on the eero.

Velop - Speed Test
Velop – Speed Test

Location Velop eero EA9500 (5GHz) RT-AC88U (5GHz)
Living Room (Download) 489.96Mbps 349.69Mbps 444.58Mbps 465.90Mbps
Living Room (Upload) 205.21Mbps 164.14Mbps 282.32Mbps 377.75Mbps

Amazon Alexa
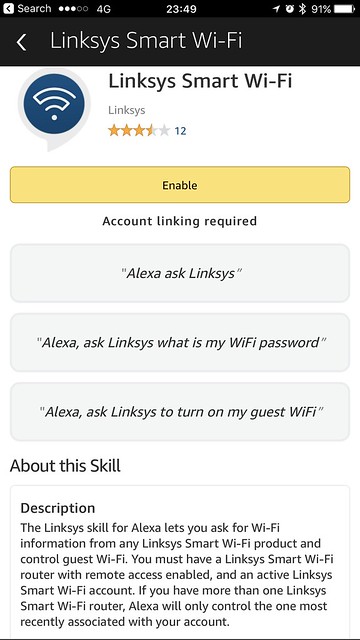
If you are using Linksys Smart Wi-Fi routers (which includes Velop), it supports integration with Amazon Alexa. You can install the Linksys Alexa Skill by searching for “Linksys” in the Skills section in your Alexa app on iOS or Android.

Linksys Alexa Skill
Linksys Alexa Skill

The features are a little limited right now. You can only ask Alexa to turn on or off your guest wi-fi and ask Alexa for your wi-fi password.

Unfortunately, I can’t get the integration to work. When I tried to ask Alexa what is my wi-fi password, it gives me a message saying “Your Linksys Skill has received the request, but there is an error processing it.”.

I am pretty sure it is due to a timeout because of the number of Linksys Smart Wi-Fi routers I have.

Alexa has a hard timeout set to 10 seconds, and if it takes 30 seconds to list down my routers in Linksys app, Alexa will also take 30 seconds to process it and hence the time out.

Conlusion
Linksys Velop is targetted at users who just wants a single wi-fi network for the whole home without the need for cumbersome configuration of using a router and a range extender.

Velop will work for simple home users where most of the devices at their home are wireless. Normally, it is something that you will get and put in your parents’ place.

When there are a mixed of wired and wireless devices, it is better for a high-end router like Linksys EA9500 or Asus RT-AC5300 to take control of the network and let Velop manage the wireless access only. If you fall into this category of users, Velop will not be suitable till they roll out Bridge Mode support.

A 3-pack Linksys Velop retails for S$719 and accordingly, to Linksys survey, people are willing to pay a premium for good wi-fi speed and coverage without the need for complex configurations.

I am a techie, and hence I am willing to pay that amount for seamless wi-fi with good speed and coverage within my home. As they say, fast and reliable wi-fi is now an essential human need.

But many of my friends already find high-end routers too expensive at S$400. So I am not sure whether people are willing to fork out S$749 which is almost two times the price for Velop.

But one thing for sure, wi-fi mesh systems are here to stay, and the prices will not be dropping anytime soon.

We will see more of these systems in 2017 from different manufacturers. Among all the upcoming wi-fi mesh systems like the Asus HiveSpot, TP-Link Deco M5, and D-Link’s CovrLinksys, I think Velop is the best among the lot when it comes to specs and execution.

However, if you compare it with eero and Google Wifi which are not available in Singapore, they are giving Velop a run for their money, not in terms of specs but the execution.

Linksys Velop
Linksys Velop

This post Linksys Velop Review appeared first on lesterchan.net.

Google Wifi Now Available in Singapore

$
0
0

Google Wifi is now officially available in Singapore through a partnership with StarHub.

Singapore is the first country in Southeast Asia to introduce Google Wifi.

Google Wifi
Google Wifi

Starting tomorrow, 31st August 2017, you can buy a three-pack Google Wifi bundle at S$15/month over 24 months when you sign up or renew selected StarHub Broadband or Hubbing all-in-one plans. No upfront payment is needed.

That works out to be about S$360. If you are getting it from Google US Online Store, you will be paying US$264 (S$358) excluding shipping to Singapore. Google US don’t ship to Singapore directly, so you need to use a freight forwarder like HopShopGo.

Alternatively, you can get it from Amazon for the same price (US$264/S$358) and it ships directly to Singapore for free as it qualifies for the free AmazonGlobal Saver Shipping.

Unfortunately, that is the only way to get Google Wifi in Singapore. You can’t get it in stores or through Google Online Store.

I am pretty sure people will eventually sell it on Carousell.

This post Google Wifi Now Available in Singapore appeared first on lesterchan.net.

Aztech AIR-706P AC1900 Dual Band Gigabit Mesh Router Review

$
0
0

Aztech AIR-706P is the first mesh router from Aztech that was launched in July 2017 and is retailing for S$269.

The AIR-706P is a budget router that can expand its range using another AIR-706P via mesh network rather than a wi-fi extender.

Despite it being branded as a mesh router, it is not using a real mesh. In a real mesh network, all nodes communicate with their neighboring nodes. For the AIR-706P, it only talks to the primary node. It is essential a star topology network. The good news is that you still get to use a single SSID for your whole house.

Features

  • AON Mesh Ready
  • Wi-Fi Radar
  • Wi-Fi Connect
  • Easy Device Setup and Installation
  • Ultra-Fast Wireless Performance
  • 4x Gigabit Ethernet Ports for Wired Connection
  • Supports IEEE 802.11a/b/g/n/ac Wireless Standard (Up to 1900Mbps)
  • Designed for Fibre-to-the-Home (FTTH) via ONT
  • Blazing Concurrent Dual Band Speed. 2.4GHz Band: Up to 600Mbps. 5.0GHz Band: Up to 1,300Mbps
  • Band Steering for 5.0GHz Band Optimization
  • USB 3.0 Ports for Faster File Storage Sharing
  • Wi-Fi Protected Setup (WPS)
  • Guest SSID Support
  • Wireless Insight for Wi-Fi Issue Diagnostics

Unboxing

Aztech AIR-706P - Box Front
Aztech AIR-706P – Box Front
Aztech AIR-706P - Box Back
Aztech AIR-706P – Box Back
Aztech AIR-706P - Box
Aztech AIR-706P – Box
Aztech AIR-706P - Box Contents
Aztech AIR-706P – Box Contents
Aztech AIR-706P - Instructions
Aztech AIR-706P – Instructions

Design
I am not a fan of the design of the router. It doesn’t give me a sense of premium when I see or touch it.

Aztech AIR-706P
Aztech AIR-706P
Aztech AIR-706P - Front - LED Indicators
Aztech AIR-706P – Front – LED Indicators

There are 11 indicators in front of the router which is the most I have ever seen in a router. Not sure why they don’t move the LAN ports indicator at the back which is what Linksys is doing.

The first button on the left allows you to turn on or off the LED indicator and the second button is the WPS.

Aztech AIR-706P - Back - Ports
Aztech AIR-706P – Back – Ports

Ports and buttons at the back of the router:

  • 2x USB 3.0 Ports
  • 4x Gigabit Ethernet Ports
  • 1x WAN Port
  • Reset Button
  • Power Port
  • Power Button
Aztech AIR-706P - Top
Aztech AIR-706P – Top
Aztech AIR-706P - Bottom
Aztech AIR-706P – Bottom

The router can be wall mounted which gives it a slight advantage as most consumer routers don’t support wall mount.

Aztech AIR-706P - Pivotal Antennas
Aztech AIR-706P – Pivotal Antennas
Aztech AIR-706P - Pivotal Antennas
Aztech AIR-706P – Pivotal Antennas

One of the selling features of the router is the four Pivotal Antennas. The antennas are attached to the router using ball and socket joint, so you will have the flexibility to rotate the antennas to face the direction experiencing weak signal.

I am not sure whether does that helps with the signal. But AIR-706P also supports Beamforming. Beamforming will direct the wireless signal towards the connected devices instead of broadcasting signal equally in all directions.

Aztech AIR-706P - Pivotal Antennas - Ball & Socket Joint
Aztech AIR-706P – Pivotal Antennas – Ball & Socket Joint

Personally, I think that the antennas are ugly; it feels cheap and plasticky like the design of the router.

Setup
To setup the router, you can either use the Aztech Smart Network app on iOS or Android.

AIR-706P - iOS App - Setup #1AIR-706P - iOS App - Setup #2
AIR-706P – iOS App – Setup
AIR-706P - iOS App - Setup #3AIR-706P - iOS App - Setup Done
AIR-706P – iOS App – Setup

One advantage of this router is that there is a web interface to configure the router as well. Whereas for other wi-fi mesh systems like eero and Velop, you can only use the app to do it.

The default URL of the router is http://192.168.1.254/.

AIR 706P - Web - Home
AIR 706P – Web – Home

The app UI for the AIR-706P is not the nicest I have seen if you compare it with eero, Google Home or even Velop. But it is functional.

AIR-706P - iOS App - HomeAIR-706P - iOS App - Connected Devices
AIR-706P – iOS App – Home / Connected Devices
AIR-706P - iOS App - Parental ControlAIR-706P - iOS App - Guest Network
AIR-706P – iOS App – Parental Control / Guest Network
AIR-706P - iOS App - Summary - InternetAIR-706P - iOS App - Summary - Router
AIR-706P – iOS App – Summary

Using it
Interestingly, the AIR-706P has a built-in Torrent client. You can use it to download “stuff” to an external hard drive that can be attached to the router via the USB 3.0 ports.

AIR 706P - Torrent Client
AIR 706P – Torrent Client

The Wi-Fi Radar is also another interesting feature. It allows you to visualize the signal strength of wi-fi devices within your network and you can use it to determine where is a good location to place the second or even third AIR-706P in your house.

AIR-706P - iOS App - Wi-Fi RadarAIR-706P - iOS App - Wi-Fi Radar - Wi-Fi Table
AIR-706P – iOS App – Wi-Fi Radar
AIR 706P - Web - Wi-Fi Insight
AIR 706P – Web – Wi-Fi Insight

There is also an interesting feature called the auto-reboot. I have not seen it in other routers before. What it does is it allows you to set a fix day and time to reboot the router.

AIR 706P - Web - Auto Reboot
AIR 706P – Web – Auto Reboot

Adding a Second AIR-706P
Adding a second AIR-706P to extend the wi-fi coverage of your house is straightforward. There is no need to use the app or the browser.

Just press and hold the WPS button on the first AIR-706P till the WPS indicator blinks fast and then proceed on to do the same thing for the second AIR-706P.

After a few minutes, the WPS pairing will be completed, and the AON indicators on both AIR-706P will be lighted.

The first time, I tried, I can’t get the second AIR-706P to form a mesh. I guess it is because I changed the default SSID of the first AIR-706P.

So I did a factory reset and tried to form the mesh again and this time round it works.

It also seems that the only way to add mesh nodes is to use the WPS button and hence it will not be able to support a wired backhaul.

Personally, I think the process of adding the nodes is not as seamless as eero or Velop.

Speed
This router is an AC1900 router, which means it has a theoretical maximum speed of 600Mbps on the 2.4GHz band and 1,300Mbps on the 5GHz band.

AC1900 routers have been on the market since 2013 which makes the technology almost four years old. It is no surprise that the router doesn’t support MU-MIMO.

The AIR-706P doesn’t have a dedicated wireless backhaul and hence the speed of the second AIR-706P will be affected if there are a lot of high traffic wireless devices connected to the first AIR-706P.

Location AIR-706P Velop eero EA9500 (5GHz) RT-AC88U (5GHz)
Living Room (Download) 495.76Mbps 489.96Mbps 349.69Mbps 444.58Mbps 465.90Mbps
Living Room (Upload) 423.92Mbps 205.21Mbps 164.14Mbps 282.32Mbps 377.75Mbps
AIR-706P - Speed Test
AIR-706P – Speed Test

I am pretty impressed with the wireless speeds of AIR-706P, it outperforms all my previous wi-fi mesh systems and even the Linksys EA9500 and Asus RT-AC88U.

Conclusion
Priced at S$269, the router isn’t exactly cheap if you want a full wi-fi mesh system. Also, the AIR-706P is not a real mesh system, and it doesn’t support wired backhaul.

Most wi-fi mesh systems come in a pack of 2 and 3. Whereas for the AIR-706P, if you need three in your house, you need to get three individual units. They do have purchase-with-purchase programs at some stores where you will get S$20 off subsequent units.

Buying three units of AIR-706P will set you back S$269 + S$249 + S$249 = S$767 after discount. It is still expensive if you ask me.

There are cheaper three-unit options around like the Google Wifi (US$264/S$358), eero (US$499/S$678) or even Linksys Velop (S$749).

However, if you need a budget router with a possible option to expand its coverage in the future by adding the same router, you can consider the AIR-706P.

I wasn’t expecting the AIR-706P to have good wireless speeds because I was pretty turned off by its design. I guess I judge the router by its design. But the AIR-706P managed to impress me with its speed.

Aztech AIR-706P
Aztech AIR-706P
This post Aztech AIR-706P AC1900 Dual Band Gigabit Mesh Router Review appeared first on lesterchan.net.

Google Wifi Review

$
0
0

Finally gotten my hands on Google Wifi.

Google Wifi was launched officially in Singapore on 31st August 2017 through a partnership with StarHub. Singapore is the first country in Southeast Asia to introduce Google Wifi.

You can buy a three-pack Google Wifi bundle at S$15/month over 24 months when you sign up or renew selected StarHub Broadband or Hubbing all-in-one plans. No upfront payment is needed. Visit StarHub’s Google Wifi for more information.

Specifications

  • Processor: Quad-core 710MHz ARM CPU
  • RAM: 512MB
  • Flash: 4GB eMMC
  • Ports: 2x Gigabit Ethernet ports. WAN and LAN on primary Wifi point; both act as LAN ports on additional Wifi points
  • Wireless:
    • AC1200 2×2 Wave 2 Wi-Fi
    • Expandable mesh Wi-Fi
    • Simultaneous dual-band Wi-Fi (2.4GHz / 5GHz) supporting IEEE 802.11a/b/g/n/ac
    • TX Beamforming
    • Bluetooth 4.0 & Bluetooth Smart Ready
  • Dimensions (Diameter x Height): 106.12 x 68.75 (mm)
  • Weight: 340g

Features
Google Wifi is a wi-fi mesh system similar to eero and Linksys Velop.

It features a dual-band 802.11ac Wave 2 wi-fi which gives you a combined speed of 1,200Mbps, and hence the name AC1200. 300Mbps on the 2.4GHz and 867Mbps on the 5GHz.

You can expand your wireless coverage by adding more Google Wifi nodes to your house. StarHub only sells them in a pack of three. So if you need a fourth one, you will probably have to buy it second hand from Amazon or Carousell.

Google Wifi supports 2×2 MU-MIMO (2 simultaneous streams) similar to Velop. The first generation eero that I reviewed doesn’t have MU-MIMO but the second generation has it.

Both Google Wifi and Velop also supports Beamforming which is also missing on the first generation of eero.

Google Wifi supports both wireless and wired backhaul which is the same as eero and Velop.

Both Google Wifi and eero are dual-band and for Velop, it is tri-band. Hence, for wireless backhaul, only the Velop has a dedicated 5GHz channel for the nodes to communicate with each other. Google Wifi and eero nodes communicate with each other over the shared 2.4GHz and 5GHz channels between the nodes and the clients.

An interesting feature only found in Google Wifi and not in eero or Velop is Bluetooth Smart Ready. Bluetooth Smart Ready allows Google Wifi to receive Bluetooth signals from other Bluetooth devices nearby. Think of it as an IoT hub except instead of Z-Wave or ZigBee; it uses Bluetooth.

Unboxing
In Singapore, it seems StarHub will give you three individual units of Google Wifi rather than a box with three units of Google Wifi as seen in the US.

Google Wifi - Three Individual Units
Google Wifi – Three Individual Units
Google Wifi - Box Front
Google Wifi – Box Front
Google Wifi - Box Back
Google Wifi – Box Back
Google Wifi - Box
Google Wifi – Box
Google Wifi - Box Open
Google Wifi – Box Open
Google Wifi - Box Contents
Google Wifi – Box Contents

Packaging contents:

  • 1x Google wifi
  • 1x Power Adapter with USB-C cable attached to it
  • 1x 2m Ethernet flat cable
  • 1x Quick start guide
  • 1x Product information card
Google Wifi - Flat LAN Cable
Google Wifi – Flat LAN Cable
Google Wifi - Power Adapter
Google Wifi – Power Adapter

The power adapter has an output of 3A and has the USB-C cable stuck to it. I guess Google didn’t include a removable USB-C cable as they do not want you to power it with a third party USB charger.

Design
The design for Google Wifi, in my opinion, is the best-designed wi-fi mesh systems out there. It looks even nicer than eero and Velop.

Google Wifi - Top
Google Wifi – Top
Google Wifi - Front
Google Wifi – Front

Similar to Velop, Google Wifi is designed to be placed on a table top, and hence you will notice that both of them are taller than the eero. Overall, eero still has a smaller footprint.

There are two LAN ports and a USB-C port at the bottom of the device. Google Wifi is powered via a USB-C port.

Google Wifi - Bottom
Google Wifi – Bottom
Google Wifi - Ports
Google Wifi – Ports

Almost all consumers routers in the market come with a built-in switch of either four ports or eight ports. Since each Google Wifi only provides two LAN ports (one if you are using a wired backhaul), I recommend plugging in a switch to Google Wifi so that you will have the possibility of more LAN connections.

Google Wifi - Back
Google Wifi – Back

At the back of the device, there is only a single button. The button is used for factory resetting your Google Wifi (you can also do a factory reset within the Google Wifi app).

Bridge Mode
Google Wifi is designed to replace your router and be the primary network device in your home.

One of the most controversial topics around Google Wifi vs. eero vs. Velop is Bridge Mode. If a wi-fi mesh system supports bridge mode, you can use a router in front of it.

Officially Google Wifi supports Bridge Mode. I find that misleading to the consumers.

The truth is, if you are using only one unit of Google Wifi, you can use it as bridge mode. But if I buy Google Wifi for mesh, why would I get only one unit? If I only need one unit, I might as well get a more powerful router.

So, usually, when my friend ask me if Google Wifi supports Bridge Mode, I would say no, to avoid the confusion. If you need a wi-fi mesh system that supports Bridge Mode, get eero or Velop.

Double NAT
If you want to use your existing router and Google Wifi, you still can do it, but you will run into Double NAT.

It is not an issue if all your connected devices are wireless as they will be connecting to Google Wifi and will be able to see and talk to each other.

Double NAT doesn’t affect the performance of your wi-fi, but if you are doing more advanced stuff like DHCP reservations, port forwarding, UPnP, there will be a problem.

Google has put up a handy guide titled, hardwire Wifi points and other devices. I highly recommend reading it before actually buying Google Wifi.

Setup
Since Google Wifi doesn’t support bridge mode, I can’t replace my eero at home. And hence, I will be testing the Google Wifi as a separate network which will run into the Double NAT issue. Double NAT will not affect this review because it doesn’t affect wi-fi speed or coverage.

I will be using wireless backhaul instead of wired backhaul because of the same reason.

Similar to eero and Velop, there is no web interface for Google Wifi and hence to get started with the setup, you need to download the Google Wifi app on iOS or Android.

Power on your Google Wifi and plug in the ethernet cable from your modem to the green labeled Ethernet port of your Google Wifi.

Google Wifi - Switched On
Google Wifi – Switched On

The setup process is incredibly smooth. Each setup screen explains what you need to do at that point of time. It is as good as eero’s setup process and better than Velop.

Google Wifi - iOS App - Setup #1Google Wifi - iOS App - Setup #2
Google Wifi – iOS App – Setup
Google Wifi - iOS App - Setup #3Google Wifi - iOS App - Setup #4
Google Wifi – iOS App – Setup
Google Wifi - iOS App - Setup #5Google Wifi - iOS App - Setup #6
Google Wifi – iOS App – Setup
Google Wifi - iOS App - Setup #7Google Wifi - iOS App - Setup #8
Google Wifi – iOS App – Setup
Google Wifi - iOS App - Setup #9Google Wifi - iOS App - Setup #10
Google Wifi – iOS App – Setup #9

It took me about 4 minutes to setup my first Google Wifi including capturing screenshots for this review. Setting up subsequent Google Wifi only takes me a minute.

iOS App
Here are some screenshots of the Google Wifi iOS app showcasing various functionalities. They are pretty self-explanatory.

Google Wifi - iOS App - HomeGoogle Wifi - iOS App - Home - Cards
Google Wifi – iOS App – Home
Google Wifi - iOS App - StatusGoogle Wifi - iOS App - Devices
Google Wifi – iOS App – Status / Devices
Google Wifi - iOS App - Device StatusGoogle Wifi - iOS App - Device Options
Google Wifi – iOS App – Device Status/Options
Google Wifi - iOS App - Device DetailsGoogle Wifi - iOS App - Priority Devices
Google Wifi – iOS App – Device Details / Priority Devices
Google Wifi - iOS App - DHCP IP ReservationGoogle Wifi - iOS App - Port Forwarding
Google Wifi – iOS App – DHCP IP Reservation / Port Forwarding
Google Wifi - iOS App - MenuGoogle Wifi - iOS App - Home Control
Google Wifi – iOS App – Menu / Home Control
Google Wifi - iOS App - Network TestGoogle Wifi - iOS App - Network Test History
Google Wifi – iOS App – Network Check / Network Test History
Google Wifi - iOS App - Network SettingsGoogle Wifi - iOS App - Advanced Network Settings
Google Wifi – iOS App – Network Settings
Google Wifi - iOS App - Family Wi-Fi #1Google Wifi - iOS App - Family Wi-Fi #2
Google Wifi – iOS App – Family Wi-Fi
Google Wifi - iOS App - Guest Wi-Fi #1Google Wifi - iOS App - Guest Wi-Fi #2
Google Wifi – iOS App – Guest Wi-Fi

Speed
Since I have both eero and Google Wifi running concurrently, I re-did my eero’s speed test together with Google Wifi.

Google Wifi’s download speed is impressive. I managed to break the 500Mbps download speed barrier with it. Whereas for upload speed, it still loses to eero.

Google Wifi - Speed Test
Google Wifi – Speed Test
Location Google Wifi Velop eero
Living Room (Download) 502.20Mbps 489.96Mbps 461.30Mbps
Living Room (Upload) 277.42Mbps 205.21Mbps 312.01Mbps

Coverage
Similar to both my eero and Velop coverage test, my primary node is in the living room, and I have one node in Bedroom 2 (Computer Room) and one node in Main Bedroom (Master Bedroom).

Here are the 2.4GHz heat maps from all three wi-fi mesh systems that I reviewed.

eero - 2.4GHz- Heatmap
eero – 2.4GHz – Heatmap

Velop - 2.4GHz - Heatmap
Velop – 2.4GHz – Heatmap

Google Wifi - 2.4GHz - Heatmap
Google Wifi – 2.4GHz – Heatmap

And below are the 5.0GHz heat maps.

eero - 5.0GHz - Heatmap
eero – 5.0GHz- Heatmap

Velop - 5.0GHz - Heatmap
Velop – 5.0GHz – Heatmap

Google Wifi - 5.0GHz - Heatmap
Google Wifi – 5.0GHz – Heatmap

Sadly, I am not impressed with Google Wifi’s coverage, especially in the 5.0GHz area. As you can see from the heat map above, my kitchen is almost covered in blue whereas, for eero, it is in green.

So far it seems, eero is still much better in coverage, followed by Velop and then Google Wifi.

My guess is Google Wifi’s antennas is not as high powered as eero or Velop. As you can see from the AP points in the heat maps, both eero and Velop has reddish streaks near them whereas, for Google Wifi, it is yellowish. Since it might be related to antenna power, It should be fixable via an over-the-air firmware upgrade if Google chooses to address it.

In case you are wondering, I am using a paid version of NetSpot to generate the above heatmaps.

Conclusion
Google Wifi is suitable for homes that consist of mainly wireless devices. The assumption is that if you fall into this category, you don’t use networking features like DHCP reservation and port forwarding very often. Google Wifi supports those features but managing it using an app is very cumbersome as it doesn’t provide a web interface.

Bridge Mode is not supported in Google Wifi, and hence it needs to replace your primary router. For most users, this is not a problem. However, if you are an advanced user that wants a router in front of it, Google Wifi is not suitable for you.

I would still recommend Google Wifi to most users despite its average coverage. It is cheap, powerful, beautifully designed and already available in Singapore.

After this review, I will be replacing my parents’ home router with this Google Wifi as all of their devices are wireless, and they don’t need any advanced networking features.

Google Wifi - With Cables
Google Wifi – With Cables
This post Google Wifi Review appeared first on lesterchan.net.

Linksys EA9300 Max-Stream AC4000 Tri-Band Router Review

$
0
0

The Linksys EA9300 Max-Stream AC4000 Tri-Band Router was launched in August 2017 and is currently retailing for S$399.

The EA9300 is not the highest end router from Linksys, that title still belongs to EA9500.

Instead, the EA9300 is the successor to the EA9200 which was launched more than two years ago.

Despite not being the highest end router, the EA9300 is the most powerful one because of its 1.8GHz quad-core processor, 512MB of RAM and 256MB of ROM.

While the EA9500 retails for S$539, the EA9300 cost S$140 lesser at S$399. The lower price brings about, the more powerful processor, more RAM, and ROM. You may be wondering why. The reason being instead of a 4×4 MU-MIMO (4 simultaneous streams) design found in the EA9500, the EA9300 only has a 3×3 MU-MIMO (3 simultaneous streams).

Because of that, the speeds also decrease. From 1,000Mbps to 750Mbps on the 2.4GHz and from 2,166Mbps to 1,625Mbps on both 5.0GHz.

Specifications (Credits: SmallNetBuilder and WikiDevi)

  • CPU: Broadcom BCM4908 1.8GHz Quad-Core (ARM Cortex-A53)
  • RAM: 512MB
  • Flash: 256MB
  • Wireless: 802.11 a/b/g/n/ac
    • 2.4GHz
      • Broadcom BCM4365EKMMLG 3×3 2.4/5G single chip 802.11ac SoC
      • Skyworks SE2623L 2.4 GHz power amp (x3)
      • IEEE 802.11n, IEEE 802.11g, IEEE 802.11b
      • Speeds up to 750 Mbps
    • 5GHz
      • Broadcom BCM4365EKMMLG 3×3 2.4/5G single chip 802.11ac SoC
      • Skyworks SKY85408-11 802.11ax 5 GHz power amp (x3)
      • IEEE 802.11ac, IEEE 802.11n & IEEE 802.11a
      • Speeds up to 1,625 Mbps
    • 5GHz
      • Broadcom BCM4365EKMMLG 3×3 2.4/5G single chip 802.11ac SoC
      • Skyworks SKY85408-11 802.11ax 5 GHz power amp (x3)
      • IEEE 802.11ac, IEEE 802.11n & IEEE 802.11a
      • Speeds up to 1,625 Mbps
  • LAN/WAN
    • Broadcom BCM4908
    • 4x 10/100/1000 Gigabit LAN ports
    • 1x 10/100/1000 Gigabit WAN port
  • Antennas: Six external non-removable antennas
  • Other Ports: 2x USB 3.0 port
  • Dimensions: 168.15 x 229.62 x 296.93 (mm)
  • Weight: 1.27kg

Unboxing
The box is huge but not as huge as EA9500’s box.

Linksys EA9300 - Box Front
Linksys EA9300 – Box Front
Linksys EA9300 - Box Back
Linksys EA9300 – Box Back
Linksys EA9300 - Box
Linksys EA9300 – Box
Linksys EA9300 - Box Contents
Linksys EA9300 – Box Contents

Design

Linksys EA9300 - Top
Linksys EA9300 – Top
Linksys EA9300 - Bottom
Linksys EA9300 – Bottom
Linksys EA9300 - Back
Linksys EA9300 – Back

The EA9300 only has four LAN ports instead of eight found in the EA9500.

Instead of one USB 2.0 and one USB 3.0 port in the EA9500, the EA9300 has two USB3.0 ports.

Linksys EA9300
Linksys EA9300

UI
Similar to the EA9500, the EA9300 is a Smart Wi-Fi Router. That means you can access and control your home network from anywhere with a web browser or a mobile device via an iOS or Android App.

I would not be covering the router UI here since it is the same across all the latest Linksys router that I reviewed.

in case you are wondering, the EA9300 supports VLAN tagging and OpenVPN server.

Speed Test
The wireless speed for EA9300 is pretty decent

Location EA9300 (5GHz) AIR-706P EA9500 (5GHz) RT-AC88U (5GHz)
Living Room (Download) 447.59Mbps 495.76Mbps 444.58Mbps 465.90Mbps
Living Room (Upload) 339.83Mbps 423.92Mbps 282.32Mbps 377.75Mbps
Linksys EA9300 - Speed Test
Linksys EA9300 – Speed Test

Coverage
The EA9300 coverage for 2.4GHz is pretty bad when compared to EA9500. It seems that Linksys routers have worse 2.4GHz coverage than Asus routers.

Linksys EA9300 - 2.4GHz - Heatmap
Linksys EA9300 – 2.4GHz – Heatmap

Linksys EA9500 - 2.4GHz - Heatmap
Linksys EA9500 – 2.4GHz – Heatmap

Asus RT-AC88U - 2.4GHz - Heatmap
Asus RT-AC88U – 2.4GHz – Heatmap

I would say the 5.0GHz coverage between the EA9300 and EA9500 is a close one. I am leaning towards EA9300 having slightly better coverage because it has less bluish areas around the main bedroom, bedroom 2, and kitchen area.

In reverse, Linksys routers have better 5.0GHz coverage than Asus routers.

Linksys EA9300 - 5.0GHz - Heatmap
Linksys EA9300 – 5.0GHz – Heatmap

Linksys EA9500 - 5.0GHz - Heatmap
Linksys EA9500 – 5.0GHz – Heatmap

Asus RT-AC88U - 5.0GHz - Heatmap
Asus RT-AC88U – 5.0GHz – Heatmap

In case you are wondering, I am using a paid version of NetSpot to generate the above heatmaps.

Conclusion
Despite it not being the highest end router in the market, it is probably the most powerful one because of its quad-core processor and 512MB RAM.

If you find the EA9500 too expensive at S$539, the EA9300 might be suitable for you at S$399 (S$140 cheaper). It is a good upgrade over the EA9200 which may be defunct soon.

S$399 is probably the maximum price I will pay for a router and EA9300 fits right into the criteria.

I wish that the EA9300 has an 8-port switch instead of just 4.

Linksys EA9300 - Plugged In
Linksys EA9300 – Plugged In
This post Linksys EA9300 Max-Stream AC4000 Tri-Band Router Review appeared first on lesterchan.net.

Synology DiskStation DS418play

$
0
0

My Synology DiskStation DS415play is starting to show it’s age when I tried streaming videos using the Plex app on my Apple TV 4K to my television.

Very often, it will show the error, “Your connection to the server is not fast enough to stream this video. Check your Network.“.

As a workaround, I have to use VLC on my Apple TV 4K to stream the video and then use Plex to marked that video as watched when I am done.

It has been three years, and I decided it is time for me to upgrade my DS415play to DS418play which was announced on 28th September 2017.

Synology DiskStation DS418play is retailing for S$711 at Fuwell.

I do not need to get any new hard drives as I will be reusing my 4x 6TB WD Red drives on my DS415play.

Features
DS418play features an Intel Celeron J3355 64-bit dual-core 2.0GHz CPU (burstable to 2.5 GHz). It comes with 2GB DDR3L RAM with the option to expand it to 6GB (2GB + 4GB).

One of my favorite upgrade to the DS418play is the support for 4K H.264/H.265 transcoding. Now you can download 4K videos and let DS418play handles the transcoding so that the videos can be converted and played on the fly on devices that do not support 4K.

Unlike the DS415play, DS418play comes with two Gigabit Ethernet port, allowing for link aggregation and failover.

DS418play supports up to 48TB (4x 12TB).

Unboxing

DS418play - Box Front
DS418play – Box Front
DS418play - Box Back
DS418play – Box Back
DS418play - Box
DS418play – Box
DS418play - Box Contents
DS418play – Box Contents
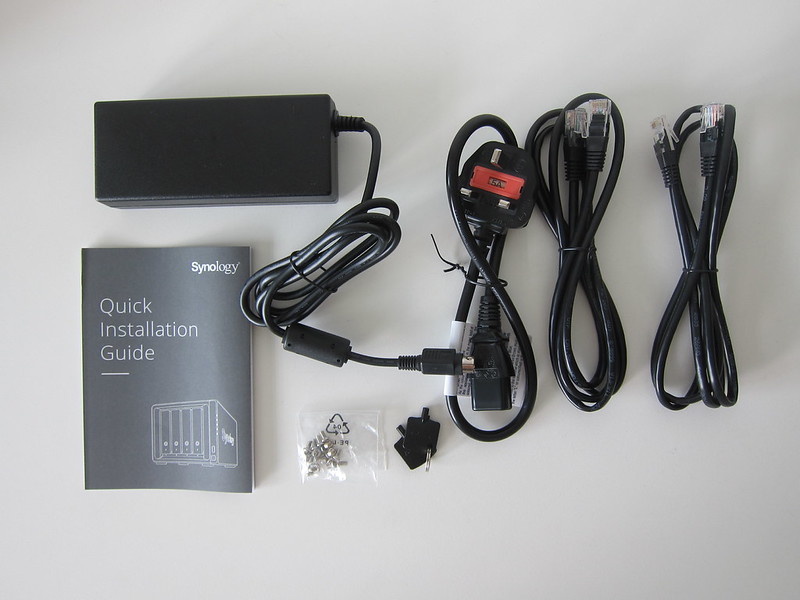
  • 1x DS418play
  • 2x Drive Lock Keys
  • 1x Packet of Screws
  • 1x AC Power Adapter
  • 1x AC Power Cord
  • 2x RJ-45 LAN Cable
  • 1x Quick Installation Guide
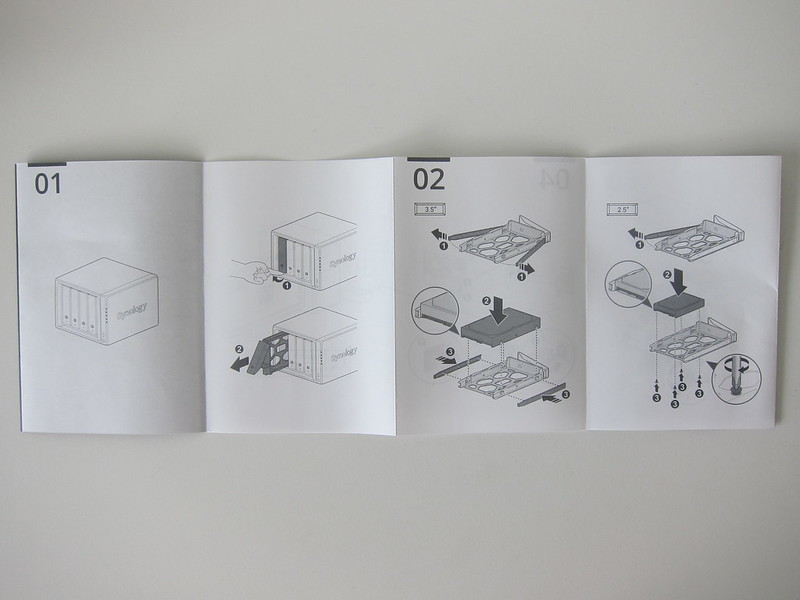
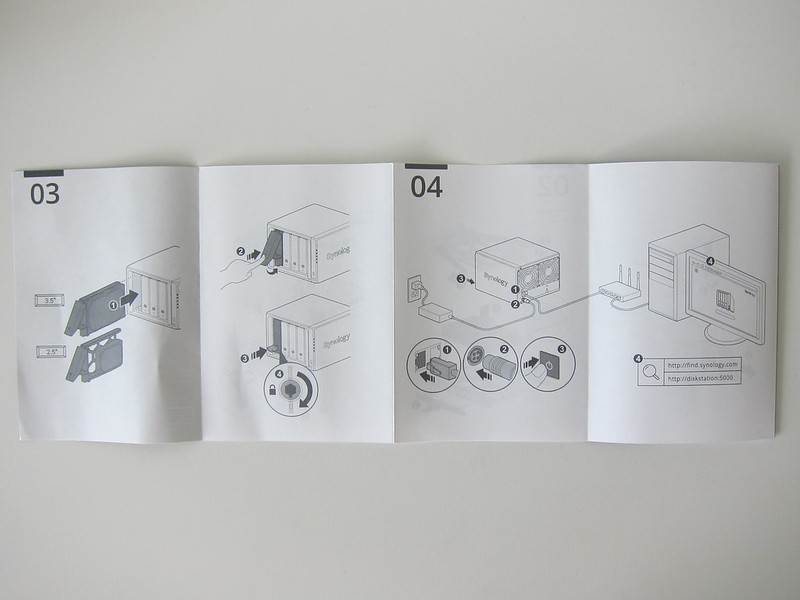
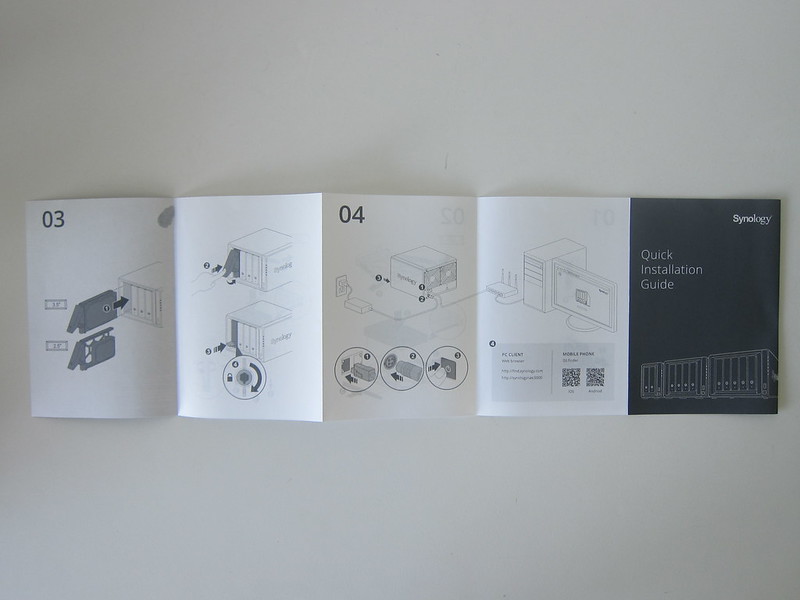
DS418play - Instructions
DS418play – Instructions
DS418play - Instructions
DS418play – Instructions

Design
I prefer the new drive tray design of the DS418play than DS415play. The cover of DS415play’s drive tray is very flimsy, and I have knocked it off many times when trying to clean it.

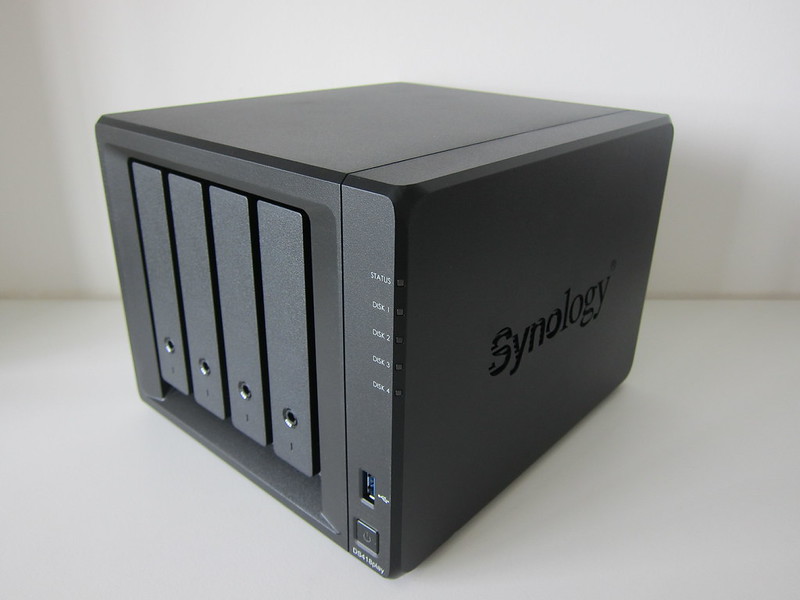
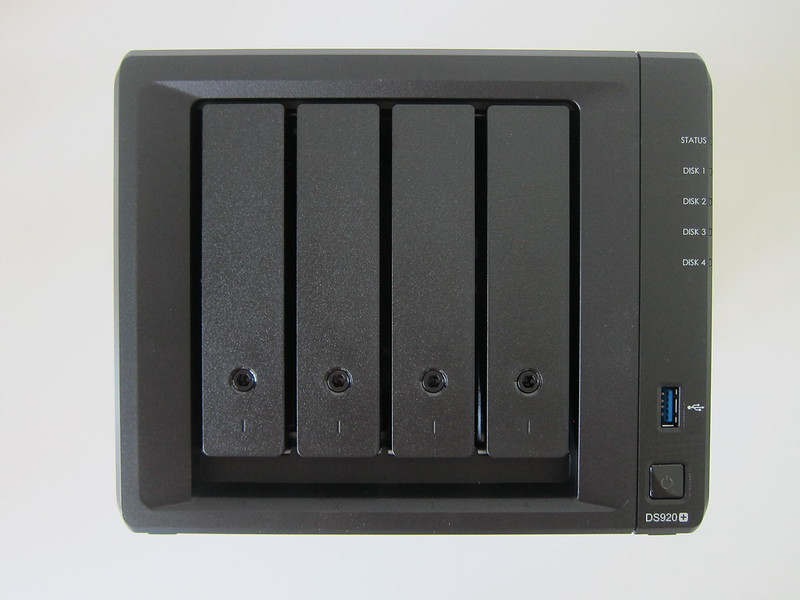
DS418play - Front
DS418play – Front

For the DS418play, they removed the cover and replaced it with a simple key locking mechanism. Synology provides two keys, so make sure you don’t lose it.

There are two USB 3.0 ports, one above the power button and one below the dual Gigabit Ethernet ports located at the back.

The two system fans located at the back of both DS415play and DS418play are the same, measuring 92mm x 92mm.

DS418play - Back
DS418play – Back

Expanding RAM
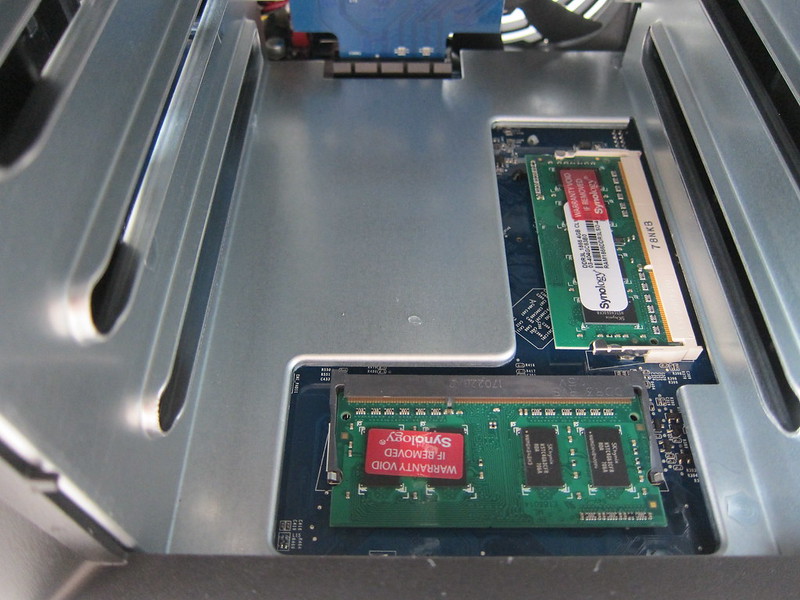
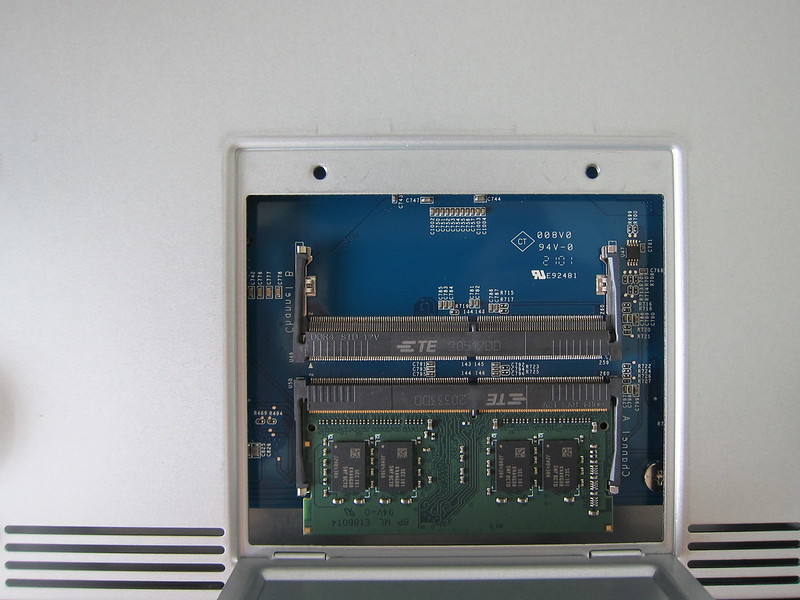
The two memory slots are located inside the DS418play. After removing all the drive trays, you can see both memory slots on the right.

DS418play - RAM
DS418play – RAM
DS418play - RAM
DS418play – RAM

Since DS418play comes with 2GB DDR3L RAM, one of the memory slots will be occupied. You can expand it to 6GB by adding another 4GB DDR3L RAM to the other memory slot.

I got an extra 4GB DDR3L RAM (D3NS1866L-4G) from Synology to expand the RAM to 6GB.

DSM - Resources Monitor
DSM – Resources Monitor

You may be wondering whether you can remove the included 2GB DDR3L RAM and replaced it with a 4GB DDR3L RAM.

I emailed Synology to asked, and the official response from them is that they do not recommend you to do it. Reason being you might accidentally damage the motherboard without knowing, and that might affect the warranty.

Having said that Synology had not tested the DS418play with 8GB of RAM, and hence they do not guarantee the product operation if you are on 8GB of RAM.

Migration
Migration between DS415play and DS418play is extremely simple.

Once I have shut down my DS415play, I removed all four hard drives on my old DS415play and inserted them to my new DS418play in the same order.

DS418play - Drive Tray Open
DS418play – Drive Tray Open
DS418play - Drive Tray Out
DS418play – Drive Tray Out
DS418play - Drive Tray Out
DS418play – Drive Tray Out
DS418play - Drive Trays Out
DS418play – Drive Trays Out
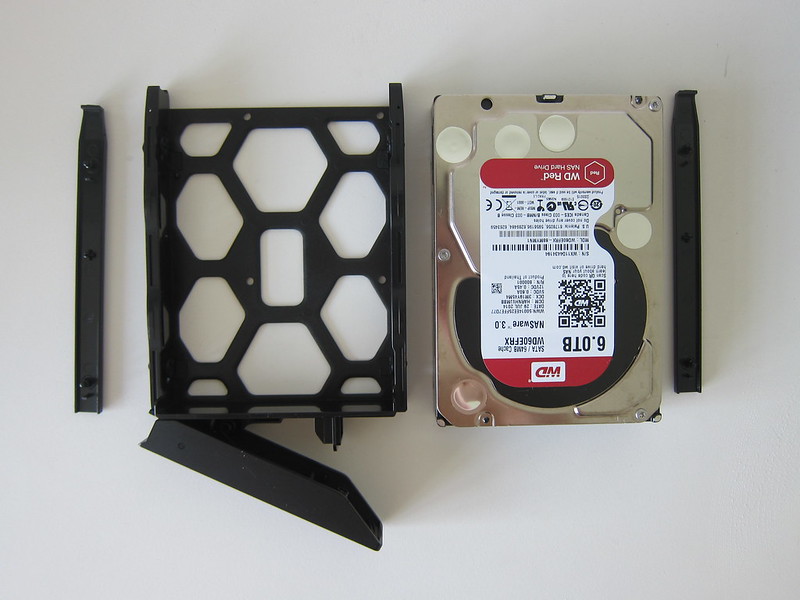
DS418play - Drive Tray
DS418play – Drive Tray
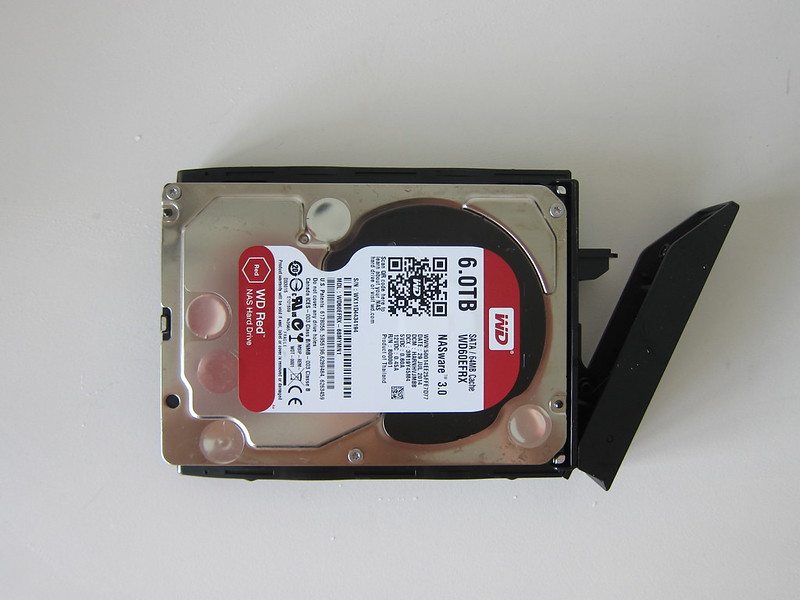
DS418play - Drive Tray With WD Red
DS418play – Drive Tray With WD Red
DS418play - Drive Tray With WD Red In
DS418play – Drive Tray With WD Red In

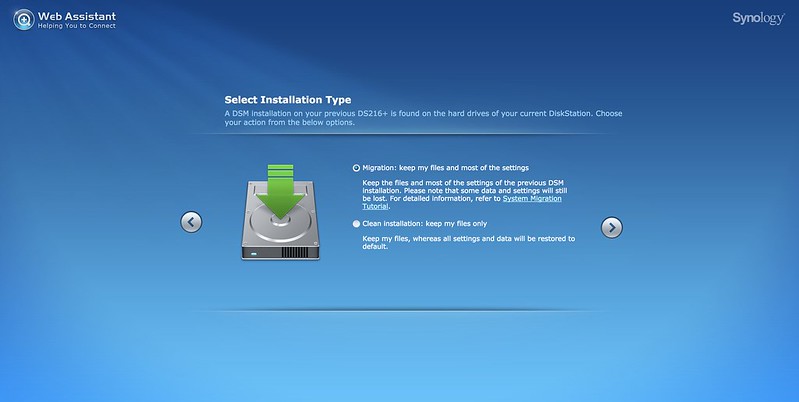
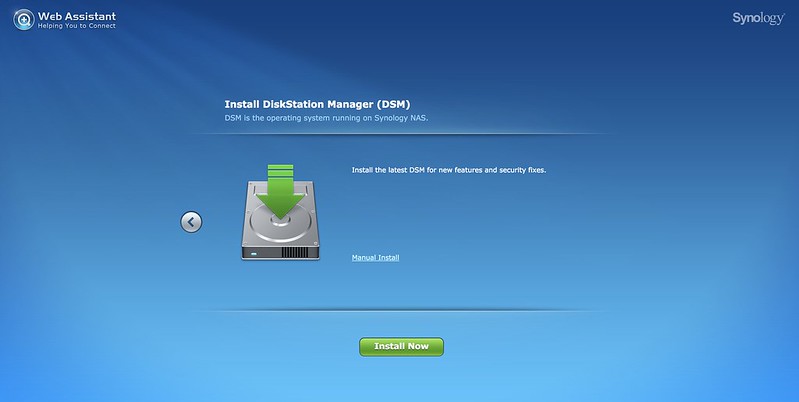
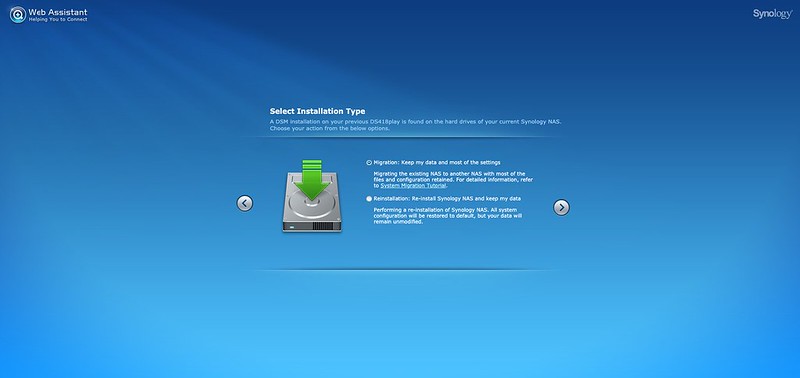
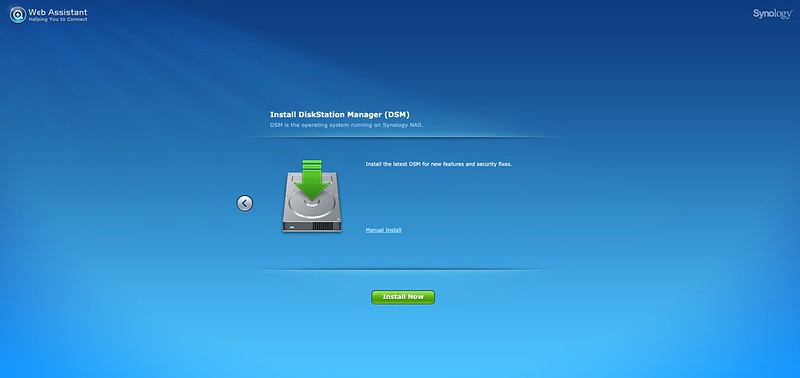
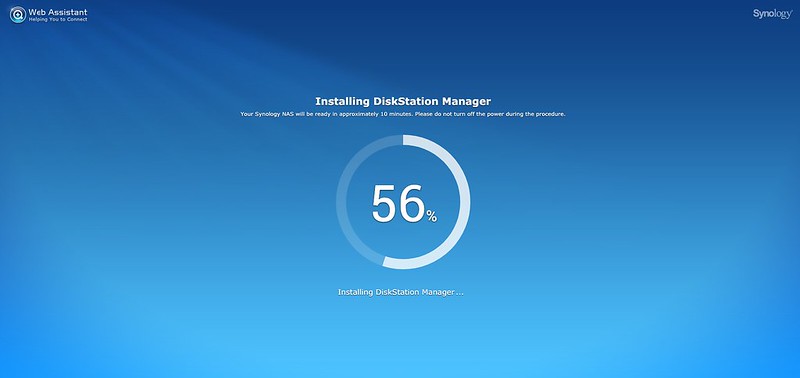
I booted up the DS418play and proceed on to visit find.synology.com using my browser. The status of my DS418play shows “Migratable,” and I just follow the onscreen instructions.

Synology Web Assistant - Setup #1
Synology Web Assistant – Setup #1
Synology Web Assistant - Setup #2
Synology Web Assistant – Setup #2
Synology Web Assistant - Setup #3
Synology Web Assistant – Setup #3
Synology Web Assistant - Setup #4
Synology Web Assistant – Setup #4
Synology Web Assistant - Setup #5
Synology Web Assistant – Setup #5

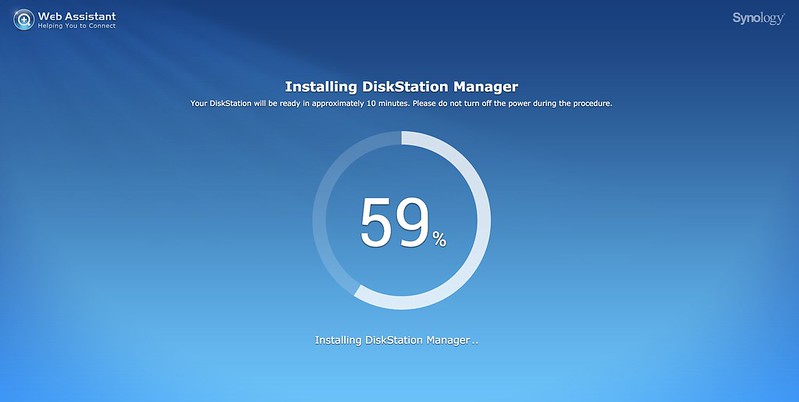
The whole process takes about 15 minutes where a bulk of it goes to downloading and installing the DiskStation Manager update followed by rebooting the DS418play. It takes at least three minutes to reboot the NAS. I hope Synology will optimize this as it has always taken that long regardless of which Synology NAS I am using.

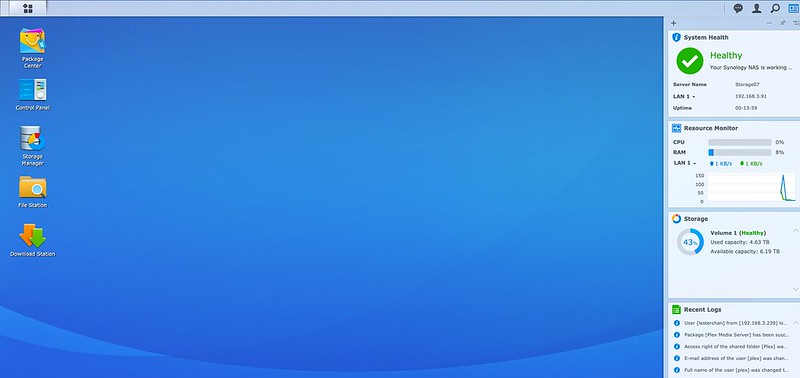
DSM - Home
DSM – Home

If you need a more detailed guide that includes backing up of configuration and data, you can refer to this article, How to migrate between Synology NAS (DSM 6.0 and later), on Synology Knowledge Base.

Using it as a Media Player
There are many excellent apps on the NAS by Synology.

Below are a few apps that I am using on either my DS216+ or DS415play.

  • CloudStation – Allows you to synchronize files between a centralized Synology NAS and multiple client computers, mobile and Synology NAS devices.
  • CloudSync – Allows you to sync and share files among your Synology NAS and multiple public cloud services.
  • DownloadStation – Allows you to download files from the Internet through BT, FTP, HTTP, NZB, Thunder, FlashGet, QQDL, and eMule.
  • Hyper Backup – Allows you to backup your NAS to local/remote Synology NAS devices, remote rsync servers and public clouds
  • FileStation – It is a file management tool that allows you to access your files and folders on the NAS.
DSM - Packages
DSM – Packages

I have been through DS413j, DS415play and now DS418play. Synology NAS “just works” if you intending to use it as a media server like me.

You will only need three apps, FileStation, DownloadStation and Plex Server/VideoStation.

DSM - FileStation
DSM – FileStation

DownloadStation allows me to download videos using torrent and put them in a folder chosen by me. It is either in a “TV” folder or “Movies” folder. Both of these folders are in a root folder called “Media.”

DSM - DownloadStation
DSM – DownloadStation

You can set the Plex app to automatically update it’s library when there are changes to a pre-defined library folder, and in my case, it is “Media.” Once a video has been downloaded, it will automatically be reflected in Plex’s Library.

Plex Synology App Download
Plex - Update Libraries
Plex – Update Libraries

I am using the Plex app on my Apple TV 4K to stream videos directly from the Plex Server of my DS418play.

Plex - Home
Plex – Home

Everything feels very snappy after upgrading to DS418play as it should. When adding a torrent to DownloadStation, the UI interaction is just so smooth and fast. Apple TV’s Plex app streams almost instantly without the need to wait for buffering.

VideoStation/DS Video
Synology has a competing solution to Plex, and that is known as VideoStation.

The apps are known as DS Video and is available on iOS, Android and Apple TV.

If you are already using Synology NAS and refuse to pay for Plex iOS and Android apps, VideoStation with DS Video apps is definitely for you.

The last time I used VideoStation was more than four years ago when I reviewed the DS413j. I have not tried it since then.

I am tempted to switch from Plex to VideoStation since I am locked into the Synology ecosystem as Synology produces the best NAS.

If I do switch, I will do a review on it.

DS418play
DS418play
This post Synology DiskStation DS418play appeared first on lesterchan.net.

Synology DiskStation DS918+ Review

$
0
0

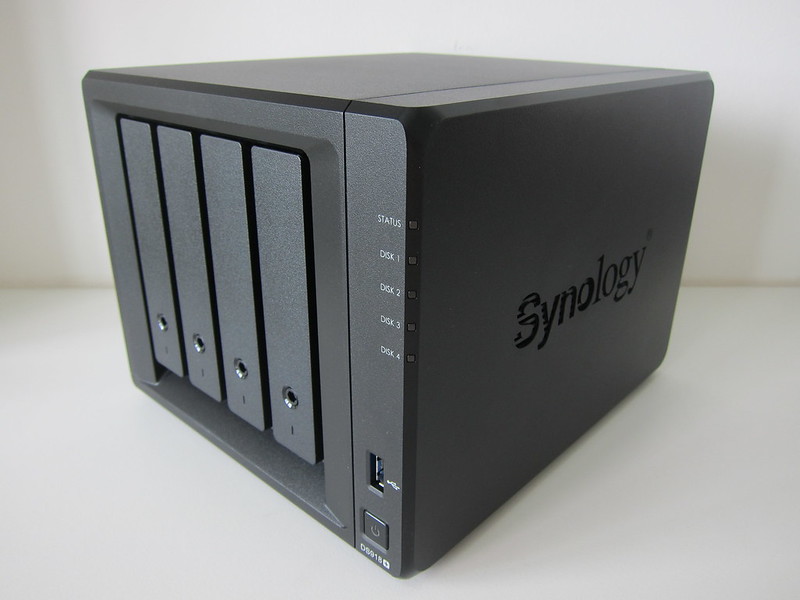
Synology DiskStation DS918+ is Synology’s flagship 4-bay NAS for prosumers and it belongs to the Synology’s Plus Series of NAS.

Announced at Computex 2017 in July 2017 and released in October 2017, it is retailing for S$811 in Singapore at Fuwell.

It cost S$100 more than the Synology DiskStation DS418play and with S$100 more, you get a quad-core 1.5GHz (burstable to 2.3GHz) processor, 4GB RAM, extra eSATA port and the ability to add in two M.2 NVMe SSD for system cache.

In case you are wondering, DS418play belongs to Synology’s Value Series of NAS.

Both the DS918+ and DS418play are powered by the same DiskStation Manager (DSM). So there is no difference regarding software. The only differences are in the hardware as stated above.

Features
DS918+ features an Intel Celeron J3455 64-bit quad-core 1.5GHz CPU (burstable to 2.3 GHz). It comes with 4GB DDR3L RAM with the option to expand it to 8GB (4GB + 4GB).

Similar to DS418play, it comes with two Gigabit Ethernet port, allowing for link aggregation and failover.

Both DS418play and DS918+ supports up to 48TB (4x 12TB). DS918+ takes a step further by supporting an additional 5-Bay Expansion Unit (DX517) (sold seperately) and hence the maximum capacity can be 108TB (9x 12TB).

Unboxing

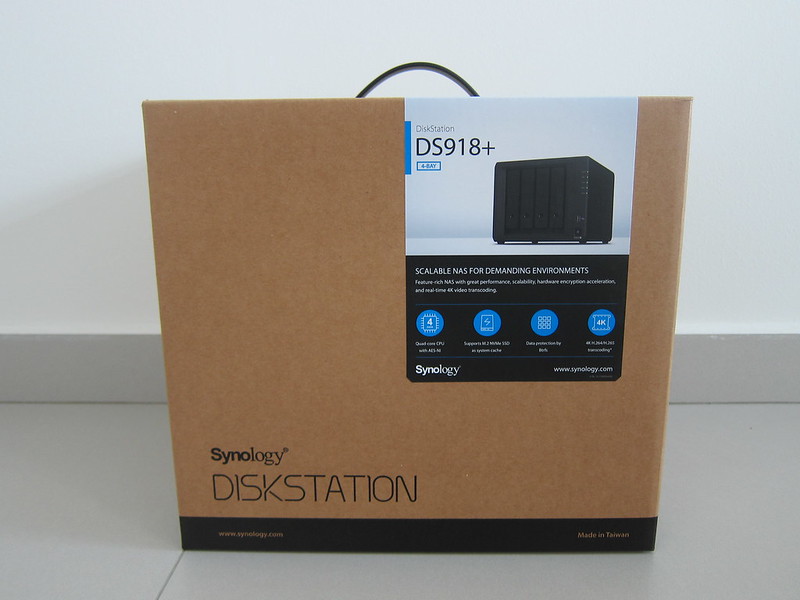
DS918+ - Box Front
DS918+ – Box Front
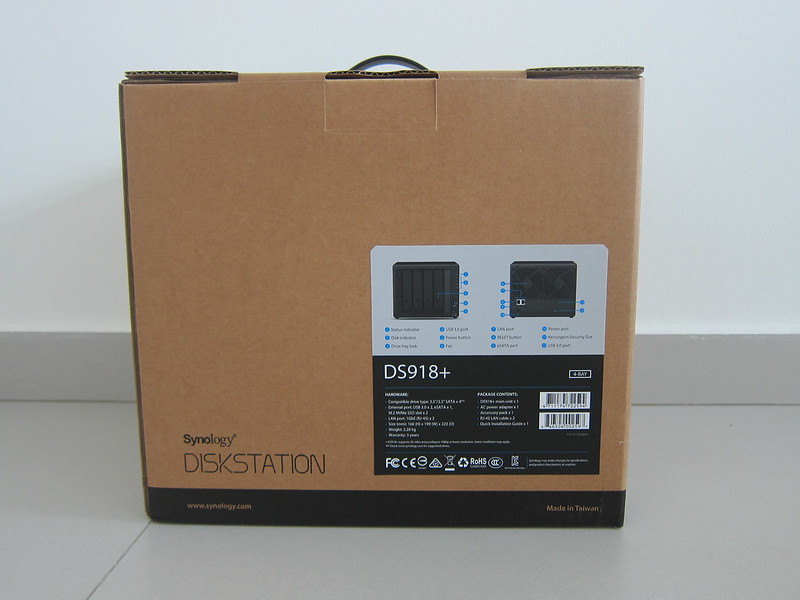
DS918+ - Box Back
DS918+ – Box Back
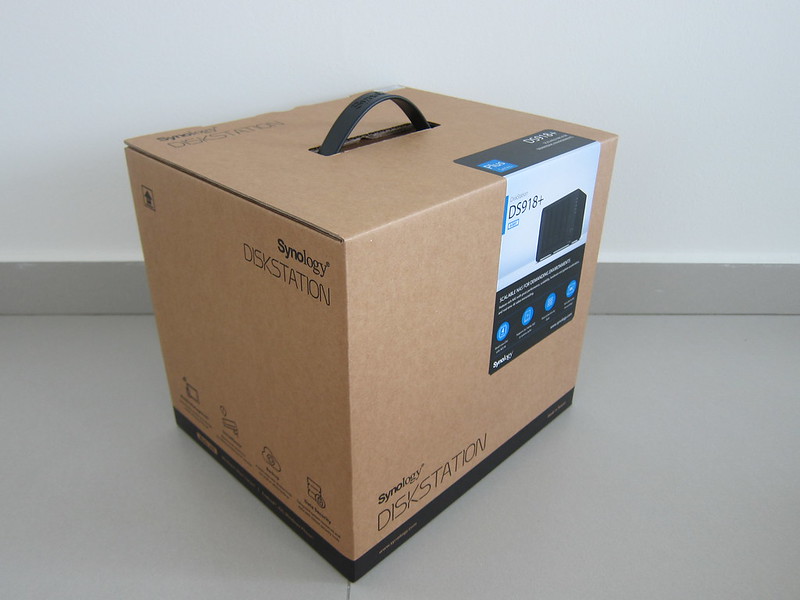
DS918+ - Box
DS918+ – Box
DS918+ - Box Contents
DS918+ – Box Contents
  • 1x DS918+
  • 2x Drive Lock Keys
  • 1x Packet of Screws
  • 1x AC Power Adapter
  • 1x AC Power Cord
  • 2x RJ-45 LAN Cable
  • 1x Quick Installation Guide
DS918+ - Instructions
DS918+ – Instructions
DS918+ - Instructions
DS918+ – Instructions

Design
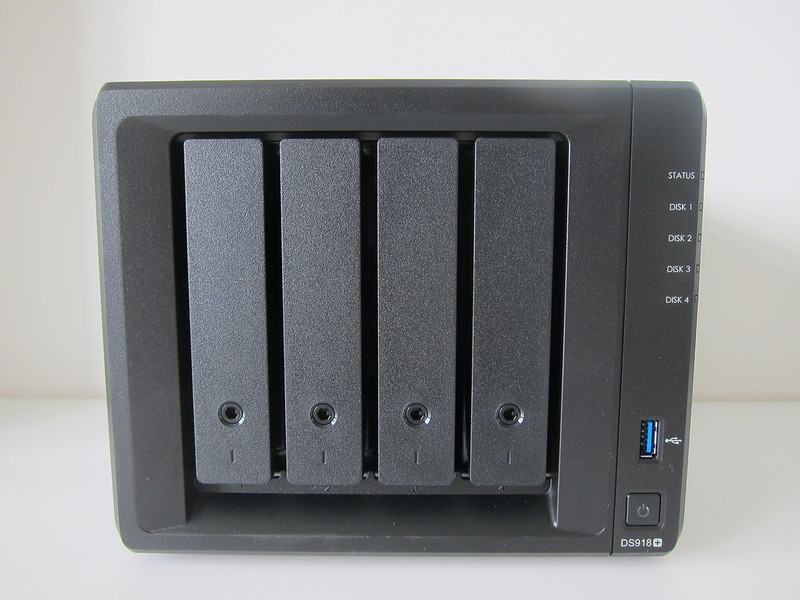
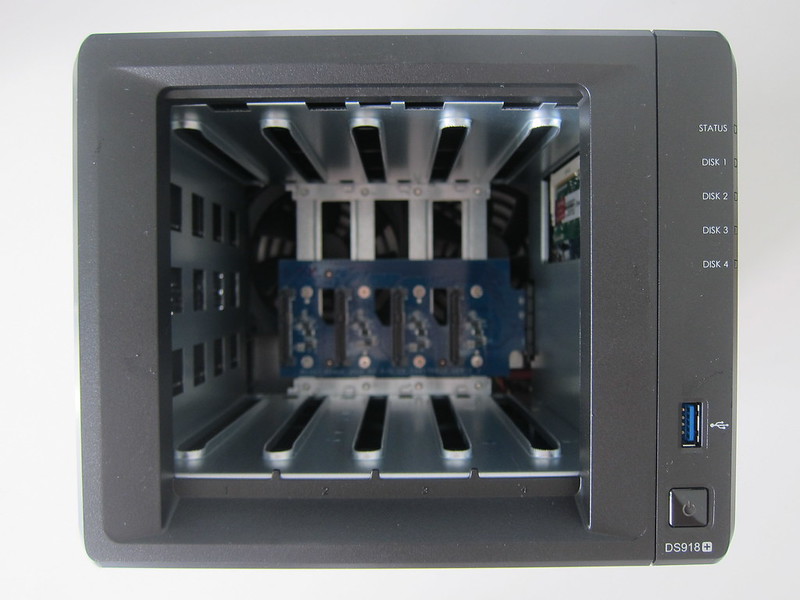
The design of the DS918+ is similar to that of the DS418play. In front of the NAS is the 4-bay drives and at the back is two 92mm x 92mm fans.

DS918+ - Front
DS918+ – Front

There are only two differences between DS918+ and DS418play.

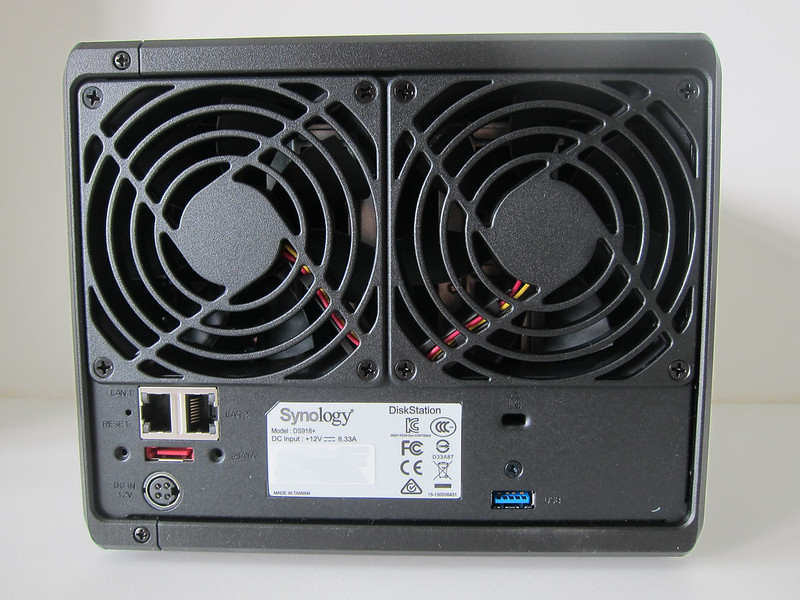
The DS918+ comes with an additional eSATA port in addition to the two USB 3.0 ports (one in front and one at the back).

DS918+ - Back
DS918+ – Back

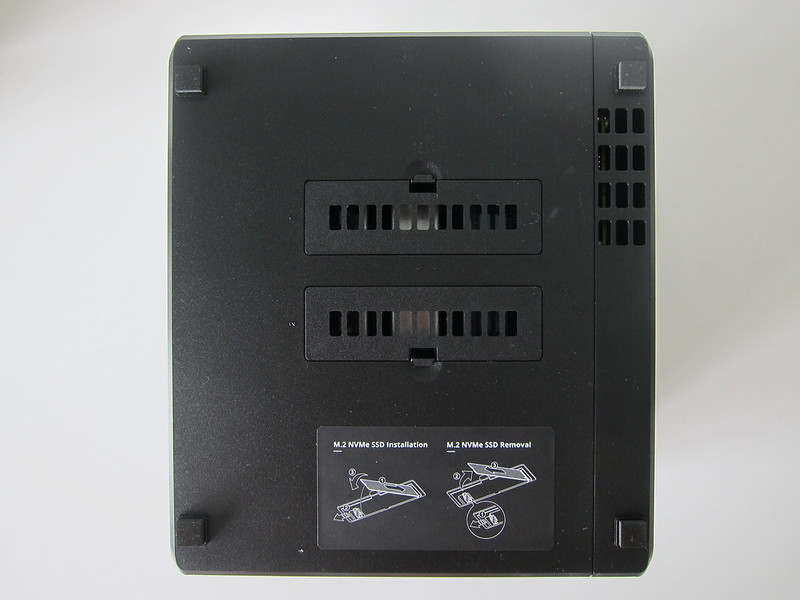
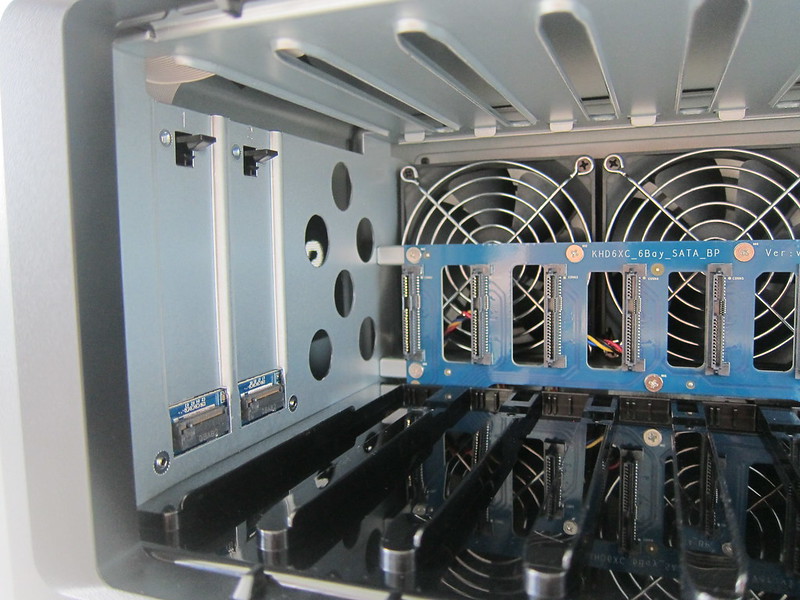
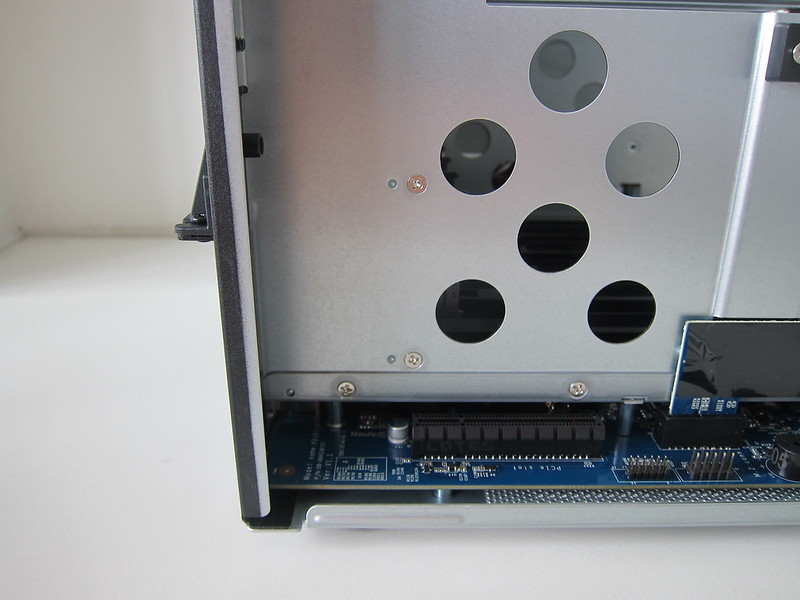
At the bottom of the DS918+ houses the two M.2 NVMe SSD slots. The DS418play doesn’t have that.

DS918+ - Bottom
DS918+ – Bottom

Upgrading RAM
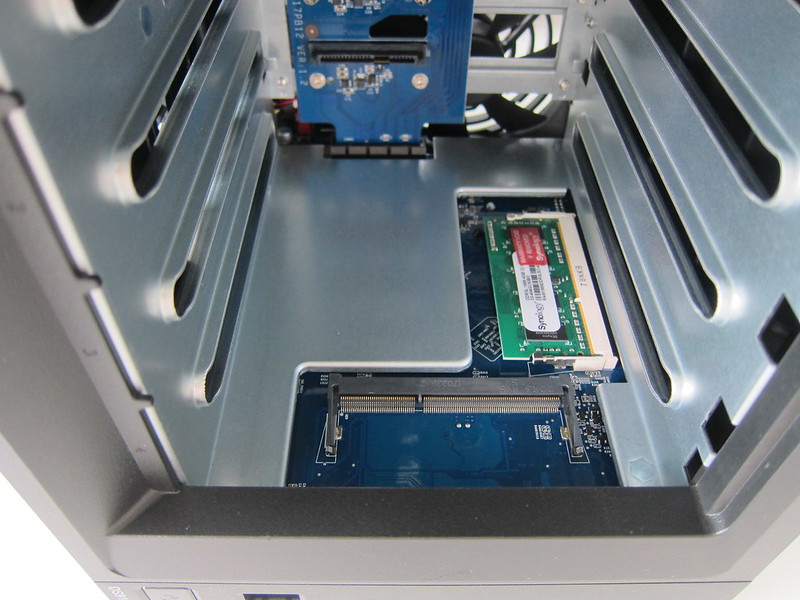
Since the design is similar to the DS418play, the RAM slots of the DS918+ is also located at the same place. It is on the right-hand side of the inside of the DS918+.

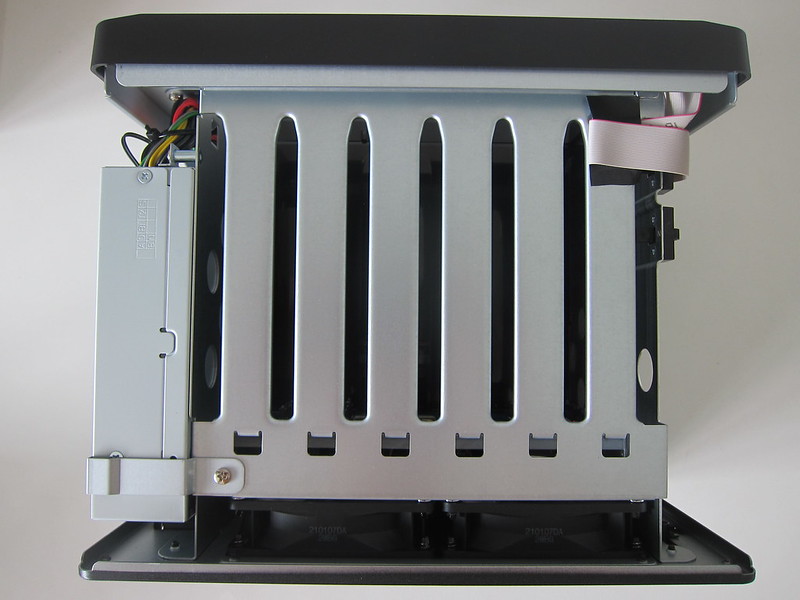
DS918+ - Drive Trays Out
DS918+ – Drive Trays Out
DS918+ - RAM
DS918+ – RAM

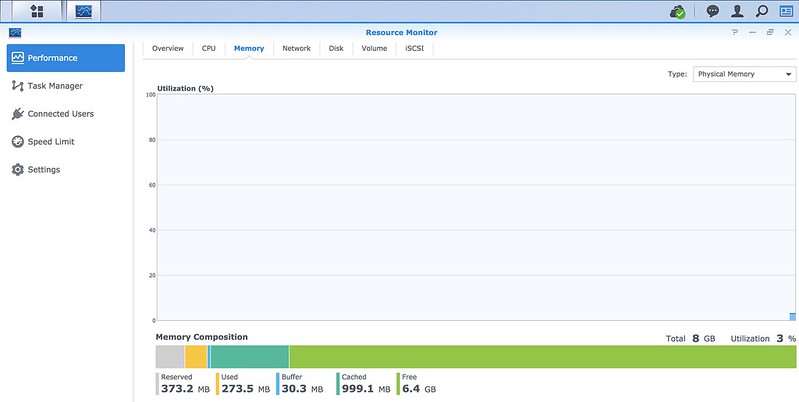
DS918+ comes with 4GB of RAM, and you can expand it with another 4GB, making it a total of 8GB of RAM. I got an extra 4GB DDR3L RAM (D3NS1866L-4G) from Synology and expanded my DS918+ to 8GB of RAM.

DS918+ - RAM
DS918+ – RAM
DSM - RAM
DSM – RAM

Adding M.2 NVMe SSD
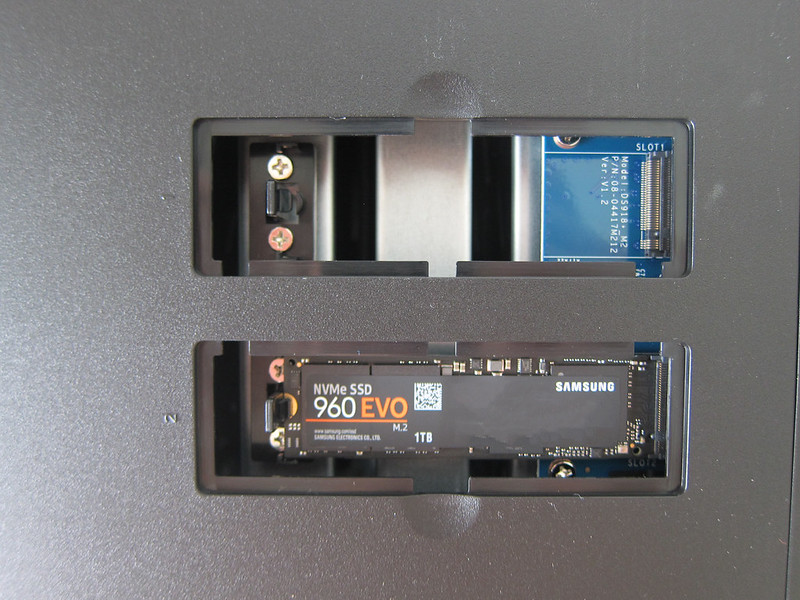
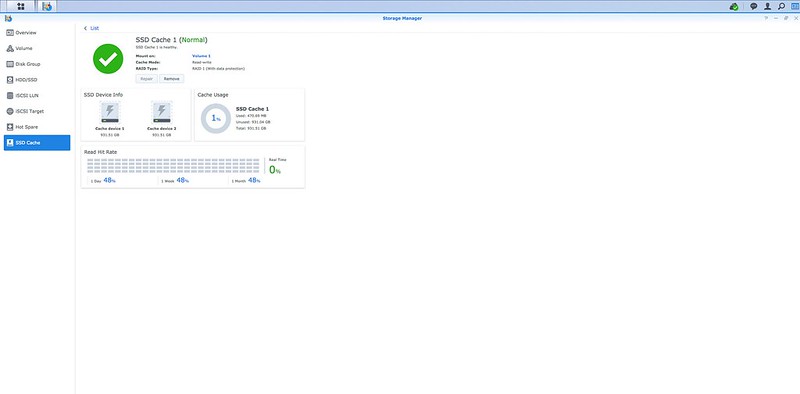
There are two M.2 NVMe SSD slots at the bottom of DS918+. Adding two M.2 NVMe SSD allows your NAS to have a faster system cache creation which will increase the overall performance.

DS918+ - Bottom - M.2 NVMe SSD Slots
DS918+ – Bottom – M.2 NVMe SSD Slots

Samsung has kindly sponsored me two Samsung 960 Evo NVMe M.2 1TB SSD for my DS918+.

Since M.2 NVMe SSDs are still pretty new to the market, there are not cheap. For the Samsung 960 Evo NVMe M.2 SSD, the 250GB retails for S$189, 1TB retails for S$359, and the 2TB retails for S$649.

Migration
Migration between a 2-bay DS216+ to a 4-bay DS918+ is straightforward, and the steps are the same as my migration from DS415play to DS418play.

Since this is an upgrade from 2-bay to 4-bay, you do not need to insert all four hard drives at the same time. You just need the two hard drives from the 2-bay DS216+ first. And similarly, the hard drives must be inserted in the same order.

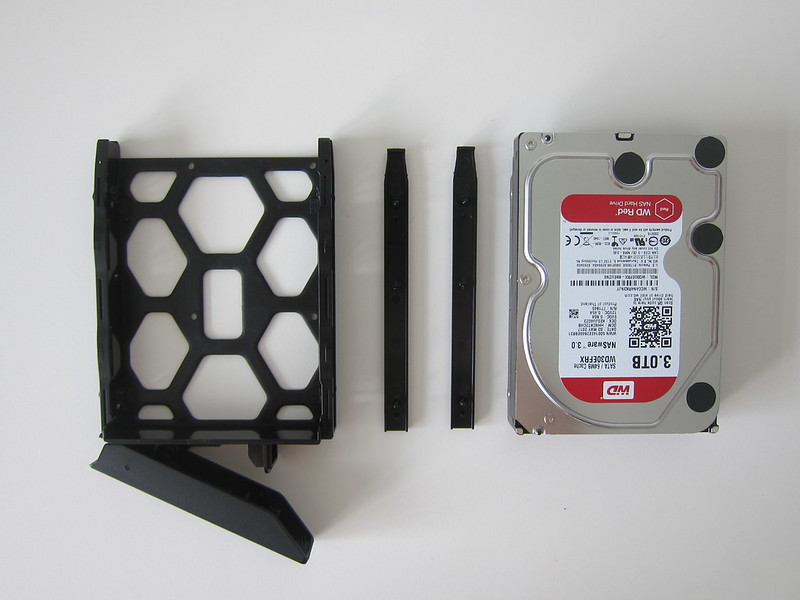
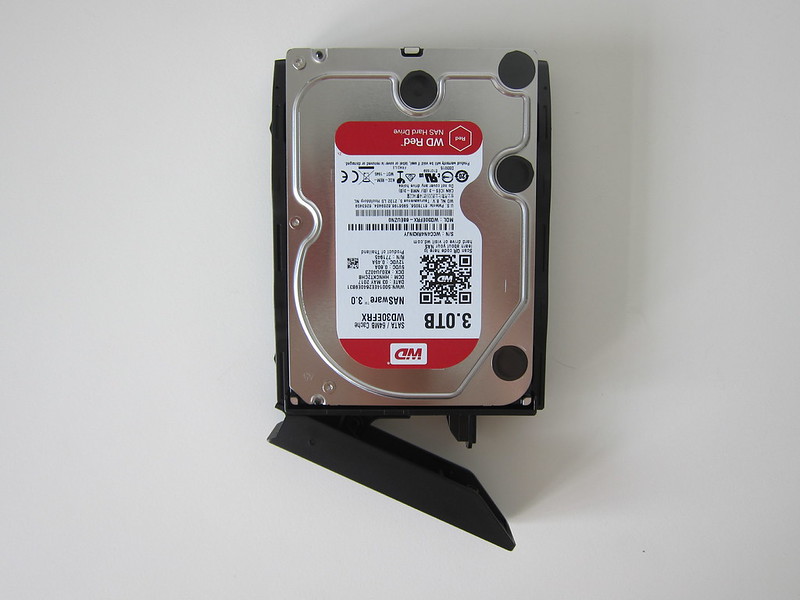
DS918+ - Drive Tray
DS918+ – Drive Tray
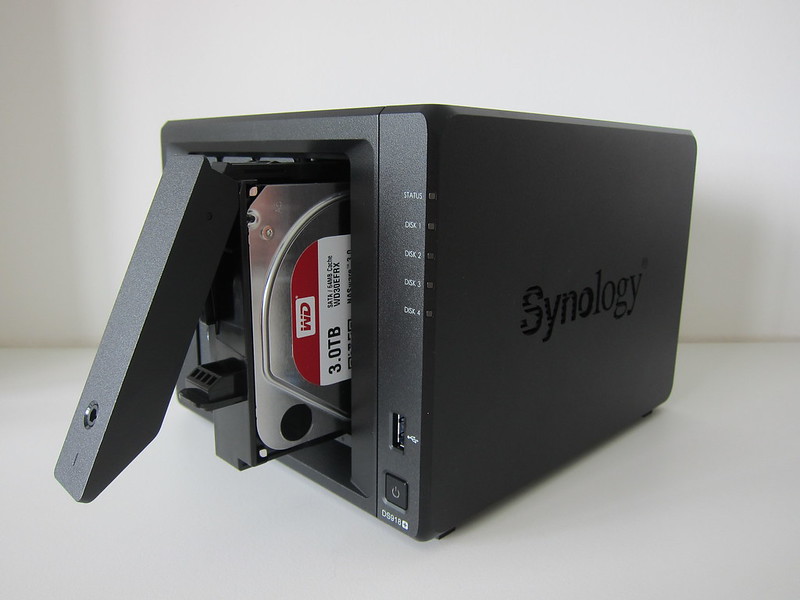
DS918+ - Drive Tray with WD Red
DS918+ – Drive Tray with WD Red
DS918+ - Drive Tray with WD Red In
DS918+ – Drive Tray with WD Red In

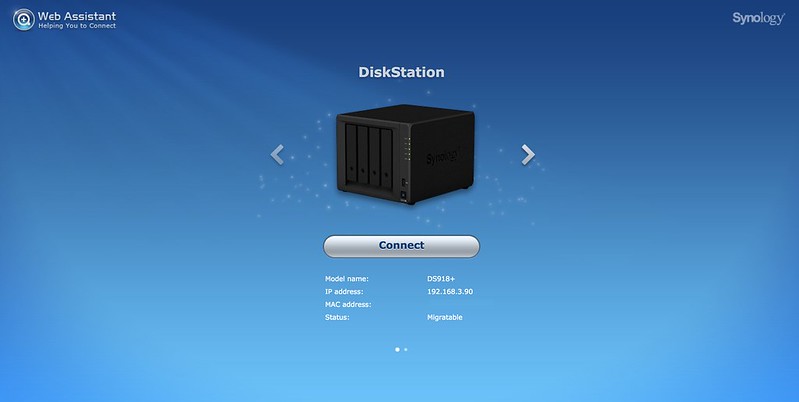
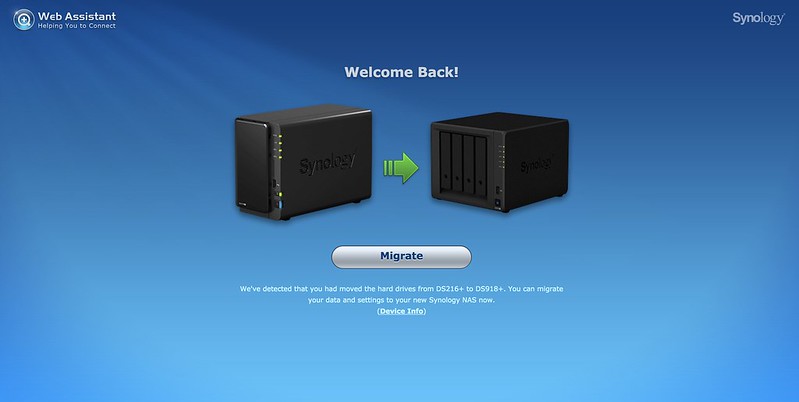
After you inserted both hard drives, just boot up and proceed on to visit find.synology.com using my browser. The status should show “Migratable,” and just follow the onscreen instructions.

Synology Web Assistant - Step #1
Synology Web Assistant – Step #1
Synology Web Assistant - Step #2
Synology Web Assistant – Step #2
Synology Web Assistant - Step #3
Synology Web Assistant – Step #3
Synology Web Assistant - Step #4
Synology Web Assistant – Step #4
Synology Web Assistant - Step #5
Synology Web Assistant – Step #5

The whole process takes about 15 minutes where a bulk of it goes to downloading and installing the DiskStation Manager update followed by rebooting the DS918+.

After rebooting, you will be redirected to a DSM login page, and that means your migration is successful. You can now insert the two blank hard drives and go to Storage Manager > Volume > Manage > Expand the Volume by adding hard disks.

It will take more than 24 hours to expand your volume.

Configuration the SSD Cache
After installing the M.2 NVMe SSDs, you need to configure it within the DSM.

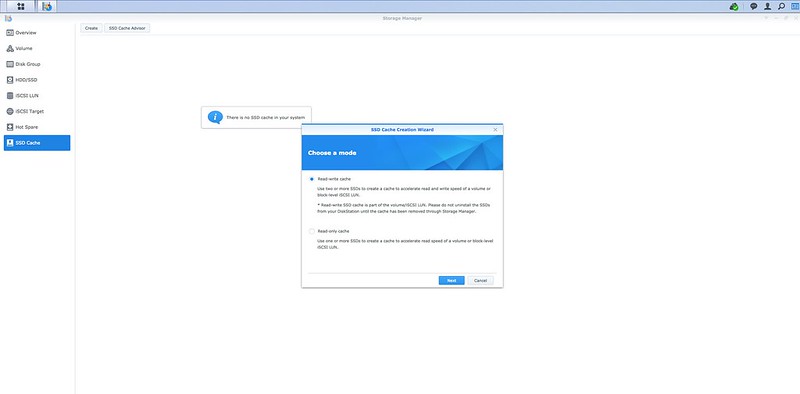
There are two modes of SSD Cache, read-write cache, and read-only cache.

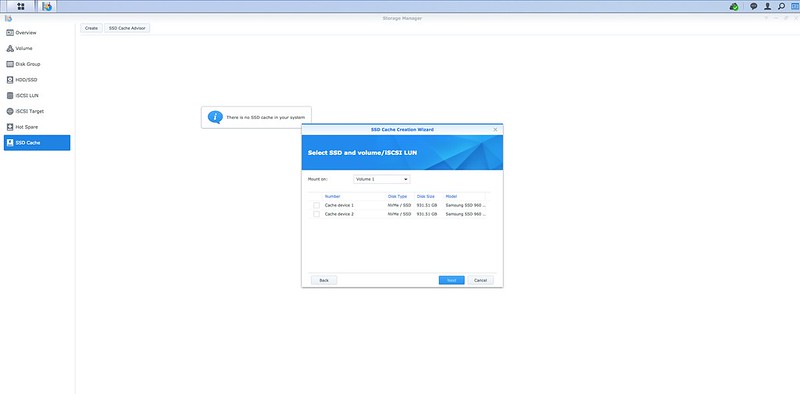
DSM - SSD Cache - Step #1
DSM – SSD Cache – Step #1
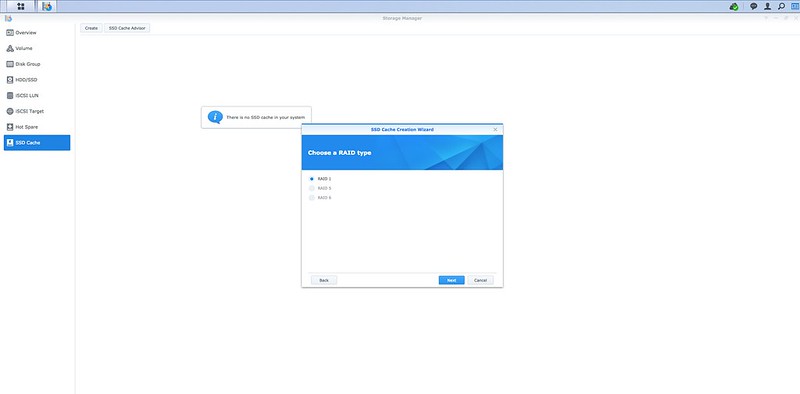
DSM - SSD Cache - Step #2
DSM – SSD Cache – Step #2

For the read-write cache, you need two SSDs, and they have to be put in RAID-1 mode. Synology recommends using the same SSDs for both slots for better compatibility and performance.

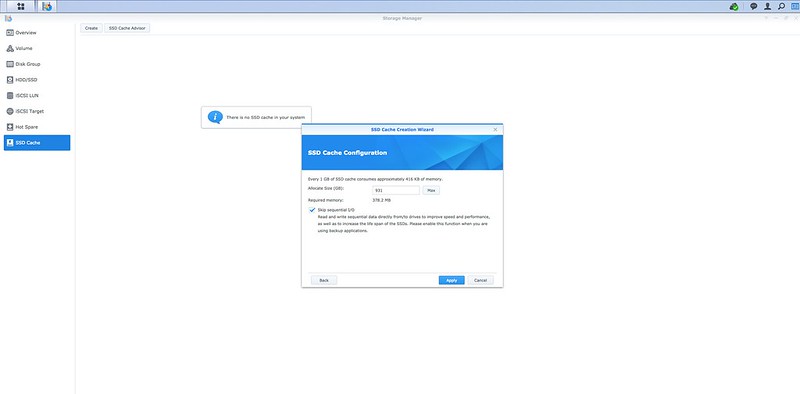
DSM - SSD Cache - Step #3
DSM – SSD Cache – Step #3

For the read-only cache, you can just use one SSD.

There is overhead for SSD cache. For every 1GB of SSD cache, it would need 416KB of RAM to process it. And hence, for my 931.51GB (1TB) of SSD, it will require the use of 378.2MB of RAM.

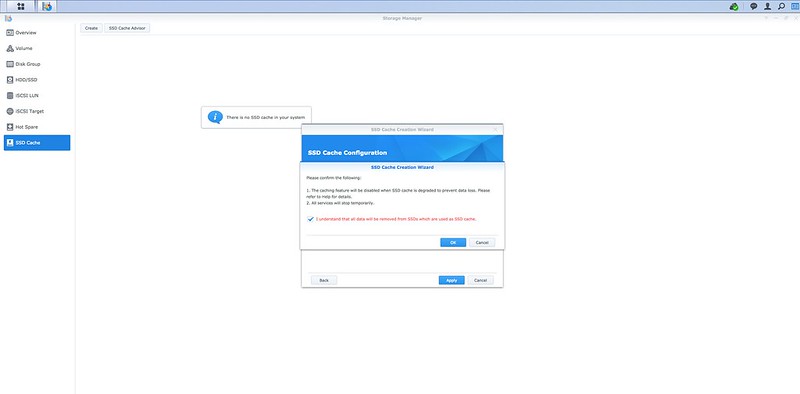
DSM - SSD Cache - Step #4
DSM – SSD Cache – Step #4
DSM - SSD Cache - Step #5
DSM – SSD Cache – Step #5

Since I upgraded to 8GB of RAM, this is not an issue. I highly recommend everyone to do the same as well.

It takes about three minutes to create the 1TB of read-write SSD cache.

DSM - SSD Cache - List
DSM – SSD Cache – List
DSM - SSD Cache - Details
DSM – SSD Cache – Details

Benchmark
The benchmarks are done using fio to test how much difference can the SSD read-write cache makes. I have upgraded the RAM from the default 4GB to 8GB, and hence this benchmark is done on 8GB of RAM.

Here is the code that I am running, courtesy of my friend, Andy. It is taken from his Synology DS1817+ Review.
fio --direct=1 --rw=randrw --refill_buffers --norandommap --randrepeat=0 --ioengine=libaio --bs=8k --rwmixread=70 --iodepth=16 --numjobs=10 --runtime=60 --group_reporting --size=1G --name=8k7030test

Similar to Andy, for the reach-write SSD cache, I ran five sets of writing and reading before running the benchmark.

  Read (MB/s) Write (MB/s)
Without SSD Cache 4.348 1.862
Read-write SSD Cache 90 38.535

When the read-write SSD cache is enabled, you can notice massive improvements to the read and write speed of the DS918+. Both performances increased by more than 1,900%.

  Min Read Latency (ms) Max Read Latency (ms) Avg Read Latency (ms)
Without SSD Cache 0.116 2,329.1 127.623
Read-write SSD Cache 0.135 1,484.3 9.514
  Min Write Latency (ms) Max Write Latency (ms) Avg Write Latency (ms)
Without SSD Cache 0.201 1,382.7 388.785
Read-write SSD Cache 0.108 1,818.4 10.649

Given that read-write cache is enabled, we expect to see lower latency since reading from a cache is always faster than reading from the hard drives. This is still true as shown in our benchmarks above.

Synology Cloud Station Suite
Synology Cloud Station Suite is a suite consisting of four software, Cloud Station ShareSync, Cloud Station Drive, Cloud Station Server, and DS Cloud.

Think of it as running your Dropbox using your Synology NAS. You store the data remotely on your own NAS, and hence you own the data.

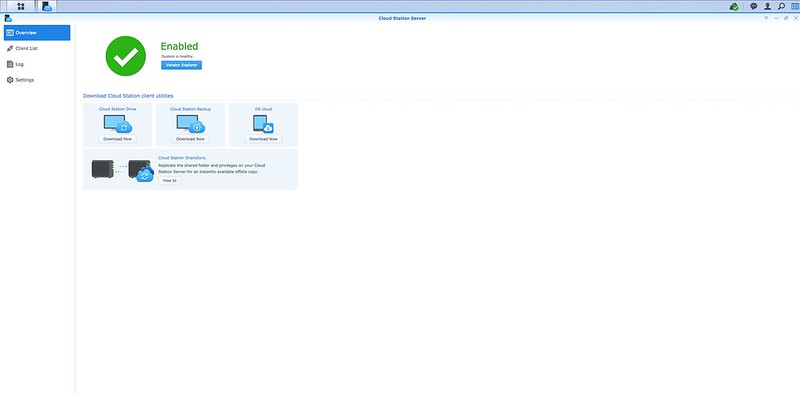
To get started, you need to install Cloud Station Server on your Synology NAS followed by Cloud Station Drive on your computer.

DSM - Cloud Station Server
DSM – Cloud Station Server

DS Cloud is the app on your mobile devices that are used to access your files stored on Cloud Station Server.

If you are running multiple Synology NAS, you can use the Cloud Station ShareSync to sync files between them.

Cloud Sync
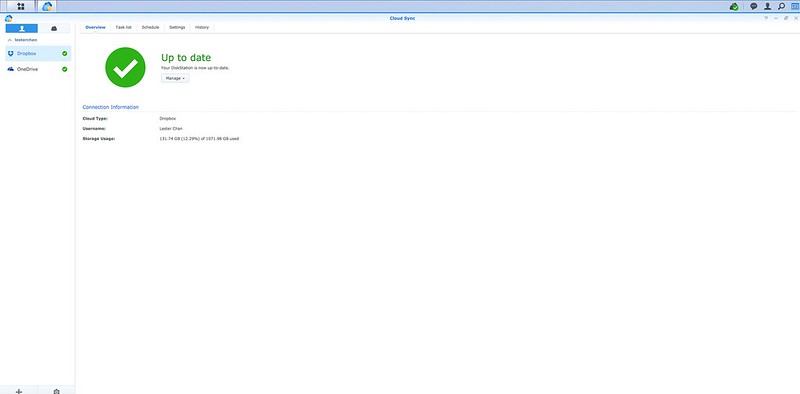
Not to be confused with Cloud Station, Cloud Sync allows you to sync your files in your public cloud to your Synology NAS.

I am using it to backup my files to my Dropbox and OneDrive to my Synology NAS.

DSM - Cloud Sync
DSM – Cloud Sync

Conclusion
The DS918+ is retailing for S$811 while the DS418play is retailing for S$711. Overall, I find that the DS918+ is more value for money than the DS418play. At S$100, you get a faster processor, more RAM and the ability to use SSD caching which is extremely good for performance.

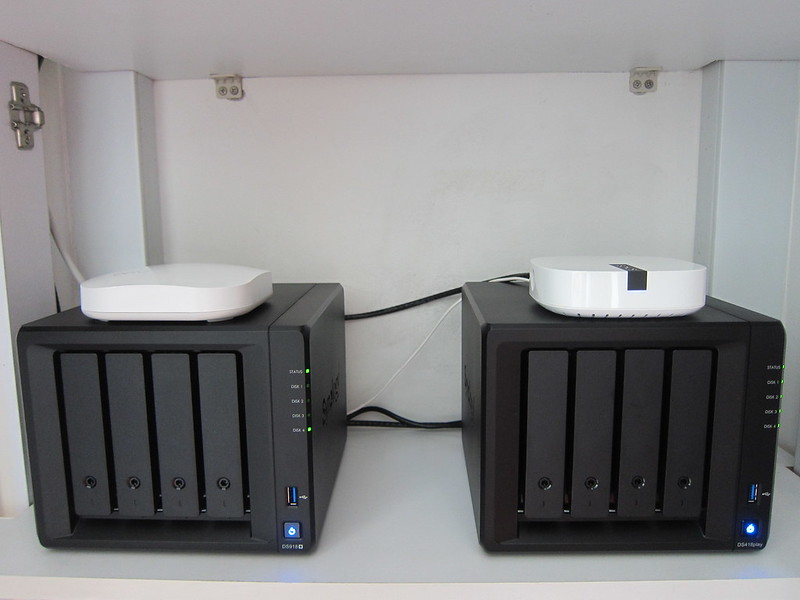
DS918+ (Left) with DS418play (Right)

To some, both might be expensive, but a NAS is worth the investment because you can use it as a media streaming server and a backup server.

If you do not like the idea of public cloud syncing services like Dropbox, you can always roll your own with Synology Cloud Station. You do not need to pay any monthly subscription fee as it is free.

The initial investment of the NAS might be expensive. You need to buy the DS918+ for S$811 and four WD Red 3TB hard drives at S$179 each. The total sum is about S$1,527. But fundamentally, a NAS is like a computer, and it consumes less power than a desktop computer while running 24/7.

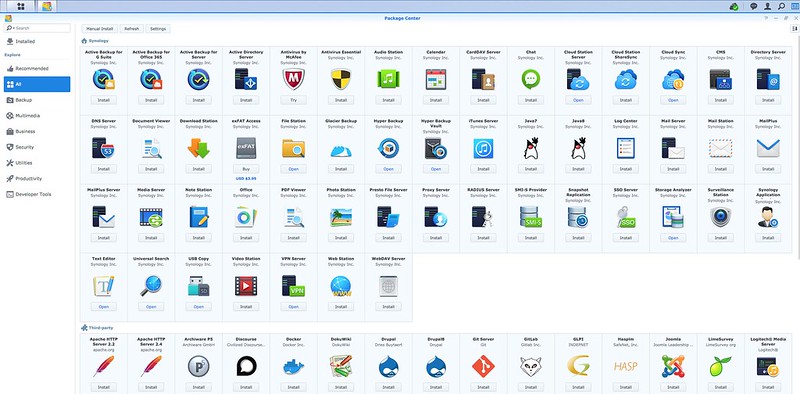
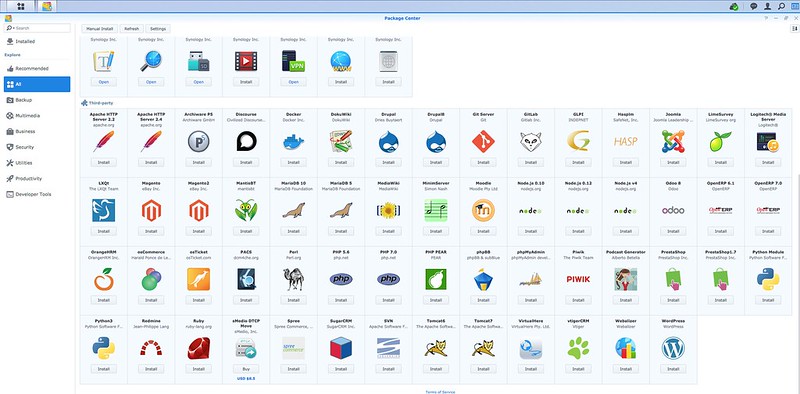
What makes Synology stands out among other NAS is the DSM that powers it and the flexibility through its packages. You can set up almost anything on a Synology NAS, ranging from Active Directory Server to Web Server. You can even install third-party packages like Plex on it.

DSM - Packages - #1
DSM – Packages – #1
DSM - Packages - #2
DSM – Packages – #2
DS918+
DS918+
This post Synology DiskStation DS918+ Review appeared first on lesterchan.net.

eero Beacon

$
0
0

eero Beacon usual price is US$149 (S$199). But on 27th December 2017, they had a sale where it was discounted to US$99 (S$132) with the discount code BEACON99.

Shipping within the US is free, and hence I sent it to my favorite fright forwarder, HopShopGo, and get them to ship to Singapore for me.

My house wi-fi is powered by three first-generation eero. All of them are wired. One in the living room, one in my computer room and one in my master bedroom.

Three units of eero suppose to cover between 2,000 and 4,000 sqft of space, but my house only measures 1,216 sqft. And yet the wi-fi strength in my kitchen is weak. I guess HDB has thick concrete walls.

My kitchen doesn’t have any LAN ports, so I would just need an eero beacon rather than an eero itself.

As an added feature, the eero Beacon comes with a nightlight. And using the eero app, you can schedule it to be switched on or off at specific times. Or you can manually on or off the nightlight by pressing the button on the left.

  • Wireless: Dual-band WiFi radios, simultaneous 2.4GHz, and 5GHz wireless
  • Wi-Fi: 2×2 MU-MIMO, beamforming, IEEE 802.11a/b/g/n/ac
  • Nightlight: 10 Lumen LED nightlight, with automated dimming
  • Dimesions: 121 x 74 x 30 (mm)
eero Beacon - Box Front
eero Beacon – Box Front
eero Beacon - Box Back
eero Beacon – Box Back
eero Beacon - Box
eero Beacon – Box
eero Beacon - Box Open
eero Beacon – Box Open
eero Beacon - Front
eero Beacon – Front
eero Beacon - Back
eero Beacon – Back
eero Beacon - Bottom
eero Beacon – Bottom
eero Beacon - Left - Nightlight Switch
eero Beacon – Left – Nightlight Switch
eero Beacon
eero Beacon
eero iOS App - Setup #1eero iOS App - Setup #2
eero iOS App – Setup
eero iOS App - Setup #3eero iOS App - Setup #4
eero iOS App – Setup
eero iOS App - Setup #5eero iOS App - Setup #6
eero iOS App – Setup
eero iOS App - Setup #7eero iOS App - Setup Done
eero iOS App – Setup
eero iOS App - Settings - Nightlight - Ambienteero iOS App - Settings - Nightlight - Schedule
eero iOS App – Settings – Nightlight
This post eero Beacon appeared first on lesterchan.net.

Linksys EA8100 Max-Stream AC2600 MU-MIMO Gigabit Router Review

$
0
0

Three years ago, Linksys launched their first MU-MIMO router with the Linksys EA8500 Max-Stream AC2600 MU-MIMO Gigabit Router.

Fast forward to today, Linksys launched their first DFS router with the Linksys EA8100 Max-Stream AC2600 MU-MIMO Gigabit Router. DFS stands for Dynamic Frequency Selection. More on that in the later part of the review as that is the only selling point of this router.

EA8000 series has always been Linksys mid-tier routers targeted at the more budget conscious customers while at the same time delivering value for money performance.

The design for EA8100 is similar to that of the EA8500. Even the specs is similar with its 4×4 MU-MIMO and AC2600 (800 Mbps (2.4 GHz) + 1,733 Mbps (5 GHz)).

However, the processor on the EA8100 is slower, 880 MHz vs. 1.4 GHz and the RAM is lesser 256 MB vs. 512 MB. Not surprising, since Linksys release it using a lower model number.

Partnership With StarHub
EA8100 retails for S$329. But sadly, you cannot get it in any retail or online stores as it is exclusive to StarHub customers.

To get the router, you need to sign up for, or renew your StarHub 1Gbps Fibre Home Broadband. The plan cost S$39.90 per month, and you will get the EA8100 free of charge.

Unboxing

Linksys EA8100 - Box Front
Linksys EA8100 – Box Front
Linksys EA8100 - Box Back
Linksys EA8100 – Box Back
Linksys EA8100 - Box
Linksys EA8100 – Box
Linksys EA8100 - Box Contents
Linksys EA8100 – Box Contents

Specifications

  • Processor: MediaTek MIPS1004kc Dual Core 880MHz
  • RAM: 256MB DDR
  • Flash: 128MB
  • Wireless: 802.11 a/b/g/n/ac wireless LAN
    • 2.4GHz
      • IEEE 802.11n, IEEE 802.11g, IEEE 802.11b
      • Speeds up to 800 Mbps
    • 5GHz
      • IEEE 802.11ac, IEEE 802.11n & IEEE 802.11a
      • Speeds up to 1733 Mbps
  • LAN/WAN
    • 4x 10/100/1000 Gigabit LAN ports
    • 1x 10/100/1000 Gigabit WAN port
  • Antennas: Four exchangeable external antennas
  • Other Ports: 1x USB 3.0 port, 1x USB 2.0 Port
  • Dimensions (L x W x D): 257 x 184 x 56 (mm)
  • Weight: 558 g (Without Antennas)

Design
As mentioned earlier, the design of the EA8100 is similar to that of the EA8500. The difference lies in the port design.

Linksys EA8100 - Top
Linksys EA8100 – Top

For EA8100, the eSATA and wi-fi on/off button have been dropped which make sense in the current age. The Internet port has also been separated from the four LAN ports and moved to the left for better visual clarity.

Linksys EA8100 - Back
Linksys EA8100 – Back
  • USB 3.0 Port
  • USB 2.0 Port
  • WPS Button
  • Factory Reset Button
  • Internet WAN Port
  • 4x LAN Ports
  • Power Port
  • Power On/Off Switch

Since it features a 4×4 MU-MIMO, it has four antennas. Two at the back and one on each side.

The weight and dimensions of the EA8100 are the same as EA8500. Measuring 257 x 184 x 56 (mm) and weighing 558 g without antennas.

Linksys EA8100 - Front
Linksys EA8100 – Front

It is exclusive to StarHub, and hence you can find a StarHub serial number label at the bottom of the router.

Linksys EA8100 - Bottom
Linksys EA8100 – Bottom

Features
The EA8100 is a smart router as well, and hence you can access your router settings remotely over the Internet using the Linksys Smart Wi-Fi website (linksyssmartwifi.com) or Linksys mobile app available on both iOS and Android.

Linksys EA8100 - Admin UI
Linksys EA8100 – Admin UI

Like most Linksys routers, it also supports beamforming. Beamforming enables the router to identify and connect directly with the devices rather than merely sending out wireless signals in a general direction. This ensures faster network speeds, better wireless range, reduced interference from other devices, and stronger Wi-Fi connections.

EA8100 supports 4×4 MU-MIMO. MU-MIMO stands for Multi-User, Multiple-Input, Multiple-Output. The router can send and receive up to four streams of data using multiple antennas to multiple clients simultaneously. Of course, the client itself must support MU-MIMO. Most modern Qualcomm Snapdragon processors found in mobile phones support MU-MIMO.

There is no OpenVPN Server support on the EA8100. It seems that OpenVPN Server is only supported in WRT series, in particular, the WRT3200ACM, WRT1900AC, WRT1900ACS, and WRT1200AC.

VLAN tagging is available in EA8100. Despite it being exclusive to StarHub, there are presets for other Singapore ISP VLAN tags as well.

LInksys EA8100 - VLAN Tagging
LInksys EA8100 – VLAN Tagging
LInksys EA8100 - VLAN Tagging - Preset VLAN Tags
LInksys EA8100 – VLAN Tagging – Preset VLAN Tags

DFS
DFS stands for Dynamic Frequency Selection. DFS is created to solve the problem of interference and airspace congestion from different routers operating in HDBs or high-rise condominiums. It solves the problem by expanding the number of available wi-fi channels of the 5 GHz band from nine to 25.

The EA8100 is probably the first and only router right now to support DFS. The reason being it requires more stringent approval from the authorities due to the use of restricted frequencies. The use of frequency throughout the world is govern by the ITU Telecommunication Standardization Sector.

How it works is pretty simple. You can refer to the graph below for a rough idea.

DFS Channels Allocation (Credits to Network Computing)

Right now, your router 5 GHz band uses one of the nine public channels marked in green (36, 40, 44, 48, 149, 153, 157, 161, and 165).

The 16 DFS channels marked in orange are restricted channels reserved by the government for the military, emergencies services, and weather radar. Out of the 16 channels, we can only use 15 of them (52, 56, 60, 64, 100, 104, 108, 112, 116, 120, 124, 128, 132, 136, and 140). Channel 144 can’t be used because older 802.11ac devices don’t support it and several worldwide regulatory prohibit the use of that channel.

You must be wondering if it is restricted, how come the EA8100 can use it? The answer lies in the DFS technology.

By default, when you set up the router, it uses the DFS Channel 108. In the background, the router is actively listening for any military, emergencies services, and weather radar that is using the same frequency. If there is an airplane flew by your house and broadcast the channel 108 frequency, your router will acknowledge it and back off from the channel by switching to a random non-DFS channel.

During this channel switch, you will encounter a short disconnection on the 5 GHz band. You will not feel any difference as it happens within a spilt-second.

The disconnection when switching from non-DFS channel to DFS channel is longer because the router needs to scan the radio environment whether the selected DFS channel is being occupied by the radar. The scanning could take up to ten minutes.

Linksys EA8100 - Wi-Fi Settings
Linksys EA8100 – Wi-Fi Settings

It will stay on the non-DFS channel till you explicitly switch it back in the settings. It will not automatically switch back because that involves dropping your connections and restarting your router. In Linksys point of view, that is deemed poor user experience, and hence they decided not to switch it back automatically.

There might be cases where you thought you are on a DFS channel, but actually, you are not. The router probably switches to a non-DFS channel while you are away as the DFS channel might be in use.

I wish Linksys will inform you via a push notification on the Linksys app or via an email when that happens. At least you know you have to switch it back, rather than keep checking the wi-fi settings page every day.

In your router admin UI, the “auto” option in the 5 GHz channel settings doesn’t include DFS channels. The router will only automatically select the best non-DFS channel. There is no auto option for DFS channels yet due to technical limitations of the chipset.

Linksys EA8100 - Wi-Fi Settings - 5 GHz Band Channels
Linksys EA8100 – Wi-Fi Settings – 5 GHz Band Channels

For now, you can select any arbitrary DFS channel. If you find that your router keeps switching back to a non-DFS channel, you might need to choose another one as your house might be near an airbase or a weather station which always broadcast the same DFS frequencies.

Speed Test
I live in a new HDB BTO flat. And like most new BTO flats, they are all built using prefabrication techniques. I think the walls of prefabrication flats are much thicker than older apartments and hence I do not get much congestion on both the 2.4 GHz and 5.0 GHz bands from my neighbors. And therefore, DFS doesn’t make much of a difference to me.

Wi-Fi Explorer - Channel 108
Wi-Fi Explorer – Channel 108

However, if you live in an older HDB flat (which I assume the walls are thinner), you might get congestion on the 5 GHz band due to all your neighbors’ routers. Likely those routers will only be using one of the nine public channels. So, if your router supports DFS, your 5 GHz band will not be “squeezing” with the public channels, and hence you will get much faster speeds.

Linksys EA8100 - Speed Test - 5 GHz - Channel 153 (non-DFS)
Linksys EA8100 – Speed Test – 5 GHz – Channel 153 (non-DFS)
Linksys EA8100 - Speed Test - 5 GHz - Channel 108 (DFS)
Linksys EA8100 – Speed Test – 5 GHz – Channel 108 (DFS)

Using DFS channel, the only speed improvement I get is for uploading speed. The speed difference is more than 100 Mbps everytime I test it with Speed Test. Downloading speed remains almost the same.

Conclusion
I can’t seem to think of any disadvantages for DFS. It doesn’t require explicit support on the client side, unlike MU-MIMO. As long as the client can connect to the 802.11ac network, it will support DFS channel frequencies.

I foresee future Linksys routers will support DFS, like how the EA8500 is the first router to support MU-MIMO and after that, you can find MU-MIMO in almost all Linksys routers.

Hopefully, by then, it will no longer be exclusive. No one switches an ISP just to get an exclusive router, though the same can’t be said for mobile phones.

Linksys EA8100
Linksys EA8100
This post Linksys EA8100 Max-Stream AC2600 MU-MIMO Gigabit Router Review appeared first on lesterchan.net.

Linksys Velop (Dual-Band) Review

$
0
0

One of the main concerns of the Linksys Velop (Tri-Band) wi-fi mesh system is the price. Linksys Velop (Tri-Band) retails their 1-pack for S$349, 2-pack for S$599 and 3-pack for S$749.

With the introduction of the Linksys Velop (Dual-Band) on 28th July 2018, Linksys manage to solve the pricing problem. It is friendly to the wallet because is about two times cheaper. Linksys Velop (Dual-Band) retails their 1-pack for S$139, 2-pack for S$269 and 3-pack for S$399.

You will be happy to know both Dual-Band and Tri-Band nodes are 100% interoperable and interchangeable. So you can mix and match the nodes to suit your budget.

It is recommended that you read my Linksys Velop (Tri-Band) review first before reading this review.

Specifications
The specifications have been reduced as well to match the price point.

Each Velop (Dual-Band) node is a Dual-Band AC 2×2 802.11ac Wave 2 with MU-MIMO Radio (1x 5.0 GHz and 1x 2.4 GHz).

If you compare it with the Velop (Tri-Band), the difference here is one less 5 GHz band. Hence the theoretical speed becomes 1,300 Mbps instead of 2,220Mbps.

The processor for both Velop (Dual-Band) and Velop (Tri-Band) are the same, which is a 716MHz quad-core ARM Cortex-A7 processor.

RAM wise, it is reduced by half, from 512MB to 256MB

Flash storage took the most reduction, from 4GB to just 256MB. I guess Linksys finally figured out that you do not need 4GB of storage space in every node.

Other features remain the same such as, Beamforming, two auto-sensing Gigabit Ethernet ports for WAN and/LAN connection, and Bluetooth 4.1/LE for easy setup. Just a minor note that Velop (Dual-Band) is on Bluetooth 4.1 instead of Bluetooth 4.0 found in Velop (Tri-Band).

Unboxing

Linksys Velop (Dual-Band) - Box Front
Linksys Velop (Dual-Band) – Box Front
Linksys Velop (Dual-Band) - Box Back
Linksys Velop (Dual-Band) – Box Back
Linksys Velop (Dual-Band) - Box
Linksys Velop (Dual-Band) – Box
Linksys Velop (Dual-Band) - Box Open
Linksys Velop (Dual-Band) – Box Open
Linksys Velop (Dual-Band) - Box Contents
Linksys Velop (Dual-Band) – Box Contents

Compared to the nodes of the Velop (Tri-Band), the power adapter of the Velop (Dual-Band) feels less premium.

Linksys Velop (Dual-Band) - Node Contents
Linksys Velop (Dual-Band) – Node Contents

The included LAN cable is not a flat cable unlike the Velop (Tri-Band). Similarly, only one LAN cable is included.

Design
Both the Dual-Band and Tri-Band Velop has similar design language. Even the square base measurement is the same at 8cm. Probably the most obvious difference is the height. The Velop (Dual-Band) measures 14cm in height while the Velop (Tri-Band) measures 19cm.

Linksys Velop (Dual-Band) - Front
Linksys Velop (Dual-Band) – Front

The only light indicator remains at the same place which is at the top.

Linksys Velop (Dual-Band) - Top
Linksys Velop (Dual-Band) – Top

Unlike the Velop (Tri-Band), I find the ports and button/switch arrangement is a little messy on the Velop (Dual-Band).

Instead of having all the buttons and ports at the bottom like the Velop (Tri-Band), the Velop (Dual-Band) splits the power port, two Ethernet ports, and the button/switch to the back and bottom.

Linksys Velop (Dual-Band) - Back
Linksys Velop (Dual-Band) – Back
Linksys Velop (Dual-Band) - Bottom
Linksys Velop (Dual-Band) – Bottom

This is probably due to a shallower cut out at the bottom.

Setup
Setup is done via the Linksys iOS app or the Linksys Android app.

Previously, I ran into some issues setting up the Velop (Tri-Band) using my iPhone 7 Plus. So I have to use my Android phone for the setup.

For Velop (Dual-Band), the first time I tried to set it up, it failed.

Linksys iOS App - Setup - #1Linksys iOS App - Setup - #2
Linksys iOS App – Setup
Linksys iOS App - Setup - #3Linksys iOS App - Setup - #4
Linksys iOS App – Setup
Linksys iOS App - Setup - #5Linksys iOS App - Setup - #6
Linksys iOS App – Setup
Linksys iOS App - Setup - #7Linksys iOS App - Setup - #8
Linksys iOS App – Setup
Linksys iOS App - Setup - #9Linksys iOS App - Setup - #10
Linksys iOS App – Setup
Linksys iOS App - Setup - #11Linksys iOS App - Setup - #12
Linksys iOS App – Setup
Linksys iOS App - Setup - #13Linksys iOS App - Setup - #14
Linksys iOS App – Setup

I have to reset the node and restart the setup again. I am glad the second time I manage to complete the setup on my iPhone X.

Linksys iOS App - Setup - #15Linksys iOS App - Setup - #16
Linksys iOS App – Cont. Setup
Linksys iOS App - Setup - #17Linksys iOS App - Setup Another Node - #1
Linksys iOS App – Setup Done / Setup Another Node

Similar to setting up the Velop (Tri-Band), I find adding subsequent nodes slow. It takes about six minutes to add the following nodes compared to just four minutes to add the first node.

If you fail to add subsequent nodes due to the error “Checking your node’s Wi-Fi strength,” move that node closer to the primary node and restart the setup. Then, move that node back to the original place when the setup is done. Previously, I have to do this when setting up the Velop (Tri-Band) at my brother’s house.

Linksys iOS App - Setup Another Node - #2>Linksys iOS App - Setup Another Node - Checking Your Node Wi-Fi Strength
Linksys iOS App – Setup Another Node / Checking Your Node Wi-Fi Strength/figcaption>
Linksys iOS App - DashboardLinksys iOS App - Devices
Linksys iOS App – Dashboard / Devices

When I reviewed the Velop (Tri-Band), Bridge Mode is not yet supported, and there is no Web UI for it. This is not the case for Velop (Dual-Band) as Bridge Mode was added to the Velop firmware in May 2017 and the Web UI in June 2017.

Linksys iOS App - SettingsLinksys iOS App - Connection Types
Linksys iOS App – Settings / Connection Types
Linksys iOS App - Bridge ModeLinksys iOS App - Bridge Mode - Enable
Linksys iOS App – Bridge Mode

There are two ways to access the Web UI. The first way is to get the local IP for it. You have to go to Settings -> Velop Administration -> IP Details. Type the IP Address (WAN) into your browser. That will be the local IP for your Web UI.

Linksys iOS App - Velop AdminLinksys iOS App - Router IP Details
Linksys iOS App – Velop Admin / Router IP Details

You will get a warning as shown below, but you can click “Still want to use your browser?” to proceed on.

Velop Web UI - Warning
Velop Web UI – Warning
Velop Web UI - Home
Velop Web UI – Home

The second way is to visit Linksys Smart Wi-Fi. Since Velop supports Linksys Smart Wi-Fi, and you have to link your Velop to your Linksys account during the setup, you can access your Velop Web UI remotely as well.

The Web UI is about configuration rather than a dashboard. So you will not see any statistics on the router or connected devices. You can configure the wi-fi settings, connectivity type, guest access, and router settings.

Coverage
Interestingly, the 2.4GHz band of the Velop (Dual-Band) performs slightly better than my Velop (Tri-Band) in my Kitchen and Service Yard. Other than that, both coverages are similar.

Velop (Dual-Band) - 2.4GHz - Heatmap
Velop (Dual-Band) – 2.4GHz – Heatmap
Velop (Tri-Band) - 2.4GHz - Heatmap
Velop (Tri-Band) – 2.4GHz – Heatmap

The most significant difference in coverage is in the 5.0GHz band. I am not sure why Velop (Dual-Band) does so poorly in this area. I am guessing it might be because of the antenna design rather than the absence of another 5.0GHz band.

Velop (Dual-Band) - 5.0GHz - Heatmap
Velop (Dual-Band) – 5.0GHz – Heatmap
Velop (Tri-Band) - 5.0GHz - Heatmap
Velop (Tri-Band) – 5.0GHz – Heatmap

Speed
Download speed-wise, it seems slower than the Velop (Tri-Band) and on par with my eero which is also dual-band. I tried testing it every hour throughout the day, and I can’t seem to get it to pass 400Mbps.

However, the upload speed is impressive. I get a constant speed of more than 450Mbps everytime I tried. On some tests, it went above 500Mbps.

Velop (Duap-Band) - Speedtest
Velop (Duap-Band) – Speedtest
Location Velop (Dual-Band) Velop (Tri-Band) eero
Living Room (Download) 368.76Mbps 489.96Mbps 349.69Mbps
Living Room (Upload) 487.03Mbps 205.21Mbps 164.14Mbps

Conclusion
Priced at S$399 for a set of three Velop (Dual-Band) nodes, I find the price attractive. It is cheaper than some high-end routers on the market. Getting a wi-fi mesh system is more worth it than getting a high-end router, as it can deliver both coverage and speed.

Since there is no dedicated backhaul for Velop, there is not much difference between a Dual-Band Velop and a Tri-Band Velop. Most users will not be able to tell the difference in speed during their day to day use.

Velop dual-band and tri-band nodes are 100% interoperable and interchangeable. For starters, getting the 2-pack Velop (Dual-Band) for S$269 should be good enough. If later on, you have more budget, you can get an additional tri-band Velop and add it to your Velop wi-fi mesh system.

With the lower pricing of Velop (Dual-Band), I hope more people can join on the wi-fi mesh system bandwagon.

Linksys Velop (Dual-Band)
This post Linksys Velop (Dual-Band) Review appeared first on lesterchan.net.

Synology Mesh Router MR2200ac Review

$
0
0

The Synology Mesh Router MR2200ac was launched in Singapore this week at a recommended retail price of S$199.

You can get it from Storage Studio on Lazada at a slightly higher price of S$220. Stocks are a little constrained right now but expect more stocks to arrive in January 2019.

MR2200ac can work as a standalone router, and it will cover about 185 m2 of space. You can add multiple MR2200ac to form a mesh network, and for each node you add, it will cover an additional 185 m2.

If you are using an existing Synology Router RT2600ac, you can also add that to the mesh network after you set up the first (primary) node using the MR2200ac.

Although each MR2200ac can cover 185 m2, you will still need an additional MR2200ac. Unless of course, your router is right in the middle of the house and your house doesn’t have any concrete walls.

For my house, the Internet point is located at the end of my house, so despite my house is only 113 m2, I would need at least two nodes. If not my master bedroom which is located at the opposite end, will not be able to get any signal.

Synology Mesh Router MR2200ac - Three Units
Synology Mesh Router MR2200ac – Three Units

Like most mesh systems, MR2200ac also supports bridge mode. Synology called it “Wireless Access Point (AP).” So you can set up the MR2200ac just for the wireless network while having your main router in front of it.

MR2200ac supports beamforming and 802.11k/v/r standards for seamless roaming.

This time around, I am going to replace both my Asus RT-AC88U Router and eero with the MR2200ac.

Usually, I will only replace the eero when testing wi-fi mesh system. But I have been waiting for a suitable product to come along so I can have a unified system for both wired and wireless networks.

MR2200ac has an excellent web administration interface and a good mobile app. So the setup can be done on either platform. eero lacks a web interface if not it would have been even better as their eero mobile app is already fantastic.

Specifications

  • CPU: Qualcomm IPQ4019 quad-core 717MHz
  • RAM: 256 MB DDR3
  • Internal Storage: 256MB
  • Antenna: 2×2 MU-MIMO high-performance internal antenna (2.4 GHz / 5 GHz)
  • Wireless:
    • IEEE 802.11a/b/g/n/ac
    • Simultaneous tri-band Wi-Fi
    • 5 GHz-1: 867Mbps
    • 5 GHz-2: 867Mbps
    • 2.4 GHz: 400Mbps
  • Wi-Fi Encryption: WEP, WPA/WPA2-Personal, WPA/WPA2-Enterprise, WPA2/WPA3-Personal, WPA3-Personal/Enterprise, Wi-Fi Enhanced Open (OWE)
  • Seamless Roaming: 802.11k/v/r support
  • Beamforming: Yes
  • 3G/4G Dongle & Tethering: Yes
  • Operating Mode: Wireless Router or Wireless AP
  • VPN: VPN Server, VPN Client, VPN Pass-through
  • Ports:
    • 1x Gigabit LAN Port
    • 1x Gigabit WAN Port
    • 1x USB 3.0 Port
  • Buttons: WPS, Power, Reset, Wi-Fi On/Off
  • Dimensions (H x W x D): 154 x 199 x 65 (mm)
  • Weight: 450 g

WPA3
MR2200ac is one of the first routers in the market to be WPA3 certified. WPA3 is the successor to the WPA2 which has been around since 2004.

WPA3 is the next generation of Wi-Fi security, bringing new capabilities to enhance Wi-Fi protections in personal and enterprise networks. Building on the widespread adoption of WPA2 over more than a decade, WPA3 adds new features to simplify Wi-Fi security, enable more robust authentication, and deliver increased cryptographic strength for highly sensitive data markets. As the Wi-Fi industry transitions to WPA3 security, WPA2 devices will continue to interoperate and provide recognized security.

WPA3 is technically backward compatible with WPA2, but to be safe, you can choose WPA2/WPA3-Personal as the security level when creating your wireless networks on the MR2200ac. It is a mixed transitional mode to ensure your old WPA2 devices are still compatible.

Unboxing

Synology Mesh Router MR2200ac - Box Front
Synology Mesh Router MR2200ac – Box Front
Synology Mesh Router MR2200ac - Box Back
Synology Mesh Router MR2200ac – Box Back
Synology Mesh Router MR2200ac - Box
Synology Mesh Router MR2200ac – Box
Synology Mesh Router MR2200ac - Box Contents
Synology Mesh Router MR2200ac – Box Contents
Synology Mesh Router MR2200ac - Instructions
Synology Mesh Router MR2200ac – Instructions
Synology Mesh Router MR2200ac - Instructions
Synology Mesh Router MR2200ac – Instructions

Design
The MR2200ac is designed to be standing up since the two feet are non-removable. You can’t place it flat on a surface.

Synology Mesh Router MR2200ac

All the ports and buttons are located at the back.

There is the USB 3.0 port and below it is the WPS and Wi-Fi On/Off buttons.

To the right is the LAN port, followed by the WAN port, power port, power button, and the reset button.

Synology Mesh Router MR2200ac - Back
Synology Mesh Router MR2200ac – Back

The ventilation grills are located at the back and the bottom of the MR2200ac.

Synology Mesh Router MR2200ac - Bottom
Synology Mesh Router MR2200ac – Bottom

There is only one LED indicator in the MR2200ac, and it is located in front.

Synology Mesh Router MR2200ac - Front
Synology Mesh Router MR2200ac – Front

It is designed to look like wi-fi signals as it shows the signal strength from the primary node. Blue means it is in setup mode and blinking blue means it is ready to be set up. It will only turn green once the setup is complete.

Synology Mesh Router MR2200ac - Side
Synology Mesh Router MR2200ac – Side

App
The companion app for Synology routers is called DS Router. It is available on both iOS and Android.

Like most router’s companion app, DS Router provides control over your wi-fi network. It is functional, and you can find what you are looking for quickly. Regarding aesthetics, it is not as nice looking as eero’s app.

DS Router - MenuDS Router - Update
DS Router – Menu / Update
DS Router - OverviewDS Router - Overview - Device List
DS Router – Overview
DS Router - Traffic MonitorDS Router - Traffic Control
DS Router – Traffic Monitor/Control
DS Router - Wi-FiDS Router - Wi-Fi Point
DS Router – Wi-Fi / Wi-Fi Point

Setup
For this review, I will be using the mobile app for the setup and web UI for the configuration.

Connect your Internet connection to the WAN port of the primary MR2200ac. Wait until the LED starts blinking blue.

DS Router - Setup #1DS Router - Setup #2
DS Router – Setup

You can either connect to the default MR2200ac wireless network via your phone’s wireless network settings or scan the QR code at the back of the MR2200ac using the DS Router app.

Because there is no Bluetooth in the MR2200ac, connecting your phone to the MR2200ac is still manual. But the whole process is still very smooth.

If you choose the first way, the SSID will look something like Synology_5MA75Y, and the password is synology.

DS Router - Setup #3DS Router - Setup #4
DS Router – Setup

Follow through the setup wizard to complete your setup.

DS Router - Setup #5DS Router - Setup #6
DS Router – Setup
DS Router - Setup #7DS Router - Setup #8
DS Router – Setup
DS Router - Setup #9DS Router - Setup #10
DS Router – Setup
DS Router - Setup #11DS Router - Setup Done
DS Router – Setup Done

After your primary node has been set up, you can proceed on to add your subsequent MR2200ac. The following nodes have to be added wirelessly. That means that you cannot connect your subsequent MR2200ac with an Ethernet cable yet. Only after the setup is done, then you can connect your MR2200ac via an Ethernet cable.

I find this a little weird. I guess it is a limitation because of the lack of Bluetooth in the MR2200ac. Velop and eero don’t have this limitation.

DS Router - Add Wi-Fi Points #1DS Router - Add Wi-Fi Points #2
DS Router – Add Wi-Fi Points

Because of this limitation, I recommend adding all the subsequent nodes close to your primary node and then move it to their respective rooms.

To make up for this limitation, Synology gives you the option to add multiple nodes at once rather than one by one.

DS Router - Add Wi-Fi Points #3DS Router - Add Wi-Fi Points #4
DS Router – Add Wi-Fi Points
DS Router - Add Wi-Fi Points #5DS Router - Add Wi-Fi Points #6
DS Router – Add Wi-Fi Points
DS Router - Add Wi-Fi Points #7DS Router - Add Wi-Fi Points Done
DS Router – Add Wi-Fi Points Done

Synology Router Manager (SRM)
Powering all Synology routers including the MR2200ac is the Synology Router Manager (SRM). It is the best operating system on a router that I have ever used.

The web UI is fast, intuitive, and nice looking.

SRM - Desktop
SRM – Desktop
SRM - Menu
SRM – Menu
SRM - Control Panel
SRM – Control Panel

You can extend the functionality of the router through packages. Right now there are six packages available:

  • Safe Access is a preinstalled package that integrates advanced parental control and security functions. You can use it to supervise users’ Internet behavior, set Internet schedules and time quotas. Web filters are also available to protect certain users and guard all devices in your network.
  • VPN Plus Server transforms your Synology Router into a powerful VPN server, featuring client-less WebVPN, high-speed Synology SSL VPN, as well as SSTP, OpenVPN, L2TP/IPSec, and PPTP.
  • Download Station allows you to download files from the Internet through BT, FTP, HTTP, NZB, Thunder, FlashGet, QQDL, and eMule, and subscribe to RSS feeds for updates.
  • DNS Server allows your Synology Router to host multiple zones as well as provide name and IP address resolution services.
  • Clud Station Server syncs your data from multiple platforms, centralizing it with previous versions of all your important files.
  • Media Server provides multimedia service for you to browse and play multimedia content located on your Synology Router via DLNA home devices.
  • Remote Authentication Dial-In User Service (RADIUS) is a networking protocol that provides centralized authentication, authorization, and account management for wireless network access.
SRM - Packages
SRM – Packages

The two main apps on the SRM is the Network Center and the Wi-Fi Connect.

SRM – Network Center
Network Center manages your router’s network. You can set up your Internet connection, DDNS, port forwarding, traffic control, etc.

SRM - Network Center - Status
SRM – Network Center – Status
SRM - Network Center - Operation Mode
SRM – Network Center – Operation Mode

VLAN tagging is also available with preset profiles for my region (Singapore). Synology called it IPTV/VOIP instead of VLAN tagging.

SRM - Network Center - Local Network
SRM – Network Center – Local Network

One of the most underrated features of the SRM is 3G/4G Dongle and Tethering. I have not seen any routers in the market with this feature.

If your Internet at home goes down, you can use a 3G/4G dongle and plugged it to the USB port of the router. After that, you have to switch your primary Internet connection from the WAN port to the USB port.

SRM - Network Center - Internet
SRM – Network Center – Internet

If you do not have a dongle, you can also use your Android phone to do a USB Tethering.

SRM - Network Center - Internet - 3G/4G
SRM – Network Center – Internet – 3G/4G

SRM – Wi-Fi Connect
Wi-Fi Connect allows you to manage your wireless network. Here you can set up your wireless network, set up a guest network, see all the nodes connected, etc.

SRM - Wi-Fi Connect - Status
SRM – Wi-Fi Connect – Status

Despite being WPA3 capable, the setup wizard will create your wireless network in WPA2 instead of the mixed transitional mode, WPA2/WPA3-Personal. I switched to WPA2/WPA3-Personal for testing, but it seems my iPhone XS Max has problems connecting to other nodes when I roam around my house. So I changed back to WPA2.

SRM - Wi-Fi Connect - Wireless
SRM – Wi-Fi Connect – Wireless

You can also do a performance test from the primary node to the rest of the nodes in Wi-Fi Connect.

SRM - Wi-Fi Connect - Wi-Fi Point
SRM – Wi-Fi Connect – Wi-Fi Point
SRM - Wi-Fi Connect - Wi-Fi Point (Wired Backhaul
SRM – Wi-Fi Connect – Wi-Fi Point (Wired Backhaul)

Wired Backhaul
The MR2200ac supports wired backhaul. But the way Synology implements it is weird, or maybe it is a limitation?

Besides the need to set up subsequent nodes wirelessly, the usage of wired backhaul has to be first connected wirelessly first.

That means that you have to place your node at the same place that you are going to have your wired backhaul. Wait for it to connect wirelessly to the primary node. In SRM -> Wi-Fi Connect -> Status, the node status should have a green tick (healthy). Only then you can plug in the Ethernet cable for wired backhaul. Your primary node will reboot itself, and now the node uplink should show wired.

If you do not wait for it to connect wirelessly and immediately plugged in the Ethernet cable, it will be stuck in the “Connecting” state.

SRM - Nodes Stuck at Connecting
SRM – Nodes Stuck at Connecting

So this brings a new problem. If there is a need to reboot the node due to a software update, you might need to plug out the Ethernet cable and repeat the above process.

I sincerely hope Synology will fix this in the next software update.

Coverage
For 2.4 GHz band coverage, I would say the MR2200ac perform almost the same as the Velop (Tri-Band).

You can still see a bluish area from the service yard all the way to the household shelter.

MR2200ac - 2.4GHz - Heatmap
MR2200ac – 2.4GHz – Heatmap

Velop - 2.4GHz - Heatmap
Velop – 2.4GHz – Heatmap

eero still wins hands down in 2.4 GHz band coverage.

eero - 2.4GHz - Heatmap
eero – 2.4GHz – Heatmap

For 5.0 band coverage, I would say it loses out to Velop (Tri-band) by a little around the service yard, kitchen, and household shelter area.

MR2200ac - 5.0GHz - Heatmap
MR2200ac – 5.0GHz – Heatmap

Velop - 5.0GHz - Heatmap
Velop – 5.0GHz – Heatmap

Again, eero still wins hands down in 5.0 GHz band coverage.

eero - 5.0GHz - Heatmap
eero – 5.0GHz – Heatmap

MR2200ac coverage is not the best, but I think it is still acceptable given its price.

Speed
The download and upload speed of MR2200ac is decent and is expected from a flagship router.

Despite being a tri-band router, it can’t hit the download speed of the Velop (Tri-Band). The upload speed, on the other hand, performs better than Velop (Tri-Band).

MR2200ac - Speed Test
MR2200ac – Speed Test
Location MR2200ac Velop (Dual-Band) Velop (Tri-Band) eero
Living Room (Download) 371.26Mbps 368.76Mbps 489.96Mbps 349.69Mbps
Living Room (Upload) 407.63Mbps 487.03Mbps 205.21Mbps 164.14Mbps

Conclusion
You might not need a mesh network now. But in the event you do, the Synology Mesh Router MR2200ac gives you the flexibility to add in another MR2200ac to form a two-node mesh network. That is the reason why Synology don’t sell the MR2200ac in sets of two or three. All MR2200ac are being sold standalone.

Three units of MR2200ac is more expensive than Linksys Velop (Dual-Band) but cheaper than Linksys Velop (Tri-Band) and eero. This makes it one of the more affordable tri-band wi-fi mesh system available.

The selling point of the MR2200ac is not the hardware, but the software, SRM. You can do a lot of things that are not possible with Linksys or eero. Things such as 3G/4G tethering, hosting your VPN server, using Download Station to download torrents, etc.

The speed is decent, but unfortunately, the coverage is not the best in the market. But I guess it is still a reasonable trade-off considering the price and SRM.

Priced at S$199 per MR2200ac, I would say it is value for money considering the number of features that SRM provides. It is also future proof as SRM are being updated regularly. Synology first router, RT1900ac, is still being updated after three years.

If you are having a budget constraint or not so sure whether you need a mesh network, I would recommend getting just one MR2200ac and use it as a router. If you discovered some blind spots at your home, buy another MR2200ac to form a mesh network.

Once you have used SRM, you will find other routers OS very primitive.

Synology Mesh Router MR2200ac - First/Master Node
Synology Mesh Router MR2200ac – First/Master Node
This post Synology Mesh Router MR2200ac Review appeared first on lesterchan.net.

eero Pro

$
0
0

Every year I have been upgrading my eero mesh network. I got my eero (1st-generation) in 2017. And in 2018, I added an eero Beacon.

In 2019, I am goign to replace the gateway node with an eero Pro.

During Black Friday, eero Pro was retailing for US$139 (S$191) down from its original price of US$199 (S$273). I got the individual unit from Amazon. Since it doesn’t ship directly to Singapore, I shipped it to my favorite freight forwarder, HopShopGo, and got them to ship for Singapore. Shipping to Singapore costs US$18.35 (S$25) with a free upgrade to express shipping (3 – 5 days).

eero Pro is, in fact, eero (2nd-generation). eero Pro has the same design and footprint as eero (1st-generation). Amazon released a cheaper eero to replace the “non-pro” eero product line in September 2019.

eero Pro - Box Front
eero Pro – Box Front
eero Pro - Box Back
eero Pro – Box Back
eero Pro - Box
eero Pro – Box
eero Pro - Box Open
eero Pro – Box Open
eero Pro - Box Open
eero Pro – Box Open
eero Pro - Box Contents
eero Pro – Box Contents
eero Pro - USB-C Power Adapter
eero Pro – USB-C Power Adapter
eero Pro - Top
eero Pro – Top
eero Pro - Bottom
eero Pro – Bottom
eero Pro - Back
eero Pro – Back
eero Pro
eero Pro

There are four main differences between eero Pro and eero (1st-generation):

  • Tri-band: eero Pro comes with three bands instead of two.
  • Power Adapter: eero Pro uses a USB-C port for power rather than the usual barrel-style power plug
  • Reset button: Instead of push-pin style hole reset, eero Pro comes with a reset button
  • USB-C Diagnostic Port: The USB-A diagnostic port has been replaced with a USB-C diagnostic port.
eero Pro vs eero (1st-generation) - Back
eero Pro vs eero (1st-generation) – Back

eero Pro is designed to get twice the performance of the first-generation eero. The radios in eero Pro are much more sophisticated, and the antennas are better.

eero Pro vs eero (1st-generation) - Bottom
eero Pro vs eero (1st-generation) – Bottom

However, the processor in eero Pro isn’t significantly much faster than the first-generation eero, 700MHz Quad-Core vs. 1.0GHz Dual-Core. RAM and flash storage stays the same at 512MB and 4GB, respectively.

This post eero Pro appeared first on lesterchan.net.

Migrating From Existing Synology DiskStation to Synology DiskStation DS920+

$
0
0

Synology DiskStation DS920+ is the highest end 4-bay NAS of the new Synology 2020 Plus series. Other models in the series include the DS420+ (4-bay), DS720+ (2-bay), and DS220+ (2-bay).

DS920+ has an Intel Celeron J4125 with 4GB of DDR4 ram. Intel J4125 is a 4-core 2.0 GHz (burstable to 2.7 GHz) processor.

You can expand the RAM on the DS920+ to 8GB by adding in another 4GB stick.

Ports wise, it has 2x USB 3.0 port, 1x eSATA port, and 2x 1GbE port.

It comes with a three-year warranty, which I think is just nice.

Fun fact, Synology refreshes its NAS every two years. The predecessor of the DS920+ is the DS918+. The last two digits of the model number represent the year it was launched.

The suffix “+” represents it belongs to the Plus series (higher-end). The suffix “play” or if there is no suffix, belongs to the Value series (mid-range). The suffix “J” or “slim” belongs to the J series, which is for entry-level NAS.

I will be upgrading my Synology DiskStation DS418play to the Synology DiskStation DS920+.

Unboxing

Synology DiskStation DS920+ - Box
Synology DiskStation DS920+ – Box

Two RJ45 (LAN) cables are included in the package. Those are Cat5e RJ45 cables. I wish they included Cat6 cables instead.

Synology DiskStation DS920+ - Box Contents
Synology DiskStation DS920+ – Box Contents
Synology DiskStation DS920+ - Instructions #1
Synology DiskStation DS920+ – Instructions #1
Synology DiskStation DS920+ - Instructions #2
Synology DiskStation DS920+ – Instructions #2

Design
The matte black design of the DS920+ is identical to my current DS918+ and my previous DS418play.

It doesn’t attract fingerprints and doesn’t leave behind watermarks after cleaning it with a damp cloth.

Five indicator LEDs are in front, one for each hard drive and one for the overall status.

Synology DiskStation DS920+ - Front
Synology DiskStation DS920+ – Front

I wished the USB 3.0 port in front was a USB-C port.

At the back, there is the dual 1GbE port, one eSATA port, another USB 3.0 port.

Synology DiskStation DS920+ - Back
Synology DiskStation DS920+ – Back

For the advanced users, the dual 1GbE port supports Link Aggregation and network failover. I don’t use both of the features.

I read a few reviews hoping that the Synology 2020 Plus series will include dual 2.5GbE ports instead of dual 1GbE. To me, it doesn’t matter as all my home equipment is only up to 1Gbps.

If my network chokes, I might consider using Link Aggregation.

To cool your DS920+, there are two 920mm fans at the back. You can choose from three levels of fan speed from the DiskStation Manager (DSM).

Synology DiskStation DS920+ - Right
Synology DiskStation DS920+ – Right
Synology DiskStation DS920+ - Left
Synology DiskStation DS920+ – Left
Synology DiskStation DS920+ - Bottom
Synology DiskStation DS920+ – Bottom

Installing Extra Ram
DS920+ comes with 4GB of RAM, and you can expand to 8GB by adding in another 4GB of RAM.

Synology DiskStation DS920+ - Without Disk Tray
Synology DiskStation DS920+ – Without Disk Tray

Synology always recommends you get the RAM from them. You can choose to ignore the recommendation and get a third-party RAM. But if things go wrong, your warranty might be voided.

The RAM slot is located inside and on the right of the NAS. You will need to remove at least two drives to get enough clearance to install the RAM.

Synology DiskStation DS920+ - Inside
Synology DiskStation DS920+ – Inside
Synology DiskStation DS920+ - RAM Slot
Synology DiskStation DS920+ – RAM Slot
Synology DiskStation DS920+ - RAM Installed
Synology DiskStation DS920+ – RAM Installed

Installing SSD Cache
Like the DS918+, the DS920+ also comes with two M.2 NVMse SSD slots to improve the performance of your NAS via SSD caching.

I bought two Crucial P1 500GB NVMe M.2 SSD to be used for SSD caching.

NVMe M.2 SSD can be expensive, but since you will be using it for SSD caching and not storage, you can get the cheapest one.

Synology DiskStation DS920+ - M.2 NVMe SSD Slot
Synology DiskStation DS920+ – M.2 NVMe SSD Slot
Synology DiskStation DS920+ - M.2 NVMe SSD Installed
Synology DiskStation DS920+ – M.2 NVMe SSD Installed

Migration
Migration is incredibly straight forward, and the whole process takes less than 10 minutes.

Synology DiskStation DS920+ - Disk Tray
Synology DiskStation DS920+ – Disk Tray
Synology DiskStation DS920+ - Disk Tray - With WD Red
Synology DiskStation DS920+ – Disk Tray – With WD Red

The most important thing to note is when removing your hard drives from your previous NAS and adding it to your new NAS; the hard drives have to be in the same order.

Synology DiskStation DS920+ - Disk Tray - With WD Red - Side
Synology DiskStation DS920+ – Disk Tray – With WD Red – Side
Synology DiskStation DS920+ - Disk Tray - With WD Red - Top
Synology DiskStation DS920+ – Disk Tray – With WD Red – Top

With the front of the NAS facing you, Bay 1 starts from the left.

Synology DiskStation DS920+ - Disk Tray With Hard Drive Inserted
Synology DiskStation DS920+ – Disk Tray With Hard Drive Inserted

I recommend removing one by one. After removing Bay 1 from your previous NAS, immediately add Bay 1 to your new NAS. Then proceed on to Bay 2 and repeat the same steps till you are done.

Synology DiskStation DS920+ - Hard Drives Installed
Synology DiskStation DS920+ – Hard Drives Installed

Once everything is in order, plugged the LAN cable, and power cable. Press the power button to power up the NAS. For the first boot, it will take about a minute, and the light will be flashing blue. Once you heard a loud beep sound and the blue light stop flashing, your NAS is booted.

Synology DiskStation DS920+ - Switched On
Synology DiskStation DS920+ – Switched On

Using your browser, go to find.synology.com. It should be able to detect your NAS there with the status Migratable.

Synology Web Assistant - #1
Synology Web Assistant – #1
Synology Web Assistant - #2
Synology Web Assistant – #2

There are two installation types when migrating, Migration and Reinstallation. Migration keeps your data and DSM settings while Reinstallation keeps your data and wipes your DSM settings. If you have to spend a lot of time configuring your DSM, I would recommend just Migration.

Synology Web Assistant - #3
Synology Web Assistant – #3
Synology Web Assistant - #4
Synology Web Assistant – #4
Synology Web Assistant - #5
Synology Web Assistant – #5

Follow the onscreen instructions, and after about 7 minutes, you are done.

DSM - Login
DSM – Login
DSM - Home
DSM – Home
DSM - Control Panel
DSM – Control Panel

Post Migration
There are a few post-migration things that I did, which may or may not apply to you. The first is to change the hostname of my NAS. Every time I upgrade my NAS, I increment the digit by one.

Synology shipped both DS920+ and DS220j to me at the same time. But I chose to set up DS920+ first. Hence DS920+ is my 7th Synology NAS, and hence it has the hostname of Storage07 while DS220j is my 8th Synology NAS, and hence it has the hostname of Storage08.

  • Storage01: DS210j
  • Storage02: DS413j
  • Storage03: DS415play
  • Storage04: DS216+
  • Storage05: DS418play
  • Storage06: DS918+
  • Storage07: DS920+
  • Storage08: DS220j

Next, I have to setup QuickConnect.

QuickConnect allows client applications to connect to your Synology NAS via the Internet without the hassle of setting up port forwarding rules. QuickConnect can also work with Synology-developed packages, such as Audio Station, Video Station, Download Station, Surveillance Station, Photo Station, File Station, Note Station, CMS, Cloud Station, and mobile applications.

DSM - QuickConnect
DSM – QuickConnect

Finally, I need to set up SSD caching.

DSM - Storage - SSD Cache - Create - Step 1
DSM – Storage – SSD Cache – Create – Step 1
DSM - Storage - SSD Cache - Create - Step 2
DSM – Storage – SSD Cache – Create – Step 2
DSM - Storage - SSD Cache - Create - Step 3
DSM – Storage – SSD Cache – Create – Step 3

There is overhead for SSD cache. For every 1GB of SSD cache, it would need 416KB of RAM to process it. And hence, for my 465GB of SSD, it will require the use of 188.9MB of RAM.

DSM - Storage - SSD Cache - Create - Step 4
DSM – Storage – SSD Cache – Create – Step 4
DSM - Storage - SSD Cache - Create - Step 5
DSM – Storage – SSD Cache – Create – Step 5
DSM - Storage - SSD Cache - Create - Done
DSM – Storage – SSD Cache – Create – Done

500GB is more than enough for normal usage. My SSD usage has not gone beyond 21%. I have been using the DS920+ for slightly more than three weeks so far.

DSM - Storage - SSD Cache - Usage
DSM – Storage – SSD Cache – Usage

Once the setup is done, I tend to verify whether some of my existing settings are migrated correctly.

I will check the Package Manager, hard drives capacity, RAM size, and UPS.

DSM - Package - Manual Install
DSM – Package – Manual Install
DSM - Storage - Manager
DSM – Storage – Manager
DSM - Storage - HDD
DSM – Storage – HDD
DSM - UPS
DSM – UPS

Performance
DS920+ is powered by Intel J4125. Intel J4125 comes with Intel UHD Graphics 600, which gives you improvements when your NAS is transcoding video.

Intel J4125 has a PassMark score of about 3,035. In comparison, DS918+ which has Intel J3455 has a score of 2,234, and DS418play which has Intel J3355 has a score of 1,186.

PassMark - CPU
PassMark – CPU

Essentially, DS920+ is 2.5x more powerful than the DS418play and 30% more powerful than its predecessor, DS918+.

If you refer to Plex’s support article on What kind of CPU do I need for my Server?, to transcode a 1080p (10Mbps, H.264) file, your CPU need to have at least 2,000 PassMark score.

So the DS920+ can transcode 1080p video with ease but will not be able to do 4K transcoding as it requires a PassMark score of at least 12,000. You will probably need a computer with a dedicated graphics card to reach that score.

You will probably see better results when using DS Video to transcode video rather than Plex. DS Video is Synology’s alternative to Plex and is optimized to run on Synology NAS hardware.

Conclusion
You will not go wrong with the Synology DS920+ being a media NAS. In fact, the DS920+ can be much more than being media server. You can use it for backing up your remote public cloud with Cloud Sync, running virtual machines Virtual Machine Manager, and running containers with Docker.

Synology DiskStation DS920+

If your budget allows, I recommend getting another Synology NAS and practice separation of concerns.

My DS920+ is only used for media streaming while I run Cloud Sync, Virtual Machines, VPN, and UPS on my DS918+.

Synology DiskStation DS918+ vs DS920+
This post Migrating From Existing Synology DiskStation to Synology DiskStation DS920+ appeared first on lesterchan.net.

Linksys Velop MX5300 Wi-Fi 6 Review

$
0
0

Linksys Velop MX5300 Wi-Fi 6 was launched in Singapore on the 20th February 2020 for S$569. At launch, it was exclusive to Challenger and Hachi.tech. Other retailers started selling from 20th March 2020 onwards.

This is Linksys’s third Velop mesh wi-fi system. The first being the original Linksys Velop (Tri-Band) and the second being Linksys Velop (Dual-Band).

In a way, this Linksys Velop MX5300 is a successor to the original Linksys Velop (Tri-Band).

If you are an existing owner of Linksys Velop, you can mix and match it with the Velop MX5300.

Linksys no longer bundles the Velop MX5300 in a pack. You will have to get multiple of the individual unit if you need more than one. Previously, Linksys sold the Velop in a pack of one, two, or three.

Hachi.tech is selling two units of Velop MX5300 aka Velop MX10600 for S$888 if you are a Value Club member. If not the original bundle price for two units is S$1,099.

Linksys Velop MX5300 Wi-Fi 6 - Boxes
Linksys Velop MX5300 Wi-Fi 6 – Boxes

Velop MX5300 is a tri-band wi-fi 6 mesh system that gives you a combined theoretical wireless speed of 5,300 Mbps (2.4 GHz Radio: 1,147 Mbps + 5 GHz Radio 1: 2,402 Mbps + 5 GHz Radio 2: 1,733 Mbps).

It comes with a 2.2 GHz quad-core CPU with 1 GB of RAM and 512 MB of flash memory.

Specifications

  • Antennas: 13 Internal Antennas And High-powered Amplifiers
  • Processor: 2.2 GHz Quad Core CPU
  • RAM: 1 GB
  • Flash: 512 MB
  • Wireless: IEEE 802.11 b/g/n (2.4 GHz), IEEE 802.11 b/n/ac/ax (5 GHz)
  • 4MU-MIMO: x4 MU-MIMO
  • Gigabit Ethernet Ports: 1x WAN, 4x LAN
  • USB Port: 1x USB 3.0
  • Bluetooth: Bluetooth 4.1 Low Energy (LE)
  • Beamforming: Beamforming For 2.4 GHz And 5 GHz
  • Smart Home: ZigBee & Bluetooth
  • Security: WPA2, WPA2 / WPA3 Mixed Mode

It seems that Velop has not rolled out Apple HomeKit support yet despite saying it is in the works since February 2020.

Unboxing
When I received the two boxes of Velop MX5300, my first impression was the boxes were huge and heavy. Each box measures about 13 x 31 x 25 (cm) and weighs 2.8kg.

Linksys Velop MX5300 Wi-Fi 6 - Box Front
Linksys Velop MX5300 Wi-Fi 6 – Box Front
Linksys Velop MX5300 Wi-Fi 6 - Box Back
Linksys Velop MX5300 Wi-Fi 6 – Box Back
Linksys Velop MX5300 Wi-Fi 6 - Box
Linksys Velop MX5300 Wi-Fi 6 – Box

The Velop MX5300 is huge! It is about 1.5 times the size of the original Velop (8 x 8 x 19 vs. 11 x 11 x 24.4 cm) and weighs 60% more (1 kg vs. 1.6 kg).

Linksys Velop MX5300 Wi-Fi 6 - Box Open
Linksys Velop MX5300 Wi-Fi 6 – Box Open

Inside the huge box contains:

  • 1x Velop MX5300
  • 1x Flat LAN Cable
  • 1x Power Adapter
  • 1x UK Power Cable
  • 1x EU Power Cable
  • 1x US Power Cable
  • 1x Setup Guide
  • 1x Disclaimer/Legal Booklet
  • 1x CD Documentation
Linksys Velop MX5300 Wi-Fi 6 - Box Contents
Linksys Velop MX5300 Wi-Fi 6 – Box Contents

I am surprised that they include the documentation on the CD. Who still uses CDs these days?

Design
The design of the Velop MX5300 is in matte white. It is pretty much similar to the original Velop, just that it is much bigger.

Linksys Velop MX5300 Wi-Fi 6 - Front
Linksys Velop MX5300 Wi-Fi 6 – Front
Linksys Velop MX5300 Wi-Fi 6 - Side
Linksys Velop MX5300 Wi-Fi 6 – Side

The grills and LED indicator is still at the top.

Linksys Velop MX5300 Wi-Fi 6 - Top
Linksys Velop MX5300 Wi-Fi 6 – Top

Ports are moved to the back of the device rather than being at the bottom.

Linksys Velop MX5300 Wi-Fi 6 - Back
Linksys Velop MX5300 Wi-Fi 6 – Back
Linksys Velop MX5300 Wi-Fi 6 - Bottom
Linksys Velop MX5300 Wi-Fi 6 – Bottom

Also, Velop MX5300 includes 4 Gigabit LAN ports instead of just one. I love the inclusion of the extra LAN ports because I always have a 4-port switch for each of my nodes because I have wired devices that need to be plugged in. With this, I no longer need the 4-port switches, thus saving space and electricity.

Linksys Velop MX5300 Wi-Fi 6 - Ports
Linksys Velop MX5300 Wi-Fi 6 – Ports

There is also an additional USB 3.0 port if you want to plug in your USB drive to your mesh wi-fi system to use it as network storage.

For power, Velop MX5300 opted for the power brick version, which kind of spoils the design of the looks. I still prefer the way the original Velop does its power.

Linksys Velop MX5300 Wi-Fi 6 - Plugged In Power Cable
Linksys Velop MX5300 Wi-Fi 6 – Plugged In Power Cable
Linksys Velop MX5300 Wi-Fi 6

Setup
To setup your Velop MX5300, you will need either the Linksys iOS App or Linksys Android App.

Linksys Velop MX5300 Wi-Fi 6 - With eero Pro
Linksys Velop MX5300 Wi-Fi 6 – With eero Pro

Surprisingly, setup was very smooth on my iPhone 11 Pro Max running iOS 14 beta. Previously, for both Velop (Tri-Band) and Velop (Dual-Band), I have issues setting up, and I have to find a workaround.

Linksys Velop MX5300 Wi-Fi 6 - Setup Up
Linksys Velop MX5300 Wi-Fi 6 – Setup Up

This time, within 5 minutes, I got the primary node up and running and another 6 minutes to get the secondary node up and running. You have to follow the on-screen instructions.

Linksys iOS App - Setup Start
Linksys iOS App – Setup Start
Linksys iOS App - Setup Done
Linksys iOS App – Setup Done
Linksys iOS App - Setup Node - Start
Linksys iOS App – Setup Node – Start
Linksys iOS App - Setup Node - End
Linksys iOS App – Setup Node – End
Linksys Velop MX5300 Wi-Fi 6 - Powered On
Linksys Velop MX5300 Wi-Fi 6 – Powered On

During the setup process, your phone is connected to the Velop MX5300 via Bluetooth, so the app is aware of the setup process at any point in time and will not be affected if the network is restarted.

The graphics and animation during the whole setup process are nicely done. I appreciate the UX for this.

After the setup, it asked me to customize my transmit region, which I chose Singapore, and the Velop MX5300 has to reboot again. It should ask me during the setup so I can avoid another reboot.

Linksys iOS App - Customised Transmit Region
Linksys iOS App – Customised Transmit Region
Linksys iOS App - Transmit Region
Linksys iOS App – Transmit Region

I can’t seem to get the channel finder to work. It keeps giving me “We ran into a problem running channel finder. Please try it again.”. I have to assume it is using the best wi-fi channel available to give me the best performance since it is so expensive.

Linksys iOS App - Channel Finder
Linksys iOS App – Channel Finder
Linksys iOS App - Home
Linksys iOS App – Home

I will not go into detail on the individual menu items. Here are some of the available settings.

Linksys iOS App - Menu
Linksys iOS App – Menu
Linksys iOS App - Menu - Advanced Settings
Linksys iOS App – Menu – Advanced Settings

Coverage
On paper, each node can cover up to 3,000 square feet of space. My house is an HDB 5-room flat, so the area is about 1,200 square feet. In reality, your Internet point is not in the middle of your home, and there are walls and objects everywhere blocking the wi-fi signals.

As you can see from the heatmap below generated from NetSpot, two nodes are not enough to give my whole house a good coverage of wi-fi.

For 2.4 GHz, it is still acceptable except for the kitchen.

Velop MX5300 - 2.4GHz - Heatmap
Velop MX5300 – 2.4GHz – Heatmap

Both my master bedroom and the kitchen don’t have good 5 GHz coverage.

Velop MX5300 - 5.0GHz - Heatmap
Velop MX5300 – 5.0GHz – Heatmap

If you remove the third node from the Velop, there is no much difference in coverage between Velop MX5300 and the original Velop (Tri-Band).

This is expected as I don’t think there will be a difference in range between Wi-Fi 5 and Wi-Fi 6 as they are still using 2.4 GHz / 5.0 GHz band.

Velop - 2.4GHz - Heatmap
Velop – 2.4GHz – Heatmap
Velop - 5.0GHz - Heatmap
Velop – 5.0GHz – Heatmap

If you are on the wireless backhaul, the nodes will communicate with each other using Wi-Fi 6. So you will get a faster speed over the same distance as compared to Wi-Fi 5. So theoretically, you can place the nodes slightly further apart from each other as compared to the original Velop.

Speed
You will only benefit from Wi-Fi 6 if you have Wi-Fi 6 devices. The only Wi-Fi 6 device that I have is my iPhone 11 Pro Max.

Linksys iOS App - Speed Check
Linksys iOS App – Speed Check

As expected, the speed on Velop MX5300 on Wi-Fi 6 (802.11ax) is faster than eero Pro, which is on Wi-Fi 5 (802.11ac).

Location Velop MX5300 eero Pro
Living Room (Download) 470 Mbps 433 Mbps
Living Room (Upload) 605 Mbps 450 Mbps
eero Pro vs Linksys Velop MX5300 - Speed Test
eero Pro vs Linksys Velop MX5300 – Speed Test

Conclusion
Each Velop MX5300 retails for S$569 (S$499 if you are a ValueClub member). If you need two of them, it will cost you S$1,138. And if you need three, it will be S$1,707. That is extremely expensive for a mesh wi-fi system.

Assuming you are a ValueClub member and you can get two units of MX5300 aka MX10600 for S$888. I think it is a good deal since most Wi-Fi 6 mesh system in the market right now will also cost you more than a S$1,000 if you need more than one node.

The Velop MX5300 is targeted at techies who do not mind spending close to S$1,000 to get the next generation wi-fi mesh system to future proof their home or office network.

For home use, it is tough to justify the purchase of such an advanced wi-fi mesh system even for S$888. Yes, the wireless speed is fast if you have Wi-Fi 6 devices. But the price to speed ratio is not worth the extra premium.

Furthermore, you can’t take full advantage of the Wi-Fi 6 speed till a few years later when your current generation of devices obsolete and you change it.

When it comes to range, there will not be a difference between Wi-Fi 5 and Wi-Fi 6, so if you are looking for better coverage, you will still need to add more nodes and each node of Velop MX5300 is expensive.

In fact, I would recommend getting the original Velop, which is on Wi-Fi 5 (802.11ac), which is down to an all-time low price of S$499 for three nodes on Hachi.tech (S$399 if you are a ValueClub member).

You will get better coverage (3 nodes vs. 2 nodes) but at a slightly slower speed (which doesn’t make a difference if you do not have any Wi-Fi 6 devices, to begin with).

Once you are on the Velop ecosystem, you can increase the nodes within your network by getting any Velop products. So once the price drops for MX5300, you can get it and add it to your network.

Linksys Velop MX5300 Wi-Fi 6
This post Linksys Velop MX5300 Wi-Fi 6 Review appeared first on lesterchan.net.

Linksys Velop MX4200 Wi-Fi 6 Mesh Router

$
0
0

Linksys Velop MX4200 is Linksys second wi-fi 6 Mesh Router. The first being the Linksys Velop MX5300 which I reviewed last year.

One might think that based on the model numbers MX4200 and MX5300, the Velop MX4200 might be a more inferior model. But it is actually not true, and in the real world, you might not notice the difference.

Based on looks, you can’t tell the Velop MX5300 and Velop MX4200 apart because it looks the same and the dimensions are the same.

Linksys Velop MX4200 - Front
Linksys Velop MX4200 – Front

The only way you can differentiate based is by looking at the Ethernet ports. Velop MX4200 comes with three Gigabit Ethernet Ports, while the MX5300 has four.

Linksys Velop MX4200 - Back
Linksys Velop MX4200 – Back

Processor and RAM are also different. A 1.4 GHz Quad-Core CPU powers Velop MX4200 with 512MB of RAM, while Velop MX5300 is much more powerful with a 2.2 GHz quad-core CPU with 1GB of RAM. Both models come with 512MB of Flash storage.

In terms of wireless speed, both are tri-band mesh routers with two 5GHz and one 2.4GHz band. Velop MX4200 is derived from 600 Mbps + 1200 Mbps + 2400 Mbps, while Velop MX5300 is derived from 1,147 Mbps + 2,402 Mbps + 1,733 Mbps.

Both Velop MX4200 5GHz bands are wi-fi 6, but only one 5GHz band of the Velop MX5300 is wi-fi 6. So if you are using wireless backhaul for Velop MX4200, you might notice an improvement due to both 5 GHz bands being wi-fi 6. But all this looks good on paper, but in the real world, they are too many factors affecting speed. The difference might be negligible, which makes the Velop MX4200 more value for money.

Linksys Velop MX4200 - Bottom
Linksys Velop MX4200 – Bottom

All the other features remain the same between Velop MX4200 and Velop MX5300 for the retail units.

StarHub has launched its Smart WiFi Pro package in an exclusive partnership with Linksys. You can get a single unit of Velop MX4200 when you re-contract or signup to a 2Gbps Fibre Broadband plan at S$62.90 per month. If you need more nodes, each additional Velop MX4200 will cost you S$288 or S$12 per month for 24 months.

StarHub Smart WiFi Pro

The single unit of Velop MX4200 is exclusive to StarHub. However, you can get the two or three units of Velop MX4200 in retail stores for S$799 and S$1,099, respectively.

You might be disappointed to know that there are two upcoming features and even more coming in the pipeline that will be exclusive to StarHub’s variant of the Velop MX4200.

One is a more intelligent QOS designed for gaming, and the other is Dynamic Frequency Selection (DFS).

I am not really interested in the gaming QOS, but I am disappointed that the DFS will not be available to the retail units of Velop MX4200. If you want to know what DFS can do, you can read my review of the Linksys EA8100 Router, which comes with DFS and also exclusive to StarHub. I am not sure whats the deal with StarHub and DFS.

I find this exclusive deal with StarHub makes the retail unit of Velop MX4200 unattractive. It feels like you are being shortchanged for features despite paying more. A good analogy is when a restaurant has an exclusive deal with GrabFood, and when you order from the restaurant on GrabFood, not only you get complimentary dishes, each dish on the menu is even cheaper than dining in the restaurant itself.

This post Linksys Velop MX4200 Wi-Fi 6 Mesh Router appeared first on lesterchan.net.

Synology DiskStation DS1621+ Review

$
0
0

I decided to upgrade my slightly more than three years old 4-bay Synology DiskStation DS918+ to the 6-bay Synology DiskStation DS1621+.

Back in 2017, DS918+ was the flagship Synology 4-bay NAS and that was replaced with DS920+ in 2020. Also in 2020, the 5-bay DS1520+ got updated.

It is now 2021, and late last year Synology updated the 6-bay DS1621+ (from DS1618+) and the 8-bay DS1821+ (from DS1819+).

The DS1621+ retails for S$1,244 and you can find them with official Synology retailers like Storage Studios on Lazada.

DiskStation Plus Series
For Synology DiskStation in their Plus Series, there are two 2-bay NAS, two 4-bay NAS, one 5-bay NAS, two 6-bay NAS, one 8-bay NAS, and one 12-bay NAS.

Synology DiskStation Plus Series

DS220+ and DS720+ are both 2-bay, where the DS720+ is the higher-end 2-bay NAS.

DS4220+ and DS920+ are both 4-bay, where DS920+ is the higher-end 4-bay NAS.

DS1520+ is a 5-bay NAS.

DS620slim and DS1621+ are both 6-bay, where DS1621+ is the higher-end 6-bay NAS.

DS1821+ is an 8-bay NAS, while DS2419+ is a 12-bay NAS.

Sometimes the last two digits of the model name represent the year it is targetted for rather than the year it is released. For example, DS1821+ is meant for 2021, but it is released in late 2020. However, DS920+ is meant for 2020 and is released in 2020.

Features
For DS1621+, instead of opting with an Intel processor, Synology decided to go with AMD. DS1621+ is powered with AMD Ryzen V1500B 64-bit processor operating at 2.2 GHz with four cores.

RAM wise, it comes preinstalled with a 4GB DDR4 ECC stick. You can swap it out and increase it to a maximum of 32GB (2x 16GB). Though at that price, I wish Synology would use an 8GB stick instead.

The line that Synology draws between normal consumers and prosumers seems to be at 6-bay since it requires ECC ram from 6-bay and above. ECC ram is slightly harder to get and much more expensive.

ECC stands for Error Correction Code and it is defined on Wikipedia as:

Error correction code memory (ECC memory) is a type of computer data storage that uses an error correction code (ECC) to detect and correct n-bit data corruption which occurs in memory. ECC memory is used in most computers where data corruption cannot be tolerated under any circumstances, like industrial control applications, critical databases, and infrastructural memory caches.

Unboxing

DS1621+ - Box
DS1621+ – Box
DS1621+ - Box Contents
DS1621+ – Box Contents
  • 1x AC Power Cord
  • 2x Drive Bay Key
  • 1x Packing of Mounting Screws
  • 2x RJ-45 Cat5e LAN Cable
  • 1x Quick Installation Guide

As much as I want manufacturers to include Cat6 LAN cables instead of Cat 5e, it will not make a difference if the Ethernet port is still on 1Gbps.

Interestingly, the two LAN cable that is included felt premium because of the metal head. Normally, the whole head will be in plastic.

Not really a nitpick, but if the DS1621+ comes with Gigabit Ethernet ports, maybe it should include four LAN cables?

Design
Like most of the NAS from Synology Plus Series, the design is all in matte black.

DS1621+
DS1621+
DS1621+ - Side
DS1621+ – Side

The power button and indicators have been moved to the top of the NAS instead of the side since 6-bays occupy more horizontal space.

DS1621+ - Front
DS1621+ – Front

DS1621+ comes with an additional indicator which is Alert, and when it blinks orange, you know you have a serious issue with your system like overheating due to the fan not spinning, etc.

Since there are four LAN ports, the four LAN port indicators are now at the top as well, and the hard drive indicators are moved to the respective drives.

DS1621+ - LED Indicators
DS1621+ – LED Indicators

Ports/Slots
Like most NAS in the Plus Series, there is only one port in front of the NAS, the USB 3.2 Gen 1 port.

Interestingly, the two 92 mm x 92 mm fans found on the DS1621+ are the same on DS918+/DS920+.

DS1621+ - Back
DS1621+ – Back

There are four Gigabit Ethernet ports (with Link Aggregation and Failover support), two eSATA ports, and two USB 3.2 Gen 1 ports.

DS1621+ - Ports
DS1621+ – Ports

Using the two eSATA ports, and together with the Synology Expansion Unit DX517, you can attach ten more bays to your DS1621+.

Since DS1621+ targets prosumers, most people complain that Synology is still not equipping their NAS with 2.5GbE Ethernet ports. I have no issues with this since my house network is still on 1GbE. Personally, I would love to see at least one USB-A port being replaced by USB-C.

For the DS1621+, you will need to use a screwdriver to remove the bottom panel to access the RAM slot. Previously for DS918+/DS920, the RAM slots are visible once you remove all the drive bays, and hence you do not need to use any tools for it.

DS1621+ - Bottom
DS1621+ – Bottom
DS1621+ - RAM Slots
DS1621+ – RAM Slots

Instead, for the DS1621+, once you remove all the drive bays, you will only see two M.2 2280 slots for NVMe caching. You can read more about it on my DS918+ review.

DS1621+ - Without Drive Bays
DS1621+ – Without Drive Bays
DS1621+ - M.2 NVMe Slots
DS1621+ – M.2 NVMe Slots

DS1621+ has a PCIe expansion slot. With the PCIe expansion slot, you can add accessories like M.2 SSD adapter and Network Interface Card (NIC) supporting up to 10GbE. Check out the various options on Synology Add-in Cards.

To access the PCIe slot, you will need to remove all the six screws at the back, securing the NAS’s cover.

DS1621+ - Open
DS1621+ – Open
DS1621+ - PCIe Slot
DS1621+ – PCIe Slot

You will also need to remove the PCIe slot cover at the back, secured by a screw.

DS1621+ - PCIe Slot - Back
DS1621+ – PCIe Slot – Back

Power/Noise
Naturally, with a 6-bay NAS, it consumes about 1.5 times more power than the 4-bay one. The power adapter included is rated 250W as compared to 100W for a normal NAS. Based on Synology, the power consumption for DS918+/DS920+ is 32.17 W (Access) / 9.69 W (HDD Hibernation), while on the DS1621+, it is 51.22 W (Access) / 25.27 W (HDD Hibernation).

DS1621+ - Power
DS1621+ – Power

One thing I like about the DS1621+ is the built-in power supply, and hence there is no need for a power brick.

DS1621+ - Power Supply
DS1621+ – Power Supply

With a more powerful processor and more hard drives spinning, the noise level also increases with the number of bays. Synology indicated that on DS918+/DS920+, the noise level is at 19.8 dBA compared to 25.2 dBA on the DS1621+.

Processor
DS1621+ marks the first time Synology went with AMD instead of Intel for their processor on their NAS. It looks like the trend of moving away from Intel has started in the NAS industry, with Synology leading the way. These days, PCs and laptops are all moving towards AMD. Intel has been comfortable for too long that they are not innovating enough compared to their competition. I wonder would they end up being a Nokia.

Based on Geekbench, AMD Ryzen V1500 in DS1621+ obtain a single-core of 590 and a multi-core score of 2,400.

Geekbench DS1621+
Geekbench DS1621+

The single-core score is 20% faster, while the multi-core score is 50% faster than that of the Intel Celeron J4125 found in DS920+ in which it has a single-core score of 471 and a multi-core score of 1,524.

Geekbench DS1621+ vs DS920+

For the Intel Celeron J3455 found in DS918+, it has a single-core score of 328 and a multi-score of 1,108. This makes the DS1621+ 80% faster on single-core and two times faster on multi-core than DS918+.

Geekbench DS1621+ vs DS918+

While AMD beats Intel in speed, it loses on the graphics. AMD Ryzen V1500 doesn’t include any processor graphics, while both Intel Celeron J3455 and Intel Celeron J4125 have Intel HD Graphics included. So the DS1621+ is not meant to be used primarily as a media server if you do transcoding. DS1621+ will still work fine for direct streaming.

I used DS918+ as a mini-computer that backups my stuff, run Docker Containers and Virtual Machines. So the DS1621+ is a good candidate to replace it, while my DS920+ acts as my Plex primary media streaming server.

DSM
The strongest advantage of using Synology NAS is its operating system, and in this case, it is the DiskStation Manager (DSM). It comes with DSM 6.2 out of the box, and DSM 7.0 is slated to be released this year.

I will not cover DSM as I have covered it many times in my Synology posts.

Migration
If you are using an existing Synology NAS, you can migrate to a new Synology NAS without any data loss. Migration from a 4-bay Synology NAS to a 6-bay Synology NAS is the same as migrating from a 4-bay Synology NAS to another 4-bay Synology NAS.

You remove the drives from your old Synology NAS and insert them into your new Synology NAS in the same order.

Next, just proceed to find.synology.com and follow the on-screen instructions and you are good to go.

DSM - Migrate - Step 1
DSM – Migrate – Step 1
DSM - Migrate - Step 2
DSM – Migrate – Step 2

For more details, you can checkout my post on Migrating From Existing Synology DiskStation to Synology DiskStation DS920+.

Setup
This time around, I chose a fresh setup as I have been migrating from many Synology NAS over the years. So I wanted to have a fresh start.

Fresh installation pretty much the same as migrating.

Head to find.synology.com and it should be able to detect your NAS.

DSM - Setup - Step 1
DSM – Setup – Step 1
DSM - Setup - Step 2
DSM – Setup – Step 2

It will prompt you to download and install DiskStation Manager (DSM), followed by a NAS reboot after detecting your NAS. This process takes about six minutes.

DSM - Setup - Step 3
DSM – Setup – Step 3

DSM is installed and it will bring you to set up your administrator account and Synology QuickConnect. QuickConnect is an optional setup.

DSM - Setup - Step 4
DSM – Setup – Step 4
DSM - Setup - Step 5
DSM – Setup – Step 5

Once that is done, you will be redirected to DSM’s main screen.

DSM - Setup - Done
DSM – Setup – Done

And now, you can proceed on to create a storage volume.

DSM - Setup - Create Volume - FS
DSM – Setup – Create Volume – FS

I chose Quick, SHR-2, and Btrfs.

DSM - Setup - Create Volume
DSM – Setup – Create Volume
DSM - Setup - Create Volume - SHR
DSM – Setup – Create Volume – SHR
DSM - Setup - Create Volume - FS
DSM – Setup – Create Volume – FS

And you are done! Now feel free to explore the wonderful world of DSM.

Conclusion
The price difference between DS920+ and DS1621+ is about S$500, S$752 vs. S$1,244. With this S$500, you get a better processor, better RAM (ECC), a PCIe slot, and two more drive bays. The only thing you potentially lose out on is the lack of an integrated GPU in the processor, which can help in transcoding media.

So if you are looking for a media NAS, I think it is better to use one with Intel processors like the DS920+ (4-bay) or DS1520+ (5-bay). Both are powered by Intel Celeron J4125 and comes with Intel UHD Graphics 600.

Other than that, I would say the DS1621+ will make an excellent work NAS for prosumers that allows you to use it as a NAS and act as a server using Docker Containers and Virtual Machines. You will have four Ethernet ports to play with for your Virtual Machines.

But of course, Synology can make it more value for money by throwing in an 8GB RAM stick instead of 4GB, using a 2.5GbE Ethernet port instead of just Gigabit.

The thing about upgrading NAS is you can never go back down to a less powerful one. It could be an expensive hobby if you considered this a hobby.

Hopefully, in the future, Synology can consider using AMD Ryzen V1605B with Radeon Vega 8 Graphics, so the next generation of the DS16/DS18 series can be used as a media streaming NAS, and I can upgrade my DS920+ to that.

DS1621+ - Powered On
DS1621+ – Powered On
This post Synology DiskStation DS1621+ Review appeared first on lesterchan.net.

Linksys Atlas Pro 6

$
0
0

Linksys Atlas is a new series of wi-fi mesh systems from Linksys after Linksys Velop.

The first wi-fi mesh router in the series is the Linksys Atlas Pro 6.

It is a dual-band wi-fi 6 mesh router powered by the same intelligent mesh technology as the Linksys Velop, and hence you can mix and match the nodes from Linksys Velop if you like.

Linksys Atlas Pro 6 is powered by Qualcomm Immersive Home 216 Platform, which consists of a 1 GHz dual-core processor and has 512MB of RAM and 256 MB flash storage.

On paper, Linksys Atlas Pro 6 has a combined theoretical speed of 5,400 Mbps. 600 Mbps on 2.4 GHz and 4,800 Mbps on 5.0 GHz with 160 MHz. And hence, in theory, it can cover up to 8,100 sqft of space.

You can purchase the Linksys Atlas Pro 6 in two or three-pack, at S$499, and S$699 respectively from Lazada or Shopee.

Linksys Atlas Pro 6 (3-Pack)

At first, I thought Linksys Atlas targeted the mid-range market with this dual-band mesh router. However, in the US, there is the Linksys Atlas Max 6E, which is a wi-fi 6E triple-band mesh router and is clearly the highest-end model since Linksys Velop doesn’t have a wi-fi 6E variant yet.

So I am very confused about where Linksys Atlas stands.

*UPDATE* I Just got a reply back from Linksys. From now on, there will be two names, Linksys Atlas and Linksys Hydra. Linksys Atlas refers to a node form factor, and Linksys Hydra indicates a traditional router form factor.

This post Linksys Atlas Pro 6 appeared first on lesterchan.net.

eero Pro 6 Review

$
0
0

After more than five long years with my eero (first generation), I finally got around to upgrade it to eero Pro 6 which supports wi-fi 6.

I got the 3-pack eero Pro 6 for US$389 (S$535) as there was a discount a few weeks back. If not, the usual price is US$599 (S$823). Since eero doesn’t ship to Singapore directly, you must go through a freight forwarder. In my case, I am using my usual HopShopGo. Shipping to Singapore is an additional US$55 (S$76), which excludes the 7% GST you have to pay since the item and shipping exceeds S$400 in value.

Unboxing
eero Pro 6 is much bigger than I expected it to be. It is easily two times the size of the first generation eero.

eero Pro 6 - Box Front
eero Pro 6 – Box Front
eero Pro 6 - Box Back
eero Pro 6 – Box Back
eero Pro 6 - Box
eero Pro 6 – Box
eero Pro 6 - Box Open
eero Pro 6 – Box Open

The 3-pack eero Pro 6 comes with three eero Pro 6, three power adapters, and one cat 5e LAN cable, which I forgot to take a picture of.

eero Pro 6 - Box Contents
eero Pro 6 – Box Contents

Design
The first generation eero is on wi-fi 5, dual-band, 1.1 GHz dual-core processor, and 512MB RAM. eero Pro 6 gives you wi-fi 6, tri-band (two 5 GHz, one 2.4 GHz), Zigbee Smart Home Hub, 1.4 GHz quad-core processor, 1GB RAM, and 4GB flash storage.

In deciding between eero Pro 6 and eero Pro 6E, I opted for the former because I don’t have any devices that support 6 GHz yet. At the expense of the 6 GHz, eero Pro 6E tri-band only has one 2.4 GHz and one 5.0 GHz. It is also not guaranteed that the eero Pro 6E will use the 6 GHz as the wireless backhaul between the nodes.

The two 5 5GHz bands in eero Pro 6 is the most important feature to me as I will need one of the 5 GHz band for wireless backhaul and that is the primary reason I chose the eero Pro 6 over the eero Pro 6E.

eero Pro 6 - Top
eero Pro 6 – Top

Besides being bigger and heavier, the design language is essentially the same between eero Pro 6 and the first-generation eero. It is in a glossy white finish with a rubberized base.

eero Pro 6 - Bottom
eero Pro 6 – Bottom

Two auto-sensing gigabit ports are at the back together, with one USB-C port for power in the middle.

eero Pro 6 - Back
eero Pro 6 – Back

The power rating also has been increased for eero 6 Pro. For the first generation eero, you get 18W. For eero Pro 6, you are getting 27W.

eero Pro 6 - Power Adapter
eero Pro 6 – Power Adapter

Relacing Existing eero Devices
Upgrading existing eero devices to newer eero devices is also straightforward.

eero iOS App - Add or Replace eero Devices
eero iOS App – Add or Replace eero Devices

You have to click the plus sign in the app, choose Replace eero device and indicate which eero device you are replacing.

eero iOS App - Replace Or Add eero Device
eero iOS App – Replace Or Add eero Device
eero iOS App - Which eero Device Are You Replacing?
eero iOS App – Which eero Device Are You Replacing?

After this step, unplug your old eero device and plug in the newer eero device.

eero iOS App - Unplug Old eero Device
eero iOS App – Unplug Old eero Device
eero iOS App - Plug New eero Device
eero iOS App – Plug New eero Device
eero iOS App - Looking For eero Devices
eero iOS App – Looking For eero Devices
eero iOS App - Setting Up Your eero Pro 6
eero iOS App – Setting Up Your eero Pro 6

That is it.

eero iOS App - Home
eero iOS App – Home

I am still keeping the eero Beacon for my Kitchen because there is a blindspot area.

As for the eero Pro in Penguin Room, I am leaving it there for now since it uses a wired backhaul.

Speed – Wired Backhaul
So if you are wondering, is there any speed difference between wi-fi 5 and wi-fi 6? Yes, there is a 100 Mbps to 200 Mbps wireless speed difference.

Tests are done using my iPhone 13 Pro Max.

iPhone 13 Pro Max - Wired Backhaul - Wi-Fi 5
iPhone 13 Pro Max – Wired Backhaul – Wi-Fi 5
iPhone 13 Pro Max - Wired Backhaul - Wi-Fi 6
iPhone 13 Pro Max – Wired Backhaul – Wi-Fi 6
Wired Backhaul Type Download Speed Upload Speed
eero (1st Generation) 506 Mbps 474 Mbps
eero Pro 6 711 Mbps 603 Mbps

Speed – Wireless Backhaul

iPhone 13 Pro Max - Wireless Backhaul - Wi-Fi 5
iPhone 13 Pro Max – Wireless Backhaul – Wi-Fi 5
iPhone 13 Pro Max - Wireless Backhaul - Wi-Fi 6
iPhone 13 Pro Max – Wireless Backhaul – Wi-Fi 6
Wireless Backhaul Type Download Speed Upload Speed
eero (1st Generation) 211 Mbps 184 Mbps
eero Pro 6 437 Mbps 602 Mbps

Conclusion
The speed difference is more significant than I expected since my Internet connection maxed 1 Gbps. A wireless speed above 700 Mbps is good enough for me.

You might not necessarily feel the speed difference if you randomly surf the Internet or check out Instagram/TikTok on your phones. But you will feel the difference when consuming more bandwidth-intensive content like streaming 4K content on Netflix/YouTube/Disney+ or having multiple Zoom calls within your household.

So if you are still on wi-fi 5 after all these years, it is time for you to upgrade your routers.

eero Pro 6
eero Pro 6
This post eero Pro 6 Review appeared first on lesterchan.net.

TP-Link 8-Port 10G Desktop/Rackmount Switch (TL-SX1008)

$
0
0

TP-Link has two models of 10Gbps unmanaged switches. TP-Link TL-SX1008 8-Port 10G Desktop/Rackmount Switch and TP-Link DS1008X Omada 8-Port 10G Desktop/Rackmount Switch. From what I read, both are the same. The only difference is the warranty period and of course the price. TL-SX1008 is for the consumers. Hence, it comes with a shorter 3-year warranty, while the DS1008X is for businesses and hence comes with a 5-year warranty. Depending on the retailers, the price difference for both models ranges from S$100 to S$200.

I wanted a 10Gbps unmanaged switch to upgrade my house network to support 10Gbps speed. I intend to get the cheapest possible 10Gbps unmanaged switch I can find.

In this case, it is the TL-SX1008. It retails for S$400 on Amazon.sg, and during Amazon Prime Day Sale, there is a S$20 credit card discount. I paid S$380 for it with an additional S$2 for shipping as it is fulfilled by BizgramAsia.

TP-Link 8-Port 10G Desktop/Rackmount Switch (TL-SX1008) - Box Front
TP-Link 8-Port 10G Desktop/Rackmount Switch (TL-SX1008) – Box Front
TP-Link 8-Port 10G Desktop/Rackmount Switch (TL-SX1008) - Box Back
TP-Link 8-Port 10G Desktop/Rackmount Switch (TL-SX1008) – Box Back
TP-Link 8-Port 10G Desktop/Rackmount Switch (TL-SX1008) - Box
TP-Link 8-Port 10G Desktop/Rackmount Switch (TL-SX1008) – Box
TP-Link 8-Port 10G Desktop/Rackmount Switch (TL-SX1008) - Box Contents
TP-Link 8-Port 10G Desktop/Rackmount Switch (TL-SX1008) – Box Contents
TP-Link 8-Port 10G Desktop/Rackmount Switch (TL-SX1008) - Front
TP-Link 8-Port 10G Desktop/Rackmount Switch (TL-SX1008) – Front
TP-Link 8-Port 10G Desktop/Rackmount Switch (TL-SX1008) - Bottom
TP-Link 8-Port 10G Desktop/Rackmount Switch (TL-SX1008) – Bottom

The power cable goes to the back of the switch.

TP-Link 8-Port 10G Desktop/Rackmount Switch (TL-SX1008) - Back
TP-Link 8-Port 10G Desktop/Rackmount Switch (TL-SX1008) – Back

On the left, there are ventilation holes for air flow.

TP-Link 8-Port 10G Desktop/Rackmount Switch (TL-SX1008) - Left
TP-Link 8-Port 10G Desktop/Rackmount Switch (TL-SX1008) – Left

On the right, there is a built-in fan within the switch. And because of this, there will be a buzzing sound. It is noticeable in a quiet environment. However, if you put the switch on a closed rack or cabinet, you cannot hear it.

TP-Link 8-Port 10G Desktop/Rackmount Switch (TL-SX1008) - Right
TP-Link 8-Port 10G Desktop/Rackmount Switch (TL-SX1008) – Right
TP-Link 8-Port 10G Desktop/Rackmount Switch (TL-SX1008)

10Gbps switches are hot. It brought up the average temperature of my closed cabinet with rattan doors from 34° to 36°. Inside my cabinet, I have two Noctua NF-A20 fans for ventilation.

Since it is an unmanaged switch, it is essentially no-frills. Besides the above two points, I don’t have other complaints, and for S$380, this switch is worth the money.

Ironically, I can’t test anything beyond 1Gbps because I don’t have any equipment that supports speed beyond that. However, it is a first step in futureproofing my house’s network.

This post TP-Link 8-Port 10G Desktop/Rackmount Switch (TL-SX1008) appeared first on lesterchan.net.
Viewing all 62 articles
Browse latest View live