Quantcast
Channel: Network – Lester Chan's Website
Viewing all 62 articles
Browse latest View live

WD Red with Synology DS415play

$
0
0

Western Digital (WD) produces the best hard drives and Synology produces the best prosumer Network Attached Storage (NAS). I have two NAS at home, both are from Synology and using WD hard drives.

My Synology DiskStation DS210j is on 2x WD Green 1TB running 24/7 since 2010 and my Synology DiskStation DS413j is on 4x WD Red 1TB running 24/7 since 2013. After all these years, both NAS and their hard drives did not give me a single problem at all.

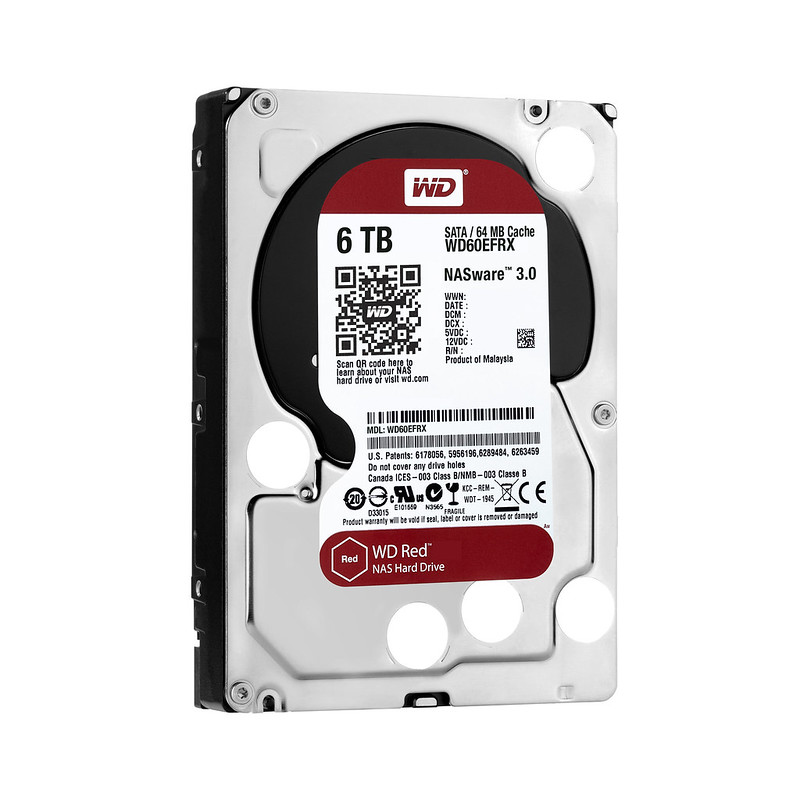
I am happy to have my third Synology NAS, Synology DiskStation DS415play, on 4x WD Red 6TB. The DS415play is meant as a media center and hence I have consolidated all my movies and TV shows onto the DS415play.

WD Red
The first generation of WD Red featuring NASware 1.0 was launched in July 2012 specifically designed for home and small office NAS systems with one to five drive bays. It is tested with top NAS box manufacturers (like Synology) and optimised for power and performance. Back then, it is only available as 3.5″ hard drives in 1TB (SGD$149), 2TB (SGD$199) and 3TB (SGD$259) capacities.

The second generation of WD Red featuring NASware 2.0 was launched in September 2013. NASware 2.0 further improves drive reliability and protects customer data in the event of a power loss or disruption. With the second generation WD Red, the 2.5″ hard drives are now available in 750GB (SGD$109) and 1TB (SGD$139) capacities. They also made a 3.5″ 4TB (SGD$329) capacity available.

The third generation of WD Red featuring NASware 3.0 was launched this year, in July 2014. NASware 3.0 again further improves drive performance and reliability. It also bring support for 8-bay NAS. The 3.5″ hard drives are now available in 5TB (SGD$339) and 6TB (SGD$419).

WD Red (6TB)
WD Red (6TB)

WD Red Pro
With the introduction of the third generation WD Red, WD also introduces WD Red Pro. WD Red Pro hard drives is targeted at the medium to large business NAS market and they are available in 2TB (SGD$219), 3TB (SGD$269) and 4TB (SGD$359) capacities.

WD Red Pro (4TB)
WD Red Pro (4TB)

When I first saw the specs of the WD Red Pro, I almost could not tell the difference between it and the WD Red.

Type WD Red WD Red Pro
Suitable Personal/Home/Small Office Medium to Large Size Business
No. of bay 1 to 8 bay NAS 8 to 16 bay NAS
Type of NAS Table Top Table Top & Rack Mount
Warranty 3-year limited 5-year limited
Application Home or Office Home or Business
Compatibility NASware 3.0
Capacity 1TB – 6TB 2TB – 4TB
HDD Size 2.5″ & 3.5″ 3.5″
Rotational Speed IntelliPower 7,200RPM
Support 24 x 7 toll free

David Chieng who is handling the PR for WD also told me that the WD Red Pro has hardware vibration compensation because when you have a rack mount with more than 8 drives, vibration resonance becomes an issue.

For more information on the differences, do checkout AnandTech’s coverage on the Western Digital Updates Red NAS Drive Lineup with 6 TB and Pro Versions.

Installing WD Red Into DS415play
Installing all the four 3.5″ WD Red drives into Synology DS415play is pretty straight forward and it does not involve any screws or screwdriver. However, if you are installing the 2.5″ WD Red, you will need those.

Synology DS415play - Setup Instructions #1
Synology DS415play – Setup Instructions #1

Synology DS415play - Setup Instructions #2
Synology DS415play – Setup Instructions #2

Synology DS415play - Setting Up With WD Red #1
Synology DS415play – Setting Up With WD Red #1

Synology DS415play - Setting Up With WD Red #2
Synology DS415play – Setting Up With WD Red #2

Synology DS415play - Setting Up With WD Red
Synology DS415play – Setting Up With WD Red

Synology DS415play - Setting Up With WD Red
Synology DS415play – Setting Up With WD Red

Synology DS415play - Setting Up With WD Red
Synology DS415play – Setting Up With WD Red

Synology DS415play - Setting Up With WD Red
Synology DS415play – Setting Up With WD Red

Synology DS415play - Setting Up With WD Red
Synology DS415play – Setting Up With WD Red

It took me less than a minute to install one 3.5″ WD Red into the Synology DS415play. So installing four drives should take you less than five minutes.

Setting Up Synology DS415play
The setting up of the Synology DS415play is similar to that of the DS413j and hence I would not talk about it.

Note that for the DS415play, the created volume cannot exceed 16TB and hence I have to choose 2 disks fault-tolerance under Synology Hybrid RAID as shown in the screenshots below.

Synology Web Assistant - Step 1
Synology Web Assistant – Step 1

Synology Web Assistant - Step 2
Synology Web Assistant – Step 2

Synology Web Assistant - Step 3
Synology Web Assistant – Step 3

Synology Web Assistant - Step 4
Synology Web Assistant – Step 4

Synology Web Assistant - Step 5
Synology Web Assistant – Step 5

Synology DiskStation - Step 1
Synology DiskStation – Step 1

Synology DiskStation - Step 2
Synology DiskStation – Step 2

Synology DiskStation - Step 3
Synology DiskStation – Step 3

Synology DiskStation - Step 4
Synology DiskStation – Step 4

Volume Creation Wizard - Step 1
Volume Creation Wizard – Step 1

Volume Creation Wizard - Step 2
Volume Creation Wizard – Step 2

Volume Creation Wizard - Step 3
Volume Creation Wizard – Step 3

Volume Creation Wizard - Step 4
Volume Creation Wizard – Step 4

Volume Creation Wizard - Step 5
Volume Creation Wizard – Step 5

Volume Creation Wizard - Step 6
Volume Creation Wizard – Step 6

Synology DiskStation - Storage Manager
Synology DiskStation – Storage Manager

Benchmark
Storage01 refers to my Synology DiskStation DS210j on 2x WD Green 1TB.

Storage01 - Disk Speed Test
Storage01 – Disk Speed Test

Storage02 refers to my Synology DiskStation DS413j on 4x WD Red 1TB (NASWare 1.0)

Storage02 - Disk Speed Test
Storage02 – Disk Speed Test

Storage03 refers to my Synology DiskStation DS415play on 4x WD Red 6TB (NASWare 3.0)

Storage03 - Disk Speed Test
Storage03 – Disk Speed Test

As you can see in real life tests, you will get about 80MB/s write and 76MB/s read on the DS415play on WD Red (NASWare 3.0) vs 43MB/s write and 65MB/s read on the DS413j on WD (NASWare 1.0).

Of course there are other factors that affect the speed like your computer network speed/latency and the CPU/RAM/Network of the NAS. Storage Reviews did a pretty detailed benchmark on the DS415play, so do check them out if you need a detailed review on the DS415play benchmark.

Linksys E8350 AC2400 Dual Band Gigabit Wi-Fi Router Review

$
0
0

The Linksys E8350 AC2400 Dual Band Gigabit Wi-Fi Router was available from 7th November 2014 at a recommend retail price of SGD$399 exclusively at Challenger and their online store. This is the second router to be priced at SGD$399 after the Linksys WRT1900AC Router.

Personally, I think Linksys should stop pricing their router so high because at that price point, no one in the right mind will get a Linksys. Gone are those days that Linksys is a top consumer brand for router. Their features just pale in comparison with the Asus RT-AC87U which is also priced at SGD$399.

Features

  • Concurrent dual-band wireless operation (600 + 1733 Mbps)
    • Data transfer rates of up to 600 Mbps on 2.4GHz (3 spatial streams with 256QAM)
    • Data transfer rates of up to 1733 Mbps on 5GHz (4 spatial streams)
  • 4 Removable and adjustable antennas
  • 4-Port Gigabit Switch/1-Gigabit WAN Port
  • USB 3.0 / 2.0 / eSATA Ports
  • MU-MIMO Ready – which will provide simultaneous streaming and gaming on multiple devices without speed degradation when technology is available
  • Integrated DHCP server with dynamic and static IP address assignment
  • PPTP, IPSec and L2TP Pass through
  • Storage features for external USB hard disk and flash drives (supports FAT, FAT32, NTFS, and HFS+)
  • UPnP IGD and media server
  • Supports DLNA for home media management
  • Virtual USB support
  • Beamforming
  • Wall Mountable

Linksys E8350 - Box Front
Linksys E8350 – Box Front

Linksys E8350 - Box Back
Linksys E8350 – Box Back

Linksys E8350 - Box
Linksys E8350 – Box

Linksys E8350 - Box Contents
Linksys E8350 – Box Contents

Specifications (From SmallNetBuilder)

  • CPU: Qualcomm dual-core IPQ8064 Internet Processor (1.4 GHz)
  • RAM: 512MB
  • Flash: 128MB
  • Wireless: 802.11 a/b/g/n/ac wireless LAN
    • 2.4GHz
      • Qualcomm Atheros QCA9880 3-stream 802.11ac radio solution
      • IEEE 802.11n, IEEE 802.11g, IEEE 802.11b
      • Speeds up to 600 Mbps
    • 5GHz
      • Quantenna QSR1000 (QT3840BC Baseband & QT2518B RF)
      • IEEE 802.11ac, IEEE 802.11n & IEEE 802.11a
      • Speeds up to 1,733 Mbps
  • LAN/WAN
    • 4x 10/100/1000 Gigabit LAN ports
    • 1x 10/100/1000 Gigabit WAN port
    • Qualcomm Atheros QCA8337
  • Antennas: Four exchangeable external antennas
  • Other Ports: 1x USB 3.0 port, 1x eSATA/USB 2.0 Port
  • Dimensions (H x W x D): 5.6 x 25.9 x 18.3cm
  • Weight: 635g

Design
The design of the E8350 is pretty nice and functional. There are holes all over the router to make it well ventilated and that will enable the router’s heat to dissipate easily. Personally, I still prefer the design of the Linksys WRT1900AC Router because it is more iconic.

Linksys E8350 - Top
Linksys E8350 – Top

Linksys E8350
Linksys E8350

If you notice there are no indicator lights at the top or in front of the router. The indicator lights are all located behind the router where all the ports and buttons are. The indicators are just located below their respective ports.

I am not really a fan of this design because the indicator lights are meant to let you know the status of your router easily. By placing it behind, it kinda defeats that purpose.

Linksys E8350 - Bottom
Linksys E8350 – Bottom

Linksys E8350 - Ports
Linksys E8350 – Ports

From left to right:

  • 1x USB3.0 Port
  • 1x eSATA/USB2.0 Port
  • 4x Gigabit LAN Ports
  • 1x Gigabit WAN Port
  • Wi-Fi Button (Enable/Disable Wi-Fi Easily)
  • Wi-Fi Protected Setup (WPS) Button
  • Reset Button
  • 12v DC Power
  • On/Off Switch

Setup
The router came with a CD for you to run it and set it up, but these days, I am pretty sure many users don’t own a CD drive anymore.

Setup #1
Setup #1

Setup #2
Setup #2

There are two alternatives to setup the router if you don’t own a CD drive.

Firstly, you can download the Setup Wizard for PC or Mac from the E8350 Support Page.

Secondly, you can connect directly to the router via the provided LAN cable and navigate to http://192.168.1.1 with the username “admin” and password “admin” to set it up.

I went with the second way because to me it is the most straight forward way.

Admin UI
The Linksys E8350 doesn’t support Smart Wi-Fi. Linksys Smart Wi-Fi gives you Smart Wi-Fi Apps and Tools that let you access your connected devices and control them from wherever you are.

Because it doesn’t support Smart Wi-Fi, the UI defaults to the typical Linksys UI that can be found back in those WRT54G days.

This may be shocking to you, but I kinda like this UI more. Despite it looks uglier, it is more functional and faster loading when compared to the Smart Wi-Fi UI.

Setup - Basic Setup
Setup – Basic Setup

Setup - Basic Wireless Settings
Setup – Basic Wireless Settings

Setup - Single Port Forwarding
Setup – Single Port Forwarding

Setup - Disk
Setup – Disk

Setup - Management
Setup – Management

VLAN Tagging
One good thing about the E8350, is that it supports VLAN tagging and this allows you to use your router directly with the Optical Network Terminal (ONT).

For this router, I am using it with my SingTel 300Mbps Fibre Home Broadband.

I just have to tag VLAN ID of 10 to the Internet port as shown in the screenshot below and I can use it directly with the ONT, replacing the default Aztech router given by SingTel.

Setup - VLAN Setup
Setup – VLAN Setup

Speedtest
If you have setup everything properly, you will get the advertised speed when connected via LAN.

Linksys E8350 - Pluggedin
Linksys E8350 – Pluggedin

Speedtest
Speedtest

Wireless Strength
I am using WiFi Explorer to test the wireless strength at 2 locations in my house, my room and the toilet.

WiFi Explorer – My Room

WiFi Explorer – Toilet

I am not very impressed with the wireless strength of the EA8350 as it seems weaker than the WRT1900AC.

Location EA8350 WRT1900AC DIR-868L My Net N900 EA6500 EA4500 DIR-855
My Room (2.4GHz) 55% 76% 79% 75% 79% 78% 80%
My Room (5GHz) 27% 78% 91% 64% 64% 65% 46%
Toilet (2.4GHz) 41% 50% 58% 46% 53% 72% 56%
Toilet (5GHz) 37% 46% 55% 35% 41% 33% 31%

Speed
The Linksys E8350 is touted to support wireless data transfer rates of up to 1,733Mbps, but that is provided you are using a MU-MIMO (multi-user multi-input multi-output) compatible device.

As far as I know, there are no such device currently on the market yet (correct me if I am wrong).

I am using Speedy Net app on Mac to test the transfer speed between Macs.

Speedy Net – LAN (MacBook Pro Retina) to LAN (MacBook Air)

Speedy Net – LAN (MacBook Pro Retina) to Wireless N 5GHz (MacBook Air)

Speedy Net – Wireless N 5GHz (MacBook Pro Retina) to Wireless N 5GHz (MacBook Air)

The LAN to LAN speed test of the Linksys EA8350 turn out pretty well. It performs much better than the Linksys WRT1900AC.

However, when it comes to LAN to wireless and wireless to wireless, the Linksys WRT1900AC wins it hands down.

Type EA8350 WRT1900AC DIR-868L My Net N900 EA4500
LAN to LAN 876.2Mbps 780.27Mbps 500.19Mbps - -
LAN to Wireless N (5GHz) 97.64Mbps 146.14Mbps 217.61Mbps 113.48Mbps 107.81Mbps
Wireless N (5GHz) to Wireless N (5GHz) 50.53Mbps 146.91Mbps 75.71Mbps 63.01Mbps 65.17Mbps

Summary
This router is priced at SGD$399 and I have absolutely no idea why Belkin price it so high. It is definitely not worth the money given then the average performance and coverage when not using MU-MIMO compatible devices.

It supports VLAN tagging which is a plus. The fast loading and functional admin UI is much better (though uglier) than Linksys Smart Wi-Fi Router UI.

I think a more reasonable price would be SGD$199. If you have SGD$399 to spare, I will highly and totally recommend getting the Asus RT-AC87U instead.

If you need a more technical review on the Linksys E8350 Router, checkout SmallNetBuilder review.

Pros:

  • VLAN Tagging
  • Functional and fast loading admin UI
  • Detachable Antenna (might be upgradable in the future)

Cons:

  • Expensive
  • Slower wireless speed compared to Linksys WRT1900AC

Linksys E8350
Linksys E8350

Linksys EA9200 Wireless AC3200 Tri Band Smart Wi-Fi Router Review

$
0
0

The Linksys EA9200 Wireless AC3200 Tri Band Smart Wi-Fi Router was launched in Singapore on the 6th February 2015 and the recommended retail price of it is S$399. It is only available at Challenger stores for now.

Linksys EA9200 is the new flagship router after the Linksys E8350 AC2400 Dual Band Gigabit Wi-Fi Router and personally I think the EA9200 is the true successor to the Linksys WRT1900AC Router which was launched last May.

The Linksys EA9200 is the second AC3200 Tri-Band Wi-Fi router in the market after the Netgear AC3200 Nighthawk X6 Tri-Band WiFi Router. Surprisingly, Linksys beats Asus and D-Link to the launch of the AC3200 routers.

Linksys EA9200 - Box Front
Linksys EA9200 – Box Front

Linksys EA9200 - Box Back
Linksys EA9200 – Box Back

Linksys EA9200 - Box
Linksys EA9200 – Box

Linksys EA9200 - Box Contents
Linksys EA9200 – Box Contents

Features

  • Concurrent dual-band wireless operation of all three radios
    • One 2.4 GHz Radio
    • Two 5.0 GHz Radios
  • AC3200 (600 + 1300 +1300 Mbps)
    • Data transfer rates up to 600 Mbps on 2.4GHz (3 spatial streams)
    • Data transfer rates up to 1300 Mbps on 5GHz (3 spatial streams)
  • 6 Antennas
    • 3 Removable External Antennas
    • 3 Fixed Internal Antennas
  • 1 GHz dual core CPU
  • 4-Port Gigabit Switch/1-Gigabit WAN Port
  • USB 3.0 and USB 2.0 ports
  • Smart Wi-Fi Enabled with parental controls, remote troubleshooting and network map
  • Integrated DHCP server with dynamic and static IP address assignment
  • Supports DLNA for home media management
  • Vertical Industrial Design
  • Beamforming
  • UPnP IGD and media server support
  • Virtual USB support
  • Smart Connect technology automatically balances your devices over the two high-speed 5GHz bands in real time. It selects the best band for each device ensuring optimal device performance.

Linksys EA9200 - Quick Start Guide
Linksys EA9200 – Quick Start Guide

Linksys EA9200 - Antenna
Linksys EA9200 – Antenna

Specifications (From SmallNetBuilder)

  • CPU: Broadcom BCM4709A Processor (1 GHz)
  • RAM: 256MB
  • Flash: 128MB
  • Wireless: 802.11 a/b/g/n/ac wireless LAN
    • 2.4GHz
      • Broadcom BCM43602
      • IEEE 802.11n, IEEE 802.11g, IEEE 802.11b
      • Speeds up to 600 Mbps
    • 5GHz
      • 2x Broadcom BCM43602
      • IEEE 802.11ac, IEEE 802.11n & IEEE 802.11a
      • Speeds up to 1,300 Mbps
  • LAN/WAN
    • 4x 10/100/1000 Gigabit LAN ports
    • 1x 10/100/1000 Gigabit WAN port
    • Broadcom BCM4709A
  • Antennas: Three fixed antennas and three exchangeable external antennas
  • Other Ports: 1x USB 3.0 port, 1x USB 2.0 Port
  • Dimensions (H x W x D): 8.9 x 25.2 x 20.32cm
  • Weight: 726g

Design
The EA9200 is the first Linksys router that is meant to be placed vertically. There is a non-removable base plate at the bottom of the EA9200 that makes it stand vertically. It would be good if the base plate can be remove to give users a choice whether they want to place their ruter vertically or horizontally.

Personally, this is my first vertically designed router and I kinda like it because it will saves some space on my table.

Linksys EA9200 - Top
Linksys EA9200 – Top

Linksys EA9200 - Front
Linksys EA9200 – Front

The logo in front of the router is actually a power indicator. When it is lit, it means the router is fully operational and when it is blinking, it means the router is booting up.

Linksys EA9200 - Connected
Linksys EA9200 – Connected

The ports are located at the back of the router and this time round, Linksys drop support for eSATA from it’s USB 2.0 port.

Linksys EA9200 - Back
Linksys EA9200 – Back

Linksys EA9200 - Ports
Linksys EA9200 – Ports

From left to right:

  • 1x USB3.0 Port
  • 1x USB2.0 Port
  • 4x Gigabit LAN Ports
  • 1x Gigabit WAN Port
  • Reset Button
  • 12v DC Power
  • On/Off Switch

On the right of the router there are two more buttons.

Linksys EA9200 - WPS + Wi-Fi Off Button
Linksys EA9200 – WPS + Wi-Fi Off Button

From left to right:

  • Wi-Fi Protected Setup (WPS) Button
  • Wi-Fi Button (Enable/Disable Wi-Fi Easily)

Linksys EA9200 - With Antennas Front
Linksys EA9200 – With Antennas Front

Linksys EA9200 - With Antennas Back
Linksys EA9200 – With Antennas Back

Linksys EA9200 - With Antennas Right
Linksys EA9200 – With Antennas Right

Linksys EA9200 - With Antennas Left
Linksys EA9200 – With Antennas Left

Linksys EA9200 - With Antennas
Linksys EA9200 – With Antennas

Smart Wi-Fi
The EA9200 belongs to the EA router series and hence it comes with Smart Wi-Fi. Smart Wi-Fi allows you to control your router settings wherever you are. I will not cover it since I already covered it in my review of the Linksys WRT1900AC.

Links EA9200 - Admin UI - Home
Links EA9200 – Admin UI – Home

Links EA9200 - Admin UI - Guest Network
Links EA9200 – Admin UI – Guest Network

Links EA9200 - Admin UI - Parental Controls
Links EA9200 – Admin UI – Parental Controls

Links EA9200 - Admin UI - External Storage
Links EA9200 – Admin UI – External Storage

Links EA9200 - Admin UI - Connectivity
Links EA9200 – Admin UI – Connectivity

Links EA9200 - Admin UI - Security
Links EA9200 – Admin UI – Security

VLAN Tagging
Similar to most high-end routers from Linksys, the EA9200 comes with VLAN tagging and because it is Smart Wi-Fi enabled, it comes with pre-loaded VLAN tags from Singapore and Malaysia Internet Service Providers (ISP). I tested it with my SingTel 300Mbps Fibre Home Bundle and it works fine. If you are using Singtel TV (previously known as mio TV), it will work for you as well.

Links EA9200 - Admin UI - VLAN Tagging
Links EA9200 – Admin UI – VLAN Tagging

Links EA9200 - Admin UI - VLAN Tagging - Preloaded VLAN Tags
Links EA9200 – Admin UI – VLAN Tagging – Preloaded VLAN Tags

If you are using Singtel just for their Internet service and you have no VOIP or IPTV, there is a small bug with Singtel (other) VLAN tag. When you choose that pre-defined VLAN tag, it will tag your 4th LAN port with 20 (which should not be the case) and you will not be able to use the 4th port for LAN. I have already reported this bug to Linksys.

A workaround is to choose Manual VLAN Tag and tag the Internet port to 10 (which is what I did in the end) as shown in the screenshot below.

Links EA9200 - Admin UI - VLAN Tagging - Manual VLAN Tag
Links EA9200 – Admin UI – VLAN Tagging – Manual VLAN Tag

AC3200
The total bandwidth of the router is 3,200Mbps which is derived from one 2.4GHz band that goes up to 600Mbps and two 5GHz bands that goes up to 1,300Mbps each. If you add all three up, it will give you a combined throughput of 3,200Mbps. But unfortunately, this is just some marketing jargon because you will never archive such speed at all.

As the saying goes, “You are only as strong as your weakest link”. The reason for two 5GHz bands is because the fastest speed you get from a single 5GHz band is your slowest device’s 5GHz speed. So when there are two 5GHz bands, the router will automatically prioritizes and balances devices over the two 5GHz bands by grouping slower 5GHz devices together on one 5GHz band and the faster 5GHz devices on the other 5GHz band.

Linksys named it “Smart Connect”. Linksys Smart Connect works by constantly monitoring and moving devices to the 5GHz band which will yield the best performance for all connected devices. Devices with fast connection speeds are placed in the low 5GHz band. Devices with slow connection speeds are presumed to be legacy devices or located further away from the router and are placed in the high 5GHz band because it has slightly higher transmission power.

Links EA9200 - Admin UI - Wireless - 5GHz Steering On
Links EA9200 – Admin UI – Wireless – 5GHz Steering On

If one of the 5GHz bands experiences a high utilization rate, it will steer some of the devices to another 5GHz band in order to prevent oversubscription.

Linksys Smart Connect uses a bounce detection algorithm to ensure that a device is not steered too often within a certain timeframe to prevent frequent moving of devices between the two 5GHz bands. Devices will only be steered when they are idle so that their activity will not be interrupted.

You can also do the steering by yourself by turning off the automatic 5GHz band steering and that will give you the option to create two 5GHz networks with different SSID as shown in the screenshot below.

Links EA9200 - Admin UI - Wireless - 5GHz Steering Off
Links EA9200 – Admin UI – Wireless – 5GHz Steering Off

You will then have to connect your devices to the respective 5GHz network that you managed (which is really a hassle).

Beamforming
Similar to the Linksys WRT1900AC and Linksys E8350, the Linksys EA9200 supports beamforming. Beamforming enables the router to identify and connect directly with the devices rather than simply sending out wireless signals in a general direction. This ensures faster network speeds, better wireless range, reduced interference from other devices, and stronger Wi-Fi connections.

Just to reiterate, the EA9200 comes with six antennas. Three of them are fixed internal antennas and another three of them are exchangeable external antennas.

Speedtest

Speedtest
Speedtest

Wireless Strength
I am using WiFi Explorer to test the wireless strength at 2 locations in my house, my room and the toilet.

I am impressed with the wireless strength of the EA9200, it is the best performing Linksys router and it outshines the Linksys WRT1900AC on the 2.4GHz band and almost on-par with Linksys WRT1900AC for the 5GHz bands.

WiFi Explorer – My Room

WiFi Explorer – Toilet

Location EA9200 E8350 WRT1900AC DIR-868L
My Room (2.4GHz) 85% 55% 76% 79%
My Room (5GHz) 76% 27% 78% 91%
Toilet (2.4GHz) 64% 41% 50% 58%
Toilet (5GHz) 46% 37% 46% 55%

In terms of speed, the EA9200 outperforms all my previous routers for LAN to LAN connection. For LAN to wireless, it is the best performing Linksys router and for wireless to wireless, it still loses to Linksys WRT1900AC.

Speedy Net – LAN (MacBook Pro Retina) to LAN (MacBook Air)

Speedy Net – LAN (MacBook Pro Retina) to Wireless N 5GHz (MacBook Air)

Speedy Net – Wireless N 5GHz (MacBook Pro Retina) to Wireless N 5GHz (MacBook Air)

Speed

Type EA9200 EA8350 WRT1900AC DIR-868L
LAN to LAN 886.36Mbps 876.2Mbps 780.27Mbps 500.19Mbps
LAN to Wireless N (5GHz) 173.49Mbps 97.64Mbps 146.14Mbps 217.61Mbps
Wireless N (5GHz) to Wireless N (5GHz) 98.79Mbps 50.53Mbps 146.91Mbps 75.71Mbps

Summary
As mentioned earlier, the Linksys EA9200 is a worthy successor of the Linksys WRT1900AC. In terms of hardware, it is near the top of the line and hence it costs a premium price of S$399. But in terms of features, it is severely lacking like lack of VPN support. This is a common problem for all high end routers from Linksys.

Since AC3200 routers are still pretty new to the market, I would suggest to hold out and consider another two more AC3200 routers which will be launching soon: Asus RT-AC3200 Tri-Band Wireless-AC3200 Gigabit Router and D-Link DIR-890L Wireless AC3200 Tri-Band Gigabit Cloud Router.

With the launch of more AC3200 routers in the market, I am pretty sure the price of AC3200 routers will be brought down.

If you need a more technical review on the Linksys EA9200 Router, checkout SmallNetBuilder review.

Pros:

  • Vertical Industrial Design
  • Supports VLAN Tagging and comes with Singapore and Malaysia ISP preloaded VLAN tags
  • Linksys Smart Connect (Dynamic 5GHz band steering)
  • Good wireless coverage and speed

Cons:

  • No VPN support
  • Expensive

Linksys EA9200 - Connected
Linksys EA9200 – Connected

OpenVPN With Linksys WRT1900AC

$
0
0

The new Linksys WRT1200AC router will provides users with the high-end features of the Linksys WRT1900AC router at AC1200 speeds and a lower price point. The Linksys WRT1200AC will retail for S$329 from 4th June 2015 at Challenger stores and at other consumer electronics retail stores by the end of June 2015.

I attended the launch of the new Linksys WRT1200AC in Singapore yesterday and I realised that the WRT firmware received a new update (service pack 4) which includes one of the features that I am looking for, which is a VPN server (Linksys is using OpenVPN server).

After the event, I went home to check and realised my router, Linksys WRT1900AC, updated the firmware automatically and now I can setup an OpenVPN server on my router (I love auto-updates). I wish it pushes a notification to my Linksys Smart Wi-Fi iOS App to inform me of this new feature when the firmware has been updated.

Last I heard, there is a major update coming to the app and this push notification feature is in the works alongside with iPhone 6/6 Plus optimized resolution.

WRT1900AC - OpenVPN
WRT1900AC – OpenVPN

WRT1900AC - OpenVPN Settings
WRT1900AC – OpenVPN Settings

WRT1900AC - OpenVPN Edit Settings
WRT1900AC – OpenVPN Edit Settings

After setting up your OpenVPN details on the router, download the .opvn file (OpenVPN Profile) and transfer the file over to your OpenVPN iOS app via iTunes.

Transfer OpenVPN Profile to OpenVPN iOS App

The OpenVPN iOS App should be able to automatically import the file once it is transferred as shown in the screenshots below.

OpenVPN iOS App - App StoreOpenVPN iOS App - Imported
OpenVPN iOS App

OpenVPN iOS App - ConfigOpenVPN iOS App - Connected
OpenVPN iOS App

Now that Linksys has shipped a VPN server with the SP4 firmware, I hope Linksys can ship a VPN client next, so I can connect the router itself to a VPN!

VyprVPN

$
0
0

Previously, I was using StrongVPN on their StrongVPN Special PPTP which I paid US$55/year (S$75/year).

After my one year contract with them ended, I didn’t renew it because I felt that their server switch quota is kinda limiting though I have never hit the limit before. Server switch basically allows you to switch to different VPN servers.

VyprVPN
VyprVPN

Last week, VyprVPN wrote to me asking whether I am interested in being in the affiliate program. Since there is no harm in doing so and I needed a VPN, I agreed to it. Before that I heard about VyprVPN through Justin Lee as well.

One thing I like about VyprVPN is that their server switches are unlimited and they have way more servers than StrongVPN. They have 700+ servers in 43 countries spread across 5 continents (North America, Central America, South America, Europe, Asia and Oceania) with 200,000+ global IPs available.

VyprVPN - Server Locations
VyprVPN – Server Locations

Apps
Similar to StrongVPN, VyprVPN also has apps for Windows, Mac, iOS and Android.

I only tested the app for Mac and iOS since both devices are my primary devices and I love the UI/UX of it.

VyprVPN - Mac - Connected
VyprVPN – Mac – Connected

VyprVPN - Mac - Server Locations
VyprVPN – Mac – Server Locations

VyprVPN - Mac - Settings - Connection
VyprVPN – Mac – Settings – Connection

VyprVPN - Mac - Settings - DNS
VyprVPN – Mac – Settings – DNS

VyprVPN - Mac - Settings - Protocol
VyprVPN – Mac – Settings – Protocol

Too bad the iOS app is not optimised for iPhone 6/6 Plus.

VyprVPN - iOSVyprVPN - iOS
VyprVPN – iOS

Price Plans
VyprVPN has three price plans similar to StrongVPN.

StrongVPN first two pricing tiers are cheaper than VyprVPN, but for the last tier, VyprVPN is much cheaper (US$10 vs US$12.92) and offers greater value.

I am on the VyprVPN Premier plan.

VyprVPN Basic VyprVPN Pro VyprVPN Premier
Billed Annually US$5.00/month (S$7) US$7.50/month (S$11) US$10/month (S$14)
Billed Monthly US$6.67 (S$9) US$8.33 (S$12) US$10 (S$14)
Simultaneous Connections 1 2 3
Unlimited Data Usage
Unlimited Server Switching
NAT Firewall No Yes Yes
PPTP Yes Yes Yes
OpenVPN No Yes Yes
L2TP/IPsec No Yes Yes
Chameleon No Yes Yes
Dump Truck Storage 10GB 25GB 50GB

The prices stated above are the discounted prices and not the original prices listed on VyprVPN.

To get the discounted price, just click on the banner below.

Note
Despite that it says it is a Zero Logging DNS, on the Privacy Policy page, it does says it logs user’s source IP address, the VyprVPN IP address used by the user, connection start and stop time and total number of bytes used. They retain these session data for 30 days to use with billing issues, troubleshooting, service offering evaluation, TOS issues, AUP issues, and for handling crimes performed over the service.

D-Link DIR-890L AC3200 Wireless Tri-Band Gigabit Cloud Router Review

$
0
0

The D-Link DIR-890L AC3200 Wireless Tri-Band Gigabit Cloud Router was released in Singapore back in February 2015 and is retailing for S$399 making it the same price as the Linksys EA9200 Wireless AC3200 Tri Band Smart Wi-Fi Router.

I wonder whats up with router names these days, is like each company is trying to add in more keywords to the official name of the router.

D-Link DIR-890L
D-Link DIR-890L

Features
The internals of the DIR-890L is basically pretty much the same as Linksys EA9200. It is the same Broadcom BCM4709A0 processor and BCM43602 Wi-Fi chip and hence the features are also the same.

It features three wireless bands (one 2.4GHz and two 5GHz) giving you a theoretically speed limit of 3.2Gbps (600Mbps + 1.3Gbps + 1.3Gbps) which you will not even get 1/3 of it in the real world.

It also has smart beamforming. Beamforming enables the router to identify and connect directly with the devices rather than simply sending out wireless signals in a general direction. This ensures faster network speeds, better wireless range, reduced interference from other devices, and stronger Wi-Fi connections.

Another new feature is the smart connect. With smart connect, you just need one wireless SSID instead of splitting up to 2.4GHz and 5Ghz band. This is because the router can intelligently identify the device, decide what band would provide it with the best possible connection, and connect it to that band.

Another benefit of smart connect is that it will load balance the devices across the three bands ensuring that one band isn’t getting overloaded while the other two are empty.

Specifications (From WikiDevi)

  • CPU: Broadcom BCM4709A Processor (1 GHz, 2 cores)
  • RAM: 512MB (EtronTech EM6GD16EWXC-15H)
  • Flash: 128MB (Spansion S34ML01G100TFI00)
  • Wireless: 802.11 a/b/g/n/ac wireless LAN
    • 2.4GHz
      • Broadcom BCM43602
      • IEEE 802.11n, IEEE 802.11g, IEEE 802.11b
      • Speeds up to 600 Mbps
    • 5GHz
      • 2x Broadcom BCM43602
      • IEEE 802.11ac, IEEE 802.11n & IEEE 802.11a
      • Speeds up to 1,300 Mbps
  • LAN/WAN
    • 4x 10/100/1000 Gigabit LAN ports
    • 1x 10/100/1000 Gigabit WAN port
    • Broadcom BCM4709A
  • Antennas: Six fixed non-replaceable antennas
  • Other Ports: 1x USB 3.0 port, 1x USB 2.0 Port
  • Dimensions (H x W x D): 8.9 x 25.2 x 20.32cm
  • Weight: 726g

Box
Just when I thought the box of my previous router, Linksys WRT1900AC, is huge, the box of this router is even bigger, almost twice the size.

D-Link DIR-890L - Box Front
D-Link DIR-890L – Box Front

D-Link DIR-890L - Box Back
D-Link DIR-890L – Box Back

D-Link DIR-890L - Box
D-Link DIR-890L – Box

D-Link DIR-890L - Box Open
D-Link DIR-890L – Box Open

D-Link DIR-890L - Box Open
D-Link DIR-890L – Box Open

D-Link DIR-890L - Box Contents
D-Link DIR-890L – Box Contents

Design
The D-Link DIR-890L comes in two colors, red or black. I chose red because that color stands out. I personally find that black a little boring for routers.

The shape of the router looks like a spaceship or a flying pyramid. I know some might disagree, but I think this is the best looking router in the market so far.

The router comes with two screws allowing you to mount it on a wall. I don’t think you can mount it on the ceiling though.

D-Link DIR-890L - Top
D-Link DIR-890L – Top

D-Link DIR-890L - Top
D-Link DIR-890L – Top

D-Link DIR-890L - Top
D-Link DIR-890L – Top

D-Link DIR-890L - Back
D-Link DIR-890L – Back

D-Link DIR-890L - Ports
D-Link DIR-890L – Ports

D-Link DIR-890L - Side
D-Link DIR-890L – Side

D-Link DIR-890L - Bottom
D-Link DIR-890L – Bottom

Setup
The default URL to setup the router is http://dlink.router or http://192.168.0.1. There is no password to the admin panel because the setup wizard will ask you to create one at the end of the setup process.

Setup - Step 1
Setup – Step 1

Setup - Step 2
Setup – Step 2

Setup - Step 3
Setup – Step 3

Setup - Step 4
Setup – Step 4

Setup - Step 5
Setup – Step 5

Setup - Step 6
Setup – Step 6

Admin UI
My previous D-Link router was the D-Link DIR-868L and that router still uses the old classic orange and black web interface.

It was a nice and pleasant surprise for me when D-Link changes the admin UI of this router. The admin UI is now more modern and brighter.

Nevertheless, it still loads as fast as the previous UI which is good. I care more about the speed of loading the admin UI rather than how fanciful it is.

Admin UI - Home
Admin UI – Home

Admin UI - Wireless
Admin UI – Wireless

Admin UI - Wireless - Smart Connect Off
Admin UI – Wireless – Smart Connect Off

Admin UI - Share Port
Admin UI – Share Port

Admin UI - Port Forwarding
Admin UI – Port Forwarding

Admin UI - Virtual Server
Admin UI – Virtual Server

Admin UI - Static Routes
Admin UI – Static Routes

Admin UI - Quick VPN
Admin UI – Quick VPN

In case you are wondering, you can set the router to be an AP (Access Point) instead. It is under Settings -> Internet -> Device Mode as shown in the screenshot below.

Admin UI - Router Mode
Admin UI – Router Mode

Wireless Strength
For the wireless strength tests of the DIR-890L, it differs by about 6% when compared to the EA9200.

I expected the DIR-890L to perform better than the EA9200 because the DIR-890L has six external antennas vs the EA9200 which only has three external antennas and three internal antennas.

I guess whether the antennas are external or internal doesn’t really make much a difference.

WiFi Explorer - My Room
WiFi Explorer – My Room

WiFi Explorer - Toilet
WiFi Explorer – Toilet

Location DIR-890L EA9200 E8350 WRT1900AC DIR-868L
My Room (2.4GHz) 85% 85% 55% 76% 79%
My Room (5GHz) 82% 76% 27% 78% 91%
Toilet (2.4GHz) 59% 64% 41% 50% 58%
Toilet (5GHz) 39% 46% 37% 46% 55%

Speed
For the speed tests of the DIR-890L, it outperform the EA9200 in every tests.

Speedy Net - LAN to LAN
Speedy Net – LAN to LAN

Speedy Net - LAN to Wireless
Speedy Net – LAN to Wireless

Speedy Net - Wireless to Wireless
Speedy Net – Wireless to Wireless

Type DIR-890L EA9200 EA8350 WRT1900AC DIR-868L
LAN to LAN 932.71Mbps 886.36Mbps 876.2Mbps 780.27Mbps 500.19Mbps
LAN to Wireless 175.87Mbps 173.49Mbps 97.64Mbps 146.14Mbps 217.61Mbps
Wireless to Wireless 119.70Mbps 98.79Mbps 50.53Mbps 146.91Mbps 75.71Mbps

Summary
The DIR-890L did slightly better in speed tests while having almost the same coverage as the EA9200. The DIR-890L comes with six non-replaceable antennas while the EA9200 comes with three internal antennas and three replaceable external antennas.

In terms of admin UI, the DIR-890L did better because it loads much faster.

I was disappointed at the lack of VLAN tagging in the DIR-890L in the current firmware. Without VLAN tagging, you can’t use the router directly with the ONT for some Internet connections. I was told that VLAN tagging will be in the next firmware update which is targeted to be released by end August 2015.

Priced at S$399, it costs the same as the Linksys EA9200. Both routers are the AC3200 Wireless Tri-Band router and hence both supports beamforming and smart connect.

To decided whether to buy the DIR-890L or EA9200, it just boils down to brand preferences and router design. But the lack of VLAN tagging currently in the DIR-890L might just make the EA9200 more favourable to Singtel and StarHub users for now.

Pros:

  • Nicely designed router
  • Smart beamforming
  • Smart connect
  • Good wireless and wired speeds

Cons:

  • Antennas are non-replaceable

D-Link DIR-890L - Plugged In
D-Link DIR-890L – Plugged In

D-Link DSP-W215 WiFi Smart Plug

$
0
0

The D-Link DSP-W215 WiFi Smart Plug as the name suggests is a plug that is connected to your wireless network and that makes it “smart”.

It runs on 802.11n wireless network and is currently retailing for S$69.

Using the mydlink Home app (iOS | Android) on your mobile phone, you can use it to turn on and off the device that is connected to the plug. The smart plug also monitors the power usage of the device that is plugged in.

Unboxing

DSP-W215 - Box Front
DSP-W215 – Box Front

DSP-W215 - Box Back
DSP-W215 – Box Back

DSP-W215 - Box
DSP-W215 – Box

DSP-W215 - Box Contents
DSP-W215 – Box Contents

DSP-W215 - Front
DSP-W215 – Front

DSP-W215 - Back
DSP-W215 – Back

DSP-W215 - Right
DSP-W215 – Right

DSP-W215 - Top
DSP-W215 – Top

DSP-W215
DSP-W215

DSP-W215 - Plugged In
DSP-W215 – Plugged In

Setup
Setting up the smart plug is pretty straight forward, you just need to install the mydlink Home app for iOS or Android) on your mobile phone and follow the on screen instructions as shown in the screenshots below.

mydlink Home iOS App - Setup Step #1mydlink Home iOS App - Setup Step #2
mydlink Home iOS App – Setup

mydlink Home iOS App - Setup Step #3mydlink Home iOS App - Setup Step #4
mydlink Home iOS App – Setup

There is an option for manual Wi-Fi setup if you are not using Wi-Fi Protected Setup (WPS) like me.

mydlink Home iOS App - Setup Step #5mydlink Home iOS App - Setup Step #6
mydlink Home iOS App – Setup Step

mydlink Home iOS App - Setup Step #7mydlink Home iOS App - Setup Step #8
mydlink Home iOS App – Setup

mydlink Home iOS App - Setup Donemydlink Home iOS App - Menu
mydlink Home iOS App – Setup Done

Devices that are plugged into the plug are monitored for energy usage and there is a thermal sensor inside the plug that will automatically turn off overheating devices.

mydlink Home iOS App - My Devicesmydlink Home iOS App - Light Information
mydlink Home iOS App – My Devices

mydlink Home iOS App - My Placesmydlink Home iOS App - Room
mydlink Home iOS App – My Places

You can also schedule it to turn on or off at a fix timing.

I wish there is geofencing built into the app, so when I reached home, the device can be switched on automatically. Philips Hue does that pretty well for its’ lights.

Judging by the app is not yet iPhone 6/6 Plus optimized after almost a year, I think the chances of such new features are slim.

mydlink Home iOS App - Schedule
mydlink Home iOS App – Schedule

mydlink Home iOS App - Basic Schedulemydlink Home iOS App - Advanced Schedule
mydlink Home iOS App – Schedule

WeMo Switch + Motion

$
0
0

The WeMo Switch + Motion is retailing at Funan’s Challenger for S$109 (member’s price is S$89) while the WeMo Switch is retailing for S$79 (member’s price is S$71.10).

For a member’s price difference of S$18, I can get the additional motion sensor, and hence I chose the WeMo Switch + Motion instead of just the WeMo Switch.

I bought the WeMo is because I got kinda addicted playing with the D-Link DSP-W215 WiFi Smart Plug. The only downside to the D-Link’s Smart Plug is the lack of third party integration like IFTTT (If First This, Then That) so you can’t really do a lot of things with the D-Link Smart Plug.

WeMo on the other hand is a much more mature product with better third-party integration.

The WeMo Switch is pretty much a no-frills switch that allows your mobile device to switch on or off the electrical device that is connected to the switch. It doesn’t have the ability to monitor the temperature or energy usage of the electrical device unlike the D-Link Smart Plug.

WeMo have another switch product called the WeMo Insights Switch which does the monitoring of energy usage but it is not available in Singapore.

WeMo Switch + Motion - Box Front
WeMo Switch + Motion – Box Front

WeMo Switch + Motion - Box Back
WeMo Switch + Motion – Box Back

WeMo Switch + Motion - Box Contents
WeMo Switch + Motion – Box Contents

WeMo Switch + Motion - Switch Front
WeMo Switch + Motion – Switch Front

WeMo Switch + Motion - Switch Back
WeMo Switch + Motion – Switch Back

WeMo Switch + Motion - Switch
WeMo Switch + Motion – Switch

WeMo Switch + Motion - Switch Plugged In
WeMo Switch + Motion – Switch Plugged In

WeMo Switch + Motion - Motion Front
WeMo Switch + Motion – Motion Front

WeMo Switch + Motion - Motion Back
WeMo Switch + Motion – Motion Back

WeMo Switch + Motion - Motion
WeMo Switch + Motion – Motion

WeMo Switch + Motion Connector

WeMo Switch + Motion - Motion Sensor
WeMo Switch + Motion – Motion Sensor

WeMo Switch + Motion - Motion Plugged In
WeMo Switch + Motion – Motion Plugged In

WeMo Switch + Motion - Motion Not Detected
WeMo Switch + Motion – Motion Not Detected

WeMo Switch + Motion - Motion Detected
WeMo Switch + Motion – Motion Detected

Despite WeMo being a more mature product, the setting up of the switch and motion is really a hassle. It took me more than 15 minutes to set both up because it is so slow in detecting the devices and during setup, my phone keeps getting disconnected to the Wi-Fi hotspot of the switch/motion.

WeMo iOS App - Switch SetupWeMo iOS App - Switch Setup Done
WeMo iOS App – Switch Setup

WeMo iOS App - Motion SetupWeMo iOS App - Motion Setup Done
WeMo iOS App – Motion Setup

The WeMo App (iOS | Android) is also quite poorly done. Firstly, it is not iPhone 6/6 Plus optimized and whenever I navigate to the Rules tab, there is a 10 seconds wait before the page loads. When I create a new rule and upon saving it brings me back to the Rules tab, and that is another 10 seconds wait. Navigating around the app too fast makes the app unresponsive at times, it is really frustrating.

I don’t have all these problems (besides the iPhone 6/6 Plus optimized) with the mydlink Home iOS app.

I hope I do not need to use the WeMo app to do anything else besides switching on and off the light. Heck, I might even get the Amazon Echo so I can just use my voice to control the WeMo switch.

WeMo iOS App - DevicesWeMo iOS App - Rules
WeMo iOS App – Devices/Rules

WeMo iOS App - New Motion RulesWeMo iOS App - New Timer Rule
WeMo iOS App – New Motion/Timer Rules

WeMo iOS App - New Notification RuleWeMo iOS App - Auto-off Timer
WeMo iOS App – New Notification Rule/Auto-off Timer

WeMo really need to brush up their new user on-boarding experience and D-Link needs to open up their Smart Plug platform.


Linksys EA8500 Max-Stream AC2600 MU-MIMO Gigabit Router Review

$
0
0

The Linksys Max-Stream AC2600 MU-MIMO Gigabit Router or Linksys EA8500 Router in short was released on 4th August 2015 exclusively at Challenger and is now available in most electronics stores. The recommended retail price of the Linksys EA8500 is S$399.

Linksys EA8500 - Box Front
Linksys EA8500 – Box Front

Linksys EA8500 - Box Back
Linksys EA8500 – Box Back

Linksys EA8500 - Box Left
Linksys EA8500 – Box Left

Linksys EA8500 - Box
Linksys EA8500 – Box

Linksys EA8500 - Box Contents
Linksys EA8500 – Box Contents

Despite having a model number of EA8500, it is not exactly a lower end model when compared to the Linksys EA9200 Router. The Linksys EA9200 is a AC3200 router and hence it is capable of speeds up to 3,200Mbps while the EA8500 is an AC2600 router capable of speeds up to 2,530Mbps. But let’s be honest here, even in the perfect case environment, we will not be able to get up to the theoretical speed.

What makes the EA8500 special is the MU-MIMO technology. The Linksys EA8500 is sort of the first MU-MIMO router in the market. The reason I said sort of is because MU-MIMO is a protocol and not a hardware feature.

There are routers like the ASUS RT-AC87U, Linksys E8350 and Nighthawk X4 AC2350 whose hardware already supports MU-MIMO but requires a firmware update to enable it.

So out of the box, the EA8500 is the first consumer router in the market to support MU-MIMO.

What is MIMO?
MIMO stands for Multiple-Input, Multiple-Output. These days it is pretty common to see specifications on router stating 2×2, 3×3 and even 4×4. What that means is that the router it is able to send and receive up to 2, 3 or 4 streams respectively using multiple antennas. The EA8500 is a 4×4 router.

Being able to send and receive multiple streams is a good thing but sometimes the clients are not able to support multiple streams. Take for example mobile devices. Most mobile devices are 1×1 meaning it supports only 1 stream and if the router supports 4 streams, the remaining 3 streams are wasted.

Why is it wasted? Most if not all routers in the market right now are SU-MIMO which means Single-User, Multiple-Input, Multiple-Output. The router can only send data to one client at a time. Think of it like a queue, only when the router finished sending data to the first client, then the router can move on to send it to the next client.

The more clients connected to the router, the slower each connected clients will get because it will take a longer time to process the whole queue and get back to the same client again (round robin).

This is what MU-MIMO technology is trying to solve.

What is MU-MIMO?
MU-MIMO stands for Multi-User, Multiple-Input, Multiple-Output. It is the ability for the router to send data simultaneously to multiple clients. MU-MIMO is part of the wave 2 of 802.11ac standards which is supported only in 5GHz band and hence MU-MIMO does not work on the 2.4GHz band.

Using my above example, if the device supports only 1 stream, there are 3 more streams from the router that is unused.

Single User vs. Multi User MIMO Throughput (Credits: Qualcomm Atheros)

Instead of just wasting it like SU-MIMO routers, MU-MIMO routers will find 3 more devices that supports 1 stream each or a mix of both 1 stream and 2 stream devices and process their requests simultaneously.

MU-MIMO is one way, meaning from the router to the clients (downstream) and not the other way round.

Another downside of MU-MIMO, is that both the clients and the routers need to support MU-MIMO.

Difference Between Tri-Band and MU-MIMO
At first I was confused between tri-band routers like the EA9200 and MU-MIMO routers like the EA8500 because they are pretty similar.

Tri-band routers are meant to make the router more efficient by grouping devices across two 5GHz bands so that slower devices doesn’t slow down the faster devices. They do this by grouping slower devices on one 5GHz band and faster devices on the other 5GHz band. The reason being the maximum speed of a band will be the speed of the slowest device connected.

For MU-MIMO routers, they will process MU-MIMO devices faster while the rest of the devices remains the same.

As what Jai Thampi who is the Head of Networking BU – International Markets, Belkin International, Inc said:

Tri Band is like building a new freeway (aka highway aka expressway) for one to get from point A to point B faster. By keeping your existing slow old cars on the current freeway, newer faster cars can go ahead and drive on the new freeway.

On the other hand, MU-MIMO facilitates a highly efficient freeway system with the existing same number of lanes. If you have a faster car, you can use the efficient freeway to drive faster (up to 3x faster). Slower older cars will go at their own pace, but as the overall freeway has become more efficient, they also get more space to drive around, and not have to tailgate and slow themselves down any further.

Why is MU-MIMO Better? (Credits: Belkin International)

How MU-MIMO Routers Benefits Non MU-MIMO Devices?
MU-MIMO routers does benefit non MU-MIMO devices but it might be negligible. The benefit comes indirectly because when MU-MIMO devices connects to a MU-MIMO router, the router is able to process these devices faster, leaving more resources for non MU-MIMO devices.

Devices
For mobile devices, currently only Xiaomi Mi Note Pro and Mi 4i supports MU-MIMO.

For laptops, the upcoming Acer Aspire V 13, Aspire V Nitro notebooks and Aspire R 13 convertible notebooks supports MU-MIMO.

EA8500

Linksys EA8500 - Top
Linksys EA8500 – Top

Linksys EA8500 - Bottom
Linksys EA8500 – Bottom

Linksys EA8500 - Back
Linksys EA8500 – Back

For testing of the EA8500 router, Belkin sent me three Dell Inspiron 13″ laptops that have been re-fitted with MU-MIMO wireless card.

Linksys EA8500 - Testing MU-MIMO
Linksys EA8500 – Testing MU-MIMO

Linksys EA8500 - Testing MU-MIMO
Linksys EA8500 – Testing MU-MIMO

As mentioned earlier, the EA8500 is the first consumer MU-MIMO router in the market. It is a 4×4 AC2600 router that is capable of combined speeds up to 2,530Mbps. It is powered by Qualcomm dual-core IPQ8064 Internet Processor running at 1.4GHz and have 512MB of RAM.

Specifications (From Linksys EA8500 Max-Stream AC2600 MU-MIMO Smart Wi-Fi Router Reviewed – Part 1)

  • CPU: Qualcomm dual-core IPQ8064 Internet Processor (1.4 GHz)
  • RAM: 512MB
  • Flash: 128MB
  • Wireless: 802.11 a/b/g/n/ac wireless LAN
    • 2.4GHz
      • Qualcomm Atheros QCA9980 4-stream 802.11ac MU-MIMO radio
      • Skyworks SE2623L 2.4 GHz power amp (x4)
      • IEEE 802.11n, IEEE 802.11g, IEEE 802.11b
      • Speeds up to 800 Mbps
    • 5GHz
      • Qualcomm Atheros QCA9980 4-stream 802.11ac MU-MIMO radio
      • Skyworks SKY85405 5 GHz power amp (x4)
      • IEEE 802.11ac, IEEE 802.11n & IEEE 802.11a
      • Speeds up to 1733 Mbps
  • LAN/WAN
    • 4x 10/100/1000 Gigabit LAN ports
      • Qualcomm Atheros QCA8337
    • 1x 10/100/1000 Gigabit WAN port
      • Qualcomm Atheros IPQ8064
  • Antennas: Four exchangeable external antennas
  • Other Ports: 1x USB 3.0 port, 1x eSATA/USB 2.0 Port
  • Dimensions (H x W x D): 5.6 x 25.6 x 18.3cm
  • Weight: 966g

In terms of design and specifications the EA8500 is pretty similar to the Linksys E8350 AC2400 Dual-Band Gigabit Wi-Fi Router. But as the model name suggests, the EA8500 is a slightly updated model with a few upgrades.

Both the EA8500 and EA8350 is a 4×4 router and both have four exchangeable external antennas but the antennas on the EA8500 are a little longer.

EA8500 is AC2600 (800 + 1733 Mbps) while the EA8350 is AC2400 (600 + 1733 Mbps).

The 5GHz band of the EA8500 has been upgraded to Qualcomm Atheros QCA9980 chip and hence the router is able to do beam-forming on 5GHz band. Previously on the EA8350, only the 2.4GHz is using the QCA9980 chip.

The power indicator is missing from the back of the EA8500 because the Linksys logo of the EA8500 now acts like a power indicator.

SU-MIMO vs MU-MIMO
Using JPref to do the benchmark between SU-MIMO and MU-MIMO with the three Dell Inspiron 13″ laptops yield the following results:

Computer #1 Computer #2 Computer #3 Aggregate
SU-MIMO 95.3 Mbps 86.7 Mbps 94.0 Mbps 276 Mbps
MU-MIMO 195 Mbps 192 Mbps 189 Mbps 576 Mbps
% Increase 104.6% 121.4% 101.1% 108.7%

As you can see with MU-MIMO, the overall increase in throughput is more than 100% because the router is able to send the data back to the MU-MIMO devices simultaneously.

Jperf - SU-MIMO
Jperf – SU-MIMO

Jperf - MU-MIMO
Jperf – MU-MIMO

Summary
Similar to how Intel CPU processors moved away from speed to multiple-cores in 2006, I would expect to see the routers doing the same as well. There is no way any devices can reach the theoretical speeds of the router, so a new approach like MU-MIMO that sends data simultaneously will be a game changer.

The Linksys EA8500 is ahead of it’s time because MU-MIMO is still a relatively new technology and not many devices in the market supports it right now. I think that will change next year.

However, if you are intending to get a new router now, I think the Linksys EA8500 will be a better buy than the Linksys EA9200 despite both of them retails at the same price of S$399.

This is because MU-MIMO looks promising and the technology is something new and different. The EA8500 is definitely more future-proof.

Linksys EA8500
Linksys EA8500

Linksys EA8500
Linksys EA8500

If you are interested in reading more about MU-MIMO, you can checkout SmallNetBuilder’s articles:

ASUS RT-AC88U Router Review

$
0
0

The ASUS RT-AC88U was launched in Singapore at SITEX 2015. SITEX is a consumer lifestyle IT event in Singapore and is usually the last major IT event for the year. It is always held at Singapore Expo and this year, the event took place from Thursday, 26th November 2015 till Sunday, 29th November 2015.

The retail price of the ASUS RT-AC88U Router is S$429.

The much awaited Asus RT-AC5300 (the eight antenna router that looks like a spider) was launched at SITEX 2015 as well and that is retailing for S$469.

Asus RT-AC88U Router - Box Front
Asus RT-AC88U Router – Box Front

Asus RT-AC88U Router - Box Back
Asus RT-AC88U Router – Box Back

Asus RT-AC88U Router - Box
Asus RT-AC88U Router – Box

Asus RT-AC88U Router - Box Open
Asus RT-AC88U Router – Box Open

Asus RT-AC88U Router - Box Contents
Asus RT-AC88U Router – Box Contents

Specifications (From WikiDevi)

  • CPU: Broadcom BCM47094 Processor (1.4 GHz, 2 cores)
  • RAM: 512MB (Nanya NT5CC256M16DP-DI)
  • Flash: 128MB (ESMT F59L1G81LA-25T)
  • Wireless: 802.11 a/b/g/n/ac wireless LAN
    • 2.4GHz
      • Broadcom BCM4366
      • IEEE 802.11n, IEEE 802.11g, IEEE 802.11b
      • Speeds up to 600 Mbps (1,000Mbps on NitroQAM)
    • 5GHz
      • 2x Broadcom BCM4366
      • IEEE 802.11ac, IEEE 802.11n & IEEE 802.11a
      • Speeds up to 1,734 Mbps (2,167 Mbps on NitroQAM)
  • LAN/WAN
    • 8x 10/100/1000 Gigabit LAN ports (Realtek RTL8365MB)
    • 1x 10/100/1000 Gigabit WAN port (Broadcom BCM47094)
  • Antennas: Four removable antennas
  • Other Ports: 1x USB 3.0 front port, 1x USB 2.0 back port
  • Dimensions: 300 x 188 x 60.5 mm
  • Weight: 950g

The RT-AC88U comes with a 4×4 antenna design and it is MU-MIMO enabled. If you are interested in knowing what MU-MIMO is all about, check out my review on Linksys EA8500 AC2600 MU-MIMO Router.

Unboxing

Asus RT-AC88U Router - Power Adapter
Asus RT-AC88U Router – Power Adapter

Asus RT-AC88U Router - Power Adapter
Asus RT-AC88U Router – Power Adapter

Asus RT-AC88U Router - Booklets
Asus RT-AC88U Router – Booklets

Asus RT-AC88U Router - Antennas
Asus RT-AC88U Router – Antennas

Design
The design looks almost the same as every other Asus routers out there.

Having said that, the design of the router is nothing much to rave about. Asus routers are not really well known for it’s design but rather it’s performance.

Asus RT-AC88U Router - Top
Asus RT-AC88U Router – Top

Asus RT-AC88U Router - Bottom
Asus RT-AC88U Router – Bottom

Asus RT-AC88U Router - Indicators
Asus RT-AC88U Router – Indicators

Asus RT-AC88U Router - With Antennas
Asus RT-AC88U Router – With Antennas

Ports
The first thing that caught my eye about this router is that it has eight LAN ports whereas most routers in the market have only four. The last time I used a router that has more than four LAN ports was the Western Digital My Net N900 Router three years ago.

Asus RT-AC88U Router - Ports
Asus RT-AC88U Router – Ports

From left to right:

  • Reset Button
  • WPS Button
  • USB 2.0 Port
  • 8x LAN Ports
  • 1x WAN Port
  • Power Port
  • Power Button

There are two USB ports on this router, one is at the back which is a USB 2.0 port and one hidden in front on the left of the router which is a USB 3.0 port. Personally, I never used the USB port feature of my routers.

ASUS RT-AC88U Router - USB 3.0 Port
ASUS RT-AC88U Router – USB 3.0 Port

WTFast
The router also supports WTFast.

WTFast is the Gamers Private Network (GPN); like a global automated army of IT specialists all working together to optimize your game connection from end to end. WTFast reports rich connection stats for your online game, so you can see exactly what is happening with your game connection.

WTFast is not a free service, it costs US$59.90/year (S$85/year) for the basic plan and US$99.90/year (S$140/year) for the advanced plan.

However, the Asus RT-AC88U is the first router with this featured built-in and is bundled free for life.

Admin UI
I have used Linksys and D-Link routers before and I find that overall Asus Admin UI is the best. It might not be the best looking, but it is functional and fast.

Linksys Admin UI is nice but slow, D-Link Admin UI is fast but menu items are hard to find.

Asus on the other hand is slightly ugly but the the menu items on the sidebar followed by the tab pages on the main content is simple and straightforward to find.

Asus RT-AC88U Router - UI - Network Map
Asus RT-AC88U Router – UI – Network Map

Asus RT-AC88U Router - UI - Guest Network
Asus RT-AC88U Router – UI – Guest Network

Asus RT-AC88U Router - UI - Dual WAN
Asus RT-AC88U Router – UI – Dual WAN

The RT-AC88U supports dual-WAN. This means that if you have two separate Internet connections at home, this router can support both. There are two modes to dual-WAN, Fail Over or Load Balance.

Fail Over means if one of your Internet connection is down, it will switch to the other one.

Load Balance means it will use both Internet connection at the same time and gives you the fastest possible speed from either of your Internet connection.

The secondary Internet connection can be either from a 3G/4G USB dongle or from any of the first four LAN ports.

Asus RT-AC88U Router - UI - Wireless
Asus RT-AC88U Router – UI – Wireless

Asus RT-AC88U Router - UI - Traffic Analyzer
Asus RT-AC88U Router – UI – Traffic Analyzer

Asus RT-AC88U Router - UI - VLAN Tagging
Asus RT-AC88U Router – UI – VLAN Tagging

You probably need VLAN tagging if you are not on Singtel’s unlimited fiber plan or are using StarHub. I have problem finding where the VLAN tagging menu item is and I have to Google to find out.

It is under LAN -> IPTV tab.

I have no idea why Asus would classify that under IPTV because you will still need VLAN tagging regardless whether you are using IPTV or not.

Calling it VLAN Tagging instead of IPTV will make it more generic and obvious to people.

Asus RT-AC88U Router - UI - VPN Client
Asus RT-AC88U Router – UI – VPN Client

Asus RT-AC88U Router - UI - VPN Server
Asus RT-AC88U Router – UI – VPN Server

Most routers I reviewed so far supports the router being a VPN server but doesn’t support the router being a VPN Client itself.

This is where Asus routers differentiate themselves. Having the router act like a VPN client is good because it allows everyone that is connected to the router to proxy through the VPN so that you can watch/purchase content that is available in the US only.

For routers that doesn’t have the VPN Client support, you have to use SmartDNS which doesn’t work for me these days on Singtel.

Personally, I find it better to use a VPN because it works 100% of the time rather than SmartDNS where sometime it works, sometime it doesn’t, depending on the traffic and your ISP.

This is a common issue in countries where the Internet is censored at the ISP level, or if the ISP is using special routing methods such as pools of IP addresses or different IP for each HTTP request. Most Singapore ISP’s such as Singtel and Starhub are known to employ such features that break full third-party SmartDNS support.

ASUS RT-AC88U Router - UI - Port Forwarding
ASUS RT-AC88U Router – UI – Port Forwarding

ASUS RT-AC88U Router - UI - Port Trigger
ASUS RT-AC88U Router – UI – Port Trigger

ASUS RT-AC88U Router - UI - Static Routes
ASUS RT-AC88U Router – UI – Static Routes

Wireless Strength
I am using the WiFi Explorer app on my MacBook Pro to test the wireless strength of two extreme corners of my house, my room and the common toilet.

ASUS RT-AC88U Router - Test - WiFi Explorer - Room
ASUS RT-AC88U Router – Test – WiFi Explorer – Room

ASUS RT-AC88U Router - Test - WiFi Explorer - Toilet
ASUS RT-AC88U Router – Test – WiFi Explorer – Toilet

As you can see from the table below, the wireless signal strength of the RT-AC88U is fantastic. Overall, it is probably the best router that I have reviewed in terms of wireless coverage.

Location RT-AC88U DIR-890L EA9200 E8350 WRT1900AC DIR-868L
My Room (2.4GHz) 88% 85% 85% 55% 76% 79%
My Room (5GHz) 82% 82% 76% 27% 78% 91%
Toilet (2.4GHz) 76% 59% 64% 41% 50% 58%
Toilet (5GHz) 55% 39% 46% 37% 46% 55%

Speed
I started using iPerf to test the speed of the router rather than my usual Speedy Net app on Mac because it is more accurate and gives a more detailed breakdown.

ASUS RT-AC88U Router - Test - iPerf - LAN to LAN
ASUS RT-AC88U Router – Test – iPerf – LAN to LAN

ASUS RT-AC88U Router - Test - iPerf - LAN to Wireless
ASUS RT-AC88U Router – Test – iPerf – LAN to Wireless

ASUS RT-AC88U Router - Test - iPerf - Wireless to Wireless
ASUS RT-AC88U Router – Test – iPerf – Wireless to Wireless

Maybe because it is more accurate, in all the three tests I ran, LAN to LAN, LAN to wireless and wireless to wireless, the RT-AC88U beats all the previous three routers that I reviewed.

Type RT-AC88U DIR-890L EA9200 EA8350 WRT1900AC DIR-868L
LAN to LAN 940Mbps 932.71Mbps 886.36Mbps 876.2Mbps 780.27Mbps 500.19Mbps
LAN to Wireless 213Mbps 175.87Mbps 173.49Mbps 97.64Mbps 146.14Mbps 217.61Mbps
Wireless to Wireless 145Mbps 119.70Mbps 98.79Mbps 50.53Mbps 146.91Mbps 75.71Mbps

Summary
The ASUS RT-AC88U is probably the most expensive router that I came across and it is not even the highest end Asus router. The RT-AC88U retails for S$429 which is S$30 more than the highest end routers from Linksys and D-Link at S$399.

Given that the RT-AC88U has much more features than the highest end routers from Linksys and D-Link, I find that the S$30 more is justifiable.

I do stream Netflix to my Chromecast regularly. Having a VPN client support is important to me because my SmartDNS is not working every since I switched to Singtel.

Dual WAN is a good option to have for businesses that have dual Internet connections for contingency purposes.

You will probably not go wrong with the RT-AC88U because of the huge amount of features that they have and I am sure your use cases will be covered in those features.

As a reminder, the RT-AC88U supports MU-MIMO which I am guessing will be the next in-thing for wireless technology next year! So this makes the RT-AC88U future proof as well.

Pros:

  • Good wireless coverage
  • Good wireless and wired speed
  • VPN server & VPN client support
  • Dual WAN support

Cons:

  • Slightly pricey
  • USB 3.0 Port located in front
  • IPTV should be renamed to VLAN Tagging

Asus RT-AC88U Router

Synology Router RT1900ac Review

$
0
0

The Synology Router RT1900ac is Synology’s first router. It is targeted at the mid-range router market and hence it’s retail price is S$234 US$149 (S$210). It started selling in Singapore on 6th October 2015. I will update this post again when I have the actual retail price in Singapore rather than using the currency conversion from the official retail price in USD.

For the unaware, Synology makes one of the best NAS in the market especially for the prosumer market. I personally owned three Synology NASes, DS210j, DS413j and DS415play.

Synology creates network attached storage, IP surveillance solutions, and network equipment that transform the way users manage data, conduct surveillance, and manage network in the cloud era. By taking full advantage of the latest technologies, Synology aims to help users centralize data storage and backup, share files on-the-go, implement professional surveillance solutions, and manage network in reliable and affordable ways. Synology is committed to delivering products with forward-thinking features and the best in class customer services.

Synology Router RT1900ac - Box Front
Synology Router RT1900ac – Box Front

Synology Router RT1900ac - Box Back
Synology Router RT1900ac – Box Back

Synology Router RT1900ac - Box
Synology Router RT1900ac – Box

Synology Router RT1900ac - Box Open
Synology Router RT1900ac – Box Open

Synology Router RT1900ac - Box Open
Synology Router RT1900ac – Box Open

Synology Router RT1900ac - Box Contents
Synology Router RT1900ac – Box Contents

Specifications (From WikiDevi)

  • CPU: Broadcom BCM58622 @ 1GHz Dual-Core (ARM Cortex A9)
  • RAM: 256MB (Samsung K4B2G1646Q-BCK0)
  • Flash: 4GB (Toshiba THGBMBG5D1KBAIT)
  • Wireless: 802.11 a/b/g/n/ac wireless LAN
    • 2.4GHz
      • Broadcom BCM43460
      • IEEE 802.11n, IEEE 802.11g, IEEE 802.11b
      • Speeds up to 600 Mbps (256-QAM supported)
    • 5GHz
      • Broadcom BCM43460
      • IEEE 802.11ac, IEEE 802.11n & IEEE 802.11a
      • Speeds up to 1,300 Mbps
  • LAN/WAN
    • 4x 10/100/1000 Gigabit LAN ports (Broadcom BCM58622)
    • 1x 10/100/1000 Gigabit WAN port (Broadcom BCM58622)
  • Antennas: Three removable antennas
  • Other Ports: 1x USB 3.0 port, 1x SD (SDXC) slot
  • Dimensions: 206 x 146 x 38 mm
  • Weight: 510g

The RT1900ac comes with a 3×3 antenna design but unfortunately it is not MU-MIMO enabled.

Unboxing

Synology Router RT1900ac - Power Adapter
Synology Router RT1900ac – Power Adapter

Synology Router RT1900ac - Stand
Synology Router RT1900ac – Stand

Synology Router RT1900ac - Antenna
Synology Router RT1900ac – Antenna

Synology Router RT1900ac - InstructionsSynology Router RT1900ac - Instructions
Synology Router RT1900ac – Instructions

Design
The router is compact and lightweight. The design is pretty simple with a huge Synology logo on the top and LED indicators in front.

The router case is well ventilated with holes pretty much on every side except the top.

Synology Router RT1900ac - Front
Synology Router RT1900ac – Front

Synology Router RT1900ac - LED Indicators
Synology Router RT1900ac – LED Indicators

Synology Router RT1900ac - Back
Synology Router RT1900ac – Back

You can place the router in two ways, either flat down on a surface or standing up using the included stand. I prefer the router to be standing so it takes up less space.

Synology Router RT1900ac - With Stand
Synology Router RT1900ac – With Stand

Synology Router RT1900ac - With Stand
Synology Router RT1900ac – With Stand

Synology Router RT1900ac - Without Stand
Synology Router RT1900ac – Without Stand

Ports
This is the first router that I encountered that has a SD card slot. The SD card slot is compatible with SDXC cards up to 2TB.

I like the way the ports and buttons on this router are organised.

At the back, you have the power button, power port, 1x WAN port followed by 4x LAN ports.

Synology Router RT1900ac - Ports
Synology Router RT1900ac – Ports

On the right side, you have the storage options where it houses the USB 3.0 port and SD card slot.

Synology Router RT1900ac - Right
Synology Router RT1900ac – Right

On the left side, you have the wireless options where it has a WPS button and a Wi-Fi on/off switch.

Synology Router RT1900ac - Left
Synology Router RT1900ac – Left

Setting Up
After plugging in the router, you can access the router admin UI via http://router.synology.com which resolves to http://192.168.1.1 and that will guide you through the set up process. There are about 4 steps in total.

Synology Router RT1900ac - Setup 1
Synology Router RT1900ac – Setup 1

Synology Router RT1900ac - Setup 2
Synology Router RT1900ac – Setup 2

Synology Router RT1900ac - Setup 3
Synology Router RT1900ac – Setup 3

Synology Router RT1900ac - Setup 4
Synology Router RT1900ac – Setup 4

Synology Router RT1900ac - Setup 5
Synology Router RT1900ac – Setup 5

Synology Router RT1900ac - Setup 6
Synology Router RT1900ac – Setup 6

Admin UI
Perhaps my favourite thing about Synology hardware is the awesome (and fast) UI. For NASes, Synology uses the Synology DiskStation Manager (DSM). And for routers, it is called Synology Router Manager (SRM).

I would like to think that the SRM is a subset of the DSM. If you are not a Synology DSM user before, don’t worry, the UI for SRM is pretty straight forward.

After setting up the router, you will get to launch the SRM for the first time. You will be given a tutorial walkthrough on the UI. I think this is the first router to do that after using routers from Linksys, D-Link and Asus.

Here are some screenshots for the common features like Port Forward, Port Triggering, Static Routes, DDNS, etc.

Synology Router RT1900ac - Login
Synology Router RT1900ac – Login

Synology Router RT1900ac - Menu
Synology Router RT1900ac – Menu

Synology Router RT1900ac - Status
Synology Router RT1900ac – Status

Synology Router RT1900ac - Wi-Fi
Synology Router RT1900ac – Wi-Fi

Synology Router RT1900ac - Guest Network
Synology Router RT1900ac – Guest Network

Synology Router RT1900ac - Port Forwarding
Synology Router RT1900ac – Port Forwarding

Synology Router RT1900ac - Port Triggering
Synology Router RT1900ac – Port Triggering

Synology Router RT1900ac - Static Route
Synology Router RT1900ac – Static Route

Synology Router RT1900ac - Firmware Update
Synology Router RT1900ac – Firmware Update

Synology Router RT1900ac - QuickConnect and DDNS
Synology Router RT1900ac – QuickConnect and DDNS

Synology Router RT1900ac - SSH
Synology Router RT1900ac – SSH

Synology Router RT1900ac - Traffic Control
Synology Router RT1900ac – Traffic Control

Mobile App
There is a DS Router app on Apple App Store as well as Google Play.

You can use the DS Router app to setup your router as well as manage it. I am not really a fan of using an app to setup or manage a router.

Furthermore, SRM is already an awesome admin interface, I don’t see the need of using an app to manage this router.

Package Center
You can easily install applications to the SRM using the package center.

Synology Router RT1900ac - Package Center
Synology Router RT1900ac – Package Center

Despite having a 4GB flash storage in the router, you cannot use the built-in storage to install applications. You will need to plug in your own USB flash drive or SD card in order to install them.

Synology Router RT1900ac - Storage
Synology Router RT1900ac – Storage

As of writing, there are only five packages available: Download Station, Media Server, VPN Server, DNS Server and RADIUS server. I hope eventually there will be more packages.

For most people, you will probably just need Download Station and Media Server.

Download Station allows you to download files from the Internet through BitTorrent, FTP, HTTP, NZB, Thunder, FlashGet, QQDL, and eMule.

Synology Router RT1900ac - Download Station
Synology Router RT1900ac – Download Station

Media Server on the other hand allows you to stream media that you have downloaded to DLNA/UPnP-compliant devices.

I wish they is a Plex app as well like they do on their NASes.

On my DS415play, I use Download Station to download content, File Station (built-in app) to move it to the correct folder and Plex app to stream the content to my devices from the folder.

Synology Router RT1900ac - File Station
Synology Router RT1900ac – File Station

VPN Client/Server
The router supports both VPN Client and VPN Server. VPN Client support is built-in, to use the router as a VPN Server, you need to visit the Package Center and download the VPN Server Package.

Synology Router RT1900ac - VPN Client
Synology Router RT1900ac – VPN Client

I tried using it as a VPN Client with my VyprVPN account and it works fine.

If you are a VyprVPN customer, you can refer to this guide. You will just need to key in your email, password, which VPN server to connect to and upload the certificate which you can download from the link in the guide.

VLAN Tagging
A very unfortunate thing about this router is the lack of VLAN Tagging. In Singapore, you pretty much need VLAN Tagging if you are on Singtel or Starhub. So the lack of VLAN Tagging means you can’t use this router directly with the Optical Network Terminal (ONT).

I really hope in future software update, this will be included. VLAN Tagging support will be released next month (January 2016) via a software update according to Synology.

Wireless Strength
I am using the WiFi Explorer app on my MacBook Pro to test the wireless strength of two extreme corners of my house, my room and the common toilet.

Location RT1900ac RT-AC88U DIR-890L EA9200 E8350 WRT1900AC DIR-868L
My Room (2.4GHz) 65% 88% 85% 85% 55% 76% 79%
My Room (5GHz) 71% 82% 82% 76% 27% 78% 91%
Toilet (2.4GHz) 59% 76% 59% 64% 41% 50% 58%
Toilet (5GHz) 46% 55% 39% 46% 37% 46% 55%

Synology Router RT1900ac - Test - WiFi Explorer - Room
Synology Router RT1900ac – Test – WiFi Explorer – Room

Synology Router RT1900ac - Test - WiFi Explorer - Toilet
Synology Router RT1900ac – Test – WiFi Explorer – Toilet

Speed
This is my second router tested using iPerf. The first being the ASUS RT-AC88U Router.

Type RT1900ac RT-AC88U DIR-890L EA9200 EA8350 WRT1900AC DIR-868L
LAN to LAN 940Mbps 940Mbps 932.71Mbps 886.36Mbps 876.2Mbps 780.27Mbps 500.19Mbps
LAN to Wireless 150Mbps 213Mbps 175.87Mbps 173.49Mbps 97.64Mbps 146.14Mbps 217.61Mbps
Wireless to Wireless 117Mbps 145Mbps 119.70Mbps 98.79Mbps 50.53Mbps 146.91Mbps 75.71Mbps

Synology Router RT1900ac - Test - iPerf - LAN to LAN
Synology Router RT1900ac – Test – iPerf – LAN to LAN

Synology Router RT1900ac - Test - iPerf - LAN to Wireless
Synology Router RT1900ac – Test – iPerf – LAN to Wireless

Synology Router RT1900ac - Test - iPerf - Wireless to Wireless
Synology Router RT1900ac – Test – iPerf – Wireless to Wireless

Summary
Both the wireless speed and coverage of this router is average. But given the price, I think it is still acceptable.

The current lack of VLAN tagging is pretty disappointing but I am glad VLAN tagging support will be coming via a software update next month (January 2016).

What I love about this router is the admin UI, I have never seen a router with such a nice and fast UI. I have to admit, I am a fanboy of Synology admin UI.

Would you recommend this router? I would say it depends. If you use your router as a mini-computer to download and stream content, this router is definitely for you because the Package Center has potential to turn the router into a mini-computer that does a lot of things. Whereas if you just use your router as a router and nothing else, you probably be better off with a high-end router like the ASUS RT-AC88U where it has much more features like eight LAN ports and Dual-WAN.

Afterall, this is Synology first router which is targeted at the mid-market. I am sure they will come out with another router that targets the high-end market next year and I am looking forward to that.

Pros:

  • Excellent admin UI
  • VPN server & VPN client support
  • Reasonably priced

Cons:

  • Average wireless speed/coverage
  • No VLAN Tagging yet (TBA January 2016)

ExpressVPN Helps Users Unblock the US Library On Netflix

$
0
0

Disclaimer: I was gifted a subscription of ExpressVPN in exchange for this post. This post was written by Arthur Baxter, Network Operations at ExpressVPN – a worldwide leading VPN provider.


Netflix is now available in almost every territory, after being launched in an additional 130 countries on January 7, 2016.

“Today you are witnessing the birth of a new global Internet TV network,” said the company CEO, Reed Hastings. And it’s hard to argue with him.

Netflix has long sought to be accessible all around the world, long striving to become the world’s first truly global network. Now, they have their wish. The logistical nuances of launching in 130 different countries simultaneously are, frankly, staggering.

But the real winners are those with a VPN subscription. Overnight, the content they have access to has increased phenomenally. With more programs than ever before, and content from almost every country in the world, it’s a good day to be a TV fan with a VPN.

Each country features its own Netflix library, and some shows are unique to specific areas. Even global blockbusters are not available everywhere, due to rules and licensing agreements within different countries. House of Cards can’t be viewed on French Netflix, for example, as another broadcaster owns the rights. You can’t watch the brilliant Better Call Saul in the US for the same reason. Regional Netflix catalogues also add their own local content, which may appeal to the ever increasing number of ExPats around the globe.

There’s also regional censorship to consider. Lots of governments have different rules as to what they deem appropriate for their citizens to view and hear. Poor dubbing or bleeped out dialogue can often ruin the viewing experience. Viewers in the Middle East or Asia, especially, may rather watch uncensored versions by using a VPN to connect to the US Netflix.

US Netflix Remains the Most Sought After
The ability to pick and choose programming from around the globe is sure to please everyone, but US Netflix remains the jewel in the Crown. It simply has more TV shows and blockbuster movies than anywhere else. And while it’s nice to have access to specialised regional content, those outside the US still get less for their money than their American counterparts. It makes sense, US Netflix was the first, and America spends far more making entertainment than any other country.

Fortunately, US Netflix is available to everyone. All you need to connect to the largest Netflix library is a quality VPN.

ExpressVPN is a premium VPN service, with incredible speed and a huge selection of global server locations. It also comes with unlimited bandwidth and speed, so there’s no need to worry about a data cap or buffering.

ExpressVPN
ExpressVPN

Watch US Netflix With ExpressVPN
Watching US Netflix with ExpressVPN is simple. Once you’ve opened your account, just download the app and select any of the servers based in the US.

It is extremely intuitive, and there are apps for Windows, iOS, and Android. It’s just as easy to connect from your PC or Mac as it is from your iPhone or Android, giving you full access to US Netflix, wherever you are.

The speed is unmatched. ExpressVPN streams HD videos effortlessly, and if you get bored of US Netflix, you can try a different region by connecting to any of the other 78 server locations, worldwide. There’s even a 30 day money back guarantee and an unrivalled 99.9% uptime.

ExpressVPN offers a free and open Internet where you can watch what you want, when you want it. Accessing US Netflix is no problem, no matter where you are in the world. If you stream your entertainment, there has never been a better time to get a VPN.

ExpressVPN Prices

ExpressVPN - Prices
ExpressVPN – Prices

Synology DiskStation DS216+

$
0
0

The Synology DiskStation DS216+ which was launched on 28th January 2016 is the successor to the Synology DiskStation DS215+. It is retailing in Singapore for S$499.

The DS216+ features a dual-core Intel CPU with AES NI hardware encryption engine, Btrfs file system support, and 4K UHD transcoding.

It is a high-performance 2-bay NAS targetted at small office and home users who want an efficient and secure storage solution to protect and share data, as well as enjoy on-the-fly video transcoding.

The DS216+ is the fourth model and the highest end of the DS216 series. The first is the budget friendly DS216se (they used to end it with j instead of se), followed by the multimedia model, DS216play, and the mid-range DS216.

Based on Fuwell‘s price list, the DS216se is retailing for S$217, the DS216play is retailing for S$360 and the DS216 is retailing for S$449.

The main difference between the models is normally the CPU, RAM and the hardware transcoding engine.

Specs DS216se DS216play DS216 DS216+
CPU Model Marvell Armada 370 88F6707 STM STiH412 Marvell Armada 385 88F6820 Intel Celeron N3050
CPU Architecture 32-bit 32-bit 32-bit 64-bit
CPU Speed 800 MHz Dual Core 1.5 GHz Dual Core 1.3 GHz Dual Core 1.6 GHz (burstable to 2.16 GHz)
RAM (DDR3) 256MB 1GB 512MB 1GB
Hardware Transcoding Engine No Yes No Yes
Size 165mm x 100mm x 225.5mm 165mm x 108mm x 233.2mm
Weight 0.87kg 0.88kg 1.3kg 1.25kg
Color White Black

DS216+ Specifications

  • CPU: Intel Celeron N3050 (64-bit) Dual Core 1.6 GHz (burstable to 2.16 GHz)
  • Ram: 1GB DDR3
  • Hardware Encryption Engine (AES-NI): Yes
  • Hardware Transcoding Engine: H.264 (AVC), MPEG-2 and VC-1; maximum resolution: 4K (4096 x 2160); maximum frame rate per second (FPS): 30
  • Drive Bays: 2
  • Compatible Drive Type: 2.5″/3.5″ SATA III / SATA II HDD & 2.5″ SATA III / SATA II SSD
  • Maximum Internal Raw Capacity: 16 TB (8 TB HDD x 2)
  • Maximum Single Volume Size: 108TB
  • Hot Swappable Drive: Yes
  • Ports: 2x USB 2.0 Port, 1x USB 3.0 (front), 1x eSATA, 1x RJ-45 1GbE LAN
  • File System: Btrfs/EXT4
  • System Fan: 1x 92mm x 92mm
  • Size: 165mm x 108mm x 233.2mm
  • Weight: 1.25kg (excluding HDD)

Unboxing

Synology DiskStation DS216+ - Box Front
Synology DiskStation DS216+ – Box Front

Synology DiskStation DS216+ - Box Back
Synology DiskStation DS216+ – Box Back

Synology DiskStation DS216+ - Box
Synology DiskStation DS216+ – Box

Synology DiskStation DS216+ - Box Open
Synology DiskStation DS216+ – Box Open

Synology DiskStation DS216+ - Instructions
Synology DiskStation DS216+ – Instructions

Synology DiskStation DS216+ - Instructions
Synology DiskStation DS216+ – Instructions

Synology DiskStation DS216+ - Front
Synology DiskStation DS216+ – Front

Synology DiskStation DS216+ - Right
Synology DiskStation DS216+ – Right

Synology DiskStation DS216+ - Back
Synology DiskStation DS216+ – Back

Synology DiskStation DS216+ - Bottom
Synology DiskStation DS216+ – Bottom

Install HDD

Synology DiskStation DS216+ - Front Open
Synology DiskStation DS216+ – Front Open

Synology DiskStation DS216+ - Front Open
Synology DiskStation DS216+ – Front Open

Synology DiskStation DS216+ - HDD Bay
Synology DiskStation DS216+ – HDD Bay

Synology DiskStation DS216+ - With HDD
Synology DiskStation DS216+ – With HDD

Synology DiskStation DS216+ - With HDD
Synology DiskStation DS216+ – With HDD

Synology DiskStation DS216+ - With HDD
Synology DiskStation DS216+ – With HDD

Setup
The first setup step would be to open find.synology.com in your browser and Synology Web Assistant will attempt to locate your NAS in your local network.

Once it detected your NAS, you will be prompted to install the Synology DiskStation Manager (DSM) and thus wiping all the contents on the HDD in the NAS. DSM is the operating system (OS) used to power Synology NASes. It is currently in version 5.2 and 6.0 will be due in March 2016.

After installing DSM, your NAS will reboot and you can login with the username “admin” and password can be left blank.

You will now be brought through a setup wizard and you can follow the instructions accordingly.

DSM 5.2 - Welcome
DSM 5.2 – Welcome

DSM 5.2 - Home
DSM 5.2 – Home

Backup & Replication
The Backup & Replication app in DSM allows you to backup your NAS to three difference places:

  • External disk or a system shared folder
  • Another Synology NAS or rsync-compatible server
  • Public Cloud (Amazon AWS S3, Microsoft Azure)

I will be using the DS216+ for my new house and my current DS210j will still be at my parent’s place.

By having two Synology NASes at different physical locations and having one replicating the data over to the other, it mitigates the risk of data lost if one of the house is caught fire.

We can lose the NAS as you can buy it again but we can’t lose the data in it.

DSM - Backup & Replication
DSM – Backup & Replication

Cloud Sync
You can find and install the Cloud Sync app using the Package Center. Cloud Sync allows you to sync public cloud services like Dropbox, Google Drive, Microsoft OneDrive to the NAS as a backup. This is my second favourite app in the Package Center after Plex Server.

DSM - Cloud Sync
DSM – Cloud Sync

DSM - Cloud Sync - Syncing
DSM – Cloud Sync – Syncing

Brightness Control for Front LED Lights
Normally I place my NASes outside my room, so the brightness of the LED indicator lights are not a concern to me.

However, if you are placing your NAS in the same room as you sleep in, you will be happy to know that DS216+ comes with a four-level brightness control for the LED indication lights.

You can adjust the level of brightness in: Control Panel > Hardware & Power -> General. The default is full brightness.

DSM - LED Brightness Control
DSM – LED Brightness Control

USB Copy Button
The only USB 3.0 port of the DS216+ is located in front and it now comes with USB Copy button. By pressing the button, you can copy the files in the USB drive to a predefined destination on the DS216+.

To enable it, you can go to: Control Panel > External Devices -> USBCopy

DSM - USBCopy
DSM – USBCopy

Btrfs File System
Besides Ext4, the DS216+ comes with the Btrfs (B-tree file system) (pronounced as Butter FS). The Btrfs is based on the copy-on-write (COW) principle which was designed by Oracle Corporation for use in Linux.

Ext4 supports volumes up to 1 EB (exabyte) and files up to 16 TB whereas Btrfs supports volumes and files up to 16EB. As a consumer, you will not hit those limits.

The area where Btrfs shines is transferring files. Since it uses COW principle, copying files to the NAS will be much faster, however reading files from it will be slower.

For the DS216+, Synology defaults to Btrfs when it did the initial formatting for you when installing DSM.

Both Ext4 and Btrfs has it’s own pros and cons, you can read this article on the comparison between them.

DSM - Storage Manager
DSM – Storage Manager

Intel AES NI
I don’t encrypt my files on my NAS because they don’t contain sensitive information, but if you do, I am sure you will be happy to know that encryption and decryption will be faster on the DS216+.

This is because the DS216+ is the only model of the DS216 series to be powered by an Intel processor. Because it uses an Intel processor, it makes use of Intel AES New Instructions (Intel AES NI).

This new encryption instruction set improves on the Advanced Encryption Standard (AES) which in turn speeds up applications performing encryption and decryption using AES.

Based on Synology benchmarks, it will give you an encrypted data transmissions of about 113 MB/s for reading and 109 MB/s for writing.

DSM - Encrypt Shared Folder
DSM – Encrypt Shared Folder

Hardware Transcoding Engine
Transcoding is needed because your device or digital media player (DMP) will not be able to play certain video formats. Plex Server and Synology Video Station may be able to transcode it to watchable formats on the fly when you stream it.

Similar to the DS216play, the DS216+ also has a Hardware Transcoding Engine which gives you the capability of performing a H.264 4K (4096×2160) to 1080p (1920×1080) video transcoding on the fly at a maximum frame rate of 30fps.

DSM - Plex Server Transcoding
DSM – Plex Server Transcoding

Summary
If you are looking for a powerful NAS with an awesome OS that doesn’t break your bank, the Synology DS216+ is for you.

Despite the DS216+ has a cheaper alternative which is the DS216se that retails for S$217, it might not be powerful enough for you as you use it along the years. You might end up getting frustrated with the slowness as time passes.

I am guessing a Synology NAS can last you about 8 to 10 years? My DS210j is 6 years old and still going strong!

I would rather you save a little bit more and go for the DS216+ which retails for S$499.

And as always, choose WD Red HDD to go with your NAS.

Synology DiskStation DS216+

TP-Link 8-Port Gigabit Desktop Switch (TL-SG108)

$
0
0

Bought the TP-Link 8-Port Gigabit Desktop Switch (TL-SG108) from Challenger at VivoCity for S$43 (member’s price: S$39).

This is my first TP-Link product and I will be using this switch for my new house.

I was contemplating between this and D-Link’s 8-Port Gigabit Desktop Switch In Metal Casing (DGS-108) which retails for S$55. But I ended up choosing TP-Link’s one because it is much cheaper.

I am currently using D-Link 8-Port Gigabit Desktop Switch (DGS-1008D) at my house which I bought about 5 years ago and still doing well.

TP-Link 8-Port Gigabit Desktop Switch (TL-SG108) - Box Front
TP-Link 8-Port Gigabit Desktop Switch (TL-SG108) – Box Front

TP-Link 8-Port Gigabit Desktop Switch (TL-SG108) - Box Back
TP-Link 8-Port Gigabit Desktop Switch (TL-SG108) – Box Back

TP-Link 8-Port Gigabit Desktop Switch (TL-SG108) - Box
TP-Link 8-Port Gigabit Desktop Switch (TL-SG108) – Box

TP-Link 8-Port Gigabit Desktop Switch (TL-SG108) - Box Contents
TP-Link 8-Port Gigabit Desktop Switch (TL-SG108) – Box Contents

TP-Link 8-Port Gigabit Desktop Switch (TL-SG108) - Power Adapter
TP-Link 8-Port Gigabit Desktop Switch (TL-SG108) – Power Adapter

TP-Link 8-Port Gigabit Desktop Switch (TL-SG108) - Ports
TP-Link 8-Port Gigabit Desktop Switch (TL-SG108) – Ports

TP-Link 8-Port Gigabit Desktop Switch (TL-SG108) - Back
TP-Link 8-Port Gigabit Desktop Switch (TL-SG108) – Back

TP-Link 8-Port Gigabit Desktop Switch (TL-SG108)

This post TP-Link 8-Port Gigabit Desktop Switch (TL-SG108) appeared first on lesterchan.net.

TP-Link 300Mbps Wireless N Nano Router

$
0
0

Bought the TP-Link 300Mbps Wireless N Nano Router (TL-WR802N) from Hachi.tech. Hachi.tech is a online tech-focused marketplace by Challenger.

The nano router cost S$45 with a 5% rebate. In Challenger stores, they are selling it for S$50 (member’s discount is S$45).

I need a small router in my master bedroom to cover a small dead zone. The router has to be small enough to be hidden in Bluelounge CableBox and needs to be powered by USB. The only two devices that will connect to this router is probably Li Xiang and my phone.

I initially thought of getting the Apple AirPort Express but it was too expensive at S$148.

The next alternative was the Asus WL-330NUL (World’s Smallest Router) at S$59 but I thought it might not be as powerful as the TP-Link 300Mbps Wireless N Nano Router. And given the price, it is more expensive than the TP-Link’s one and hence I ended up going for the TP-Link.

TP-Link 300Mbps Wireless N Nano Router - Box Front
TP-Link 300Mbps Wireless N Nano Router – Box Front

TP-Link 300Mbps Wireless N Nano Router - Box Back
TP-Link 300Mbps Wireless N Nano Router – Box Back

TP-Link 300Mbps Wireless N Nano Router - Box
TP-Link 300Mbps Wireless N Nano Router – Box

TP-Link 300Mbps Wireless N Nano Router - Box Contents
TP-Link 300Mbps Wireless N Nano Router – Box Contents

TP-Link 300Mbps Wireless N Nano Router - Instructions #1
TP-Link 300Mbps Wireless N Nano Router – Instructions #1

TP-Link 300Mbps Wireless N Nano Router - Instructions #2
TP-Link 300Mbps Wireless N Nano Router – Instructions #2

TP-Link 300Mbps Wireless N Nano Router - Top
TP-Link 300Mbps Wireless N Nano Router – Top

TP-Link 300Mbps Wireless N Nano Router - Bottom
TP-Link 300Mbps Wireless N Nano Router – Bottom

The TP-Link 300Mbps Wireless N Nano Router is powered by USB (Micro USB) and it measures 57mm x 57mm x18 mm. It supports IEEE 802.11n, IEEE 802.11g, IEEE 802.11b and comes with one 10/100Mbps WAN/LAN Port.

The only complain I have is the 10/100Mbps WAN port. I wish it comes with a 10/100/1000Mbps WAN port instead. I don’t mind paying a higher price for that given my Internet connection is 1Gbps.

I am also not sure how it can archive the theoretical 300Mbps wireless speed given that the bottleneck is the 100Mbps WAN port.

TP-Link 300Mbps Wireless N Nano Router - Ports
TP-Link 300Mbps Wireless N Nano Router – Ports

In my living room, I am able to achieve about 94Mbps down and 92Mbps up with a ping of 3ms on my iPhone 6s Plus.

Speedtest - Asus RT-AC88U
Speedtest – Asus RT-AC88U

Using the TP-Link 300Mbps Wireless N Nano Router in my master bedroom, my speed is about 77Mbps down and 91Mbps up with a ping of 14ms

Speedtest - TP-Link TL-WR802N
Speedtest – TP-Link TL-WR802N

The speed is good and better than what I expected considering the size and the price for the router.

TP-Link 300Mbps Wireless N Nano Router

This post TP-Link 300Mbps Wireless N Nano Router appeared first on lesterchan.net.

D-Link DAP-1860 AC Wi-Fi Range Extender

$
0
0

The D-Link DAP-1860 AC Wi-Fi Range Extender was launched in Singapore last month and is retailing for S$189.

The D-Link DAP-1860 operates on both the 2.4GHz and 5GHz wireless bands using concurrent dual-band technology with four MIMO external antennas. It supports MU-MIMO.

It uses wireless 802.11ac Wave II technology and hence it can provide speeds of up to 2,532Mbps (1732Mbps Wireless AC + 800Mbps Wireless N).

Specifications

  • Wireless: IEEE 802.11 ac/n/g/b/a wireless LAN
  • Wireless Security: Wi-Fi Protected Access (WPA/WPA2), WPS (PBC)
  • 2.4GHz Band: 2400 – 2483 MHz ISM Band (11 Channels for USA, 13 Channels for European Countries)
  • 5.0GHz Band: 5180 – 5850 MHz USA, 5150 – 5175 MHz European Countries ( 5 GHz Band:36 – 165 USA, 36 – 140 European Countries)
  • Wired: 10/100/1000 Gigabit Ethernet Port
  • Antenna: Four Adjustable External Antennas (4×4 MIMO Configuration)
  • Buttons/Switches: Power Switch, WPS Button, Reset Button
  • LED Lights: Status/WPS, 3 Segment Wi-Fi Signal Strength Indicator
  • Dimensions: 158.5 x 69.8 x 51 mm
  • Weight: 403g

D-Link DAP-1860 - Box Front
D-Link DAP-1860 – Box Front

D-Link DAP-1860 - Box Back
D-Link DAP-1860 – Box Back

D-Link DAP-1860 - Box
D-Link DAP-1860 – Box

D-Link DAP-1860 - Box Contents
D-Link DAP-1860 – Box Contents

D-Link DAP-1860 - Front
D-Link DAP-1860 – Front

D-Link DAP-1860 - Back
D-Link DAP-1860 – Back

D-Link DAP-1860 - Left
D-Link DAP-1860 – Left

D-Link DAP-1860 - Right
D-Link DAP-1860 – Right

D-Link DAP-1860 - Bottom
D-Link DAP-1860 – Bottom

D-Link DAP-1860 - Top
D-Link DAP-1860 – Top

D-Link DAP-1860 - With Antenna Opened
D-Link DAP-1860 – With Antenna Opened

D-Link DAP-1860 - LAN Port
D-Link DAP-1860 – LAN Port

Setup
I am using the D-Link DAP-1860 with my ASUS RT-AC88U Router at my new place.

I was using the D-Link DIR-890L AC3200 Wireless Tri-Band Gigabit Cloud Router previously when I am still staying with my parents.

Setting up the DAP-1860 is very straight forward if you are using Wi-Fi Protected Setup (WPS). Just press the WPS button on the DAP-1860 followed by the WPS button on your router and you are good to go.

D-Link DAP-1860 - Plugged In
D-Link DAP-1860 – Plugged In

D-Link DAP-1860
D-Link DAP-1860

Unfortunately, I don’t use WPS and I have to set it up manually (which is more fun for me).

Setting up manually isn’t as complicated as I thought. I am setting it up as a Wi-Fi repeater mode rather than a hotspot mode via the built-in Ethernet port.

After plugging in the DAP-1860, just go to the admin URL which is indicated in your D-Link Wi-Fi Configuration Card. For me, mine is http://dlinkapDD7C.local which points to 192.168.0.50. The default username is “Admin” and password can be left blank.

Once inside the admin panel, just go to Network -> Extender and you can configure the DAP-1860 easily. Check out the screenshots below:

D-Link DAP-1860 - System
D-Link DAP-1860 – System

D-Link DAP-1860 - Admin - Extender
D-Link DAP-1860 – Admin – Extender

D-Link DAP-1860 - Admin - Wi-Fi Scan
D-Link DAP-1860 – Admin – Wi-Fi Scan

This post D-Link DAP-1860 AC Wi-Fi Range Extender appeared first on lesterchan.net.

Linksys WUSB6100M Max-Stream AC600 MU-MIMO USB Adapter

$
0
0

The Linksys WUSB6100M Max-Stream AC600 MU-MIMO USB Adapter is the world’s first MU-MIMO enabled adapter. It was launched in Singapore on 1st August 2016 and is currently retailing for S$129.

The WUSB6100M adapter allows you to connect your PC to a wireless-AC network as well as a MU-MIMO router.

Unfortunately, you can’t use this adapter with a Mac because there is no software or driver for it on the Mac.

It supports 802.11ac Wave 2. 802.11ac Wave 2 is an addition to the original 802.11ac wireless specification that utilizes MU-MIMO technology.

The reason why there is an AC600 in the name is because it supports dual-band AC Wi-Fi speeds up to 600Mbps. 433Mbps on AC and 150Mbps on N.

You can read more about MU-MIMO on my Linksys EA8500 Max-Stream AC2600 MU-MIMO Gigabit Router Review which I did last year.

I also have with me the Linksys Max-Stream AC1900+ MU-MIMO Range Extender (RE7000) and the Linksys Max-Stream AC5400 MU-MIMO Gigabit Router (EA9500). So stay tuned!

WUSB6100M - Box Front
WUSB6100M – Box Front

WUSB6100M - Box Back
WUSB6100M – Box Back

WUSB6100M - Box
WUSB6100M – Box

WUSB6100M - Box Contents
WUSB6100M – Box Contents

WUSB6100M - Front
WUSB6100M – Front

WUSB6100M - Back
WUSB6100M – Back

WUSB6100M
WUSB6100M

WUSB6100M - It Does Not Work For Mac.
WUSB6100M – It Does Not Work For Mac.

This post Linksys WUSB6100M Max-Stream AC600 MU-MIMO USB Adapter appeared first on lesterchan.net.

Linksys RE7000 Max-Stream AC1900 MU-MIMO Wi-Fi Range Extender

$
0
0

The Linksys RE7000 Max-Stream AC1900 Wi-Fi Range Extender has been available in Singapore since 1st August 2016. It is retailing for S$199.

The RE7000 is an AC1900 dual-band range extender with a Gigabit Ethernet Port and four internal antennas.

It is not the first range extender that supports MU-MIMO, but it is the first range extender with MU-MIMO and Seamless Roaming.

Seamless Roaming
Seamless Roaming allows you to have a single network in your home with a single SSID so you can walk around your home without having to manually connect to the range extender.

Of course to support this, the RE7000 needs to be paired with a Linksys Max-Stream router like the EA7500 (AC1900), EA8500 (AC2600) or the latest EA9600 (AC5400).

The RE7000 will also work with other routers but without Seamless Roaming. Hence, you will have to manually choose which network you want to connect to if you are out of range.

Seamless Roaming aims to solve the problem of sticky clients. Sticky clients are clients that refuse to drop the connection to a router/AP/range extender unless they are out of range.

802.11r
Linksys uses 802.11r to support Seamless Roaming.

It is actually common in most enterprise Access Points (AP) and now it is being brought to consumer products.

The 802.11r mentioned is Linksys proprietary implementation of IEEE 802.11r-2008 (Fast BSS transition) on RE7000 to support fast roaming. Although it says proprietary, it still follows closely to the default 802.11r standard.

When a 802.11r-compliant device such as iPhone (iPhone 4s and later) roams from one Max-Stream router to another RE7000, the fast transition mechanism can reduce the authentication time needed, which leads to minimal connectivity loss and application disruption.

Seamless Roaming guarantees no dropped Voice over IP (VoIP) calls, no lag streaming video/video calls such as FaceTime or Skype.

802.11r requires both the router and range extender shares the same encryption keys so that the roaming client does not need to re-authenticate every time it transitions from the router to the range extender.

Do note that when you use Android devices, there are known isolated issues with delays. This is an Android issue and happens not just on Linksys products but in enterprise environments as well. Cisco has outlined the issue and provide some workarounds here.

802.11k
802.11r and 802.11k comes hand-in-hand.

802.11k is the standard which allows the client to determine the next router, AP or range extender that has the best signal.

Once any of those has a better signal, the client automatically switches to it. And with the help of 802.11r, the authentication time is greatly reduced. This makes it looks seamless.

You can check out Apple’s support article on Wi-Fi network roaming with 802.11k, 802.11r, and 802.11v on iOS.

Auto Cross-Band Technology
Auto Cross-Band technology intelligently uses both 2.4GHz and 5GHz bands to communicate with the Wi-Fi router in order to optimize the performance of the wireless clients in the dual-band extended network.

It will also identify the best backhaul path for relaying traffic from/to a given Wi-Fi client. For example, the RE7000 will use the 5GHz backhaul to relay the traffic from/to a nearby 5GHz client with strong signals. On the other hand, the RE7000 may use the 2.4GHz backhaul to relay the traffic from/to a distant 5GHz client with weak signals.

Gigabit Ethernet Port
There is a Gigabit Ethernet Port at the bottom of the RE7000. It can act as a wireless bridge if you connect a computer or a NAS to it.

It can also act like a wired range extender if you connect it directly to your router.

I will be using the RE7000 as a wired range extender.

RE7000 with EA9500
My master bedroom has a wireless blind spot in which my Asus RT-AC88U Router can’t reach.

I am currently using the TP-Link Nano Router to create a seperate network in my master bedroom.

I am hoping that the RE7000 and the Linksys Max-Stream AC5400 MU-MIMO Gigabit Router (EA9500) will solve my problem and allow me to have a single network at home.

So stay tuned for my review.

RE7000 - Box Front
RE7000 – Box Front

RE7000 - Box Back
RE7000 – Box Back

RE7000 - Box
RE7000 – Box

RE7000 - Box Contents
RE7000 – Box Contents

RE7000 - Front
RE7000 – Front

RE7000 - Back
RE7000 – Back

RE7000 - Plug Adapter
RE7000 – Plug Adapter

RE7000 - Bottom - Ethernet Port
RE7000 – Bottom – Ethernet Port

RE7000 - Right - WPS & Reset Button
RE7000 – Right – WPS & Reset Button

RE7000 - Left
RE7000 – Left

RE7000 - Top
RE7000 – Top

RE7000
RE7000

RE7000 - Plugged In
RE7000 – Plugged In

RE7000 - Plugged In
RE7000 – Plugged In

This post Linksys RE7000 Max-Stream AC1900 MU-MIMO Wi-Fi Range Extender appeared first on lesterchan.net.

Linksys EA9500 Max-Stream AC5400 MU-MIMO Gigabit Router Review

$
0
0

The Linksys Max-Stream AC5400 MU-MIMO Gigabit Router (EA9500) has been available in Singapore since 1st August 2016. It is retailing for S$539.

The EA9500 is the highest-end router of the Linksys Max-Stream family. I did a review of the mid-range model which is the Linksys EA8500 Max-Stream AC2600 Router back in October 2015.

EA9500 features 802.11ac Wave 2 Wi-Fi standard which includes MU-MIMO (8 simultaneous MU-MIMO streams) and has tri-band wireless AC5400 (1,000Mbps 2.4GHz + 2,166Mbps 5GHz + 2,166Mbps 5GHz).

You can read more about MIMO and MU-MIMO in my review of the Linksys EA8500 Router as mentioned earlier.

When paired with the Linksys RE7000 Max-Stream AC1900 MU-MIMO Wi-Fi Range Extender, Seamless Roaming Technology allows you to have a single network in your home with a single SSID so you can walk around your home without having to manually connect to the range extender.

You can read more about Seamless Roaming in my Linksys RE7000 Range Extender post.

There are 8 external non-removable antennas on the router, 9 Gigabit Ethernet ports (8 LAN, 1 WAN), 1 USB 3.0 and 1 USB 2.0 port.

It is powered by Broadcom 1.4GHz Dual-Core processor, has 256MB of RAM and 128MB of flash storage.

Despite it being Linksys highest-end router, it is weird that it only has 256MB of RAM. In comparison, the mid-range router, EA8500, has 512MB of RAM.

Specifications (Credits: SmallNetBuilder and WikiDevi)

  • CPU: Broadcom BCM4709C0 1.4 GHz Dual-Core Processor
  • RAM: 256MB (2x EtronTech EM6GD16EWXD-12H)
  • Flash: 128MB (Toshiba TC58BVG0S3HTA00)
  • Wireless: 802.11 a/b/g/n/ac
    • 2.4GHz
      • Broadcom BCM4366 4×4 2.4/5G single chip 802.11ac SoC
      • Skyworks SE2623L 2.4 GHz power amp (x4)
      • IEEE 802.11n, IEEE 802.11g, IEEE 802.11b
      • Speeds up to 1,000 Mbps
    • 5GHz
      • Broadcom BCM4366 4×4 2.4/5G single chip 802.11ac SoC
      • RFMD RFPA5542 5 GHz PA module (x4)
      • IEEE 802.11ac, IEEE 802.11n & IEEE 802.11a
      • Speeds up to 2,166 Mbps
    • 5GHz
      • Broadcom BCM4366 4×4 2.4/5G single chip 802.11ac SoC
      • RFMD RFPA5542 5 GHz PA module (x4)
      • IEEE 802.11ac, IEEE 802.11n & IEEE 802.11a
      • Speeds up to 2,166 Mbps
  • LAN/WAN
    • Broadcom BCM53125
    • 8x 10/100/1000 Gigabit LAN ports
    • 1x 10/100/1000 Gigabit WAN port
  • Antennas: Eight external non-removable antennas
  • Other Ports: 1x USB 3.0 port, 1x USB 2.0 Port
  • Dimensions (Without Antennas): 264.52 x 318.15 x 66.66 (mm)
  • Weight: 1.73kg

Unboxing

EA9500 - Box Front
EA9500 – Box Front

EA9500 - Box Back
EA9500 – Box Back

EA9500 - Box
EA9500 – Box

EA9500 - Box Open
EA9500 – Box Open

EA9500 - Box Contents
EA9500 – Box Contents

EA9500 - Power Adapter
EA9500 – Power Adapter

Design
The router is huge and heavy. These days, I am not sure if the dimensions and weight correspond to the price of the routers.

EA9500 - Top
EA9500 – Top

EA9500 - Bottom
EA9500 – Bottom

Despite there are holes all over the router for ventilation, the router still feels very hot. I remember attending a demo of the EA9500 and it is placed on a laptop cooler even though it is in office settings with air conditioning switched on.

EA9500 - Front
EA9500 – Front

EA9500 - Back
EA9500 – Back

There are eight LAN ports and one WAN ports at the back. It also comes with one USB 3 and one USB 2 port.

EA9500 - Buttons & Ports
EA9500 – Buttons & Ports

EA9500 - Left
EA9500 – Left

EA9500 - Right
EA9500 – Right

There are eight external non-removable antennas. Three on each side and two at the back. Personally, I prefer non-removable antennas as they are less flimsy and doesn’t come loose easily. Also, how often do you really change the antennas? If your antennas spoilt, probably it is time for you to change a new router.

EA9500 - Wi-Fi & WPS Button
EA9500 – Wi-Fi & WPS Button

UI
The EA9500 is a Smart Wi-Fi Router. That means you can access and control your home network from anywhere with a web browser or a mobile device via an iOS or Android App.

I would not be covering the router UI here since it is the same across all the latest Linksys router that I reviewed.

I am still not a fan of the web UI, I find it pleasing to the eyes, but it is much slower than D-Link or Asus router UI.

The EA9500 supports VLAN tagging and OpenVPN.

Speed

Linksys EA9500 - 2.4GHz - Living RoomAsus RT-AC88U - 2.4GHz - Living Room
2.4GHz – Living Room (EA9500 vs RT-AC88U)

Linksys EA9500 - 2.4GHz - Master BedroomAsus RT-AC88U - 2.4GHz - Master Bedroom
2.4GHz – Master Bedroom (EA9500 vs RT-AC88U)

Asus RT-AC88U - 5.0GHz - Living RoomLinksys EA9500 - 5.0GHz - Living Room
5.0GHz – Living Room (EA9500 vs RT-AC88U)

Asus RT-AC88U - 5.0GHz - Master Bedroom
Asus RT-AC88U – 5.0GHz – Master Bedroom

Using the EA9500, I can’t get any Internet connection on my 5GHZ band network in my master bedroom.

Location EA9500 RT-AC88U
Living Room (2.4GHz) (Download) 90.11Mbps 90.14Mbps
Living Room (2.4GHz) (Upload) 119.41Mbps 127.32Mbps
Living Room (5GHz) (Download) 444.58Mbps 465.90Mbps
Living Room (5GHz) (Upload) 282.32Mbps 377.75Mbps
Master Bedroom (2.4GHz) (Download) 24.49Mbps 32.06Mbps
Master Bedroom (2.4GHz) (Upload) 10.64Mbps 8.83Mbps
Master Bedroom (5GHz) (Download) 0.62Mbps
Master Bedroom (5GHz) (Upload) 1.31Mbps

I am not impressed with the wireless speed of the EA9500, in most tests, it still loses out to my Asus RT-AC88U.

Coverage

Linksys EA9500 - 2.4GHz - Heatmap
Linksys EA9500 – 2.4GHz – Heatmap

Asus RT-AC88U - 2.4GHz - Heatmap
Asus RT-AC88U – 2.4GHz – Heatmap

Linksys EA9500 - 5.0GHz - Heatmap
Linksys EA9500 – 5.0GHz – Heatmap

Asus RT-AC88U - 5.0GHz - Heatmap
Asus RT-AC88U – 5.0GHz – Heatmap

As you can see from the heat map of my house, generally for the 2.4GHz band, it fares slightly poorer than the Asus RT-AC88U. You can look out for the bluish area which means there is little wireless coverage.

For the 5.0GHz band, the coverage is almost the same as my Asus RT-AC88U but I am not sure why the EA9500 can’t get any Internet connection in the master bedroom on it.

RE7000 Range Extender
The saving grace of the EA9500 would be using it with the Linksys RE7000 Max-Stream AC1900 MU-MIMO Wi-Fi Range Extender. I find the seamless roaming works as advertised.

I ran a speed test while walking from the living room to my master bedroom.

During the transition period between the EA9500 and RE7000, the speed test pauses for about 8 seconds before resuming to the full 5GHz band speed as it is now connected to the RE7000. Before using the RE7000, I wasn’t able to get any Internet connection on the 5GHz band in my master bedroom.

Here is how the heat map looks like if you include the RE7000 coverage.

Linksys EA9500 with RE7000 - 2.4GHz - Heatmap
Linksys EA9500 with RE7000 – 2.4GHz – Heatmap

Linksys EA9500 with RE7000 - 5.0GHz - Heatmap
Linksys EA9500 with RE7000 – 5.0GHz – Heatmap

Conclusion
Given that this router is priced very steeply at S$539, it is not for everyone.

MU-MIMO is still in a very early stage. Despite being a techie guy, I have no MU-MIMO devices in my house that I can use to test with this router. So having MU-MIMO with eight simultaneous streams is not really a selling point for this router for most consumers.

In fact, the only attractive feature of this router is the seamless roaming. If you have a huge house, you can get the EA9500 with one or two RE7000 and your house wireless coverage will be sufficient. You can use the RE7000 as a wired range extender which is what I did for better speeds. It is a good alternative till wireless mesh network is more widely available for consumers in Singapore.

EA9500
EA9500

This post Linksys EA9500 Max-Stream AC5400 MU-MIMO Gigabit Router Review appeared first on lesterchan.net.

eero Wi-Fi System Review

$
0
0

eero is a home wi-fi system that is based on wireless mesh network (WMN). Accordingly to Wikipedia, A wireless mesh network (WMN) is a communications network made up of radio nodes organized in a mesh topology. It is also a form of wireless ad hoc network.

eero is not cheap. A single eero retails for US$199 (S$285), a 2-pack eero retails for US$349 (S$500) and a 3-pack eero retails for US$499 (S$714).

During Black Friday two months ago, eero drops the price of their products. Single eero was US$149 (S$214), 2-pack eero was US$299 (S$428) and 3-pack eero was US$399 (S$570).

I got the 3-pack eero during Black Friday and it is probably the best Black Friday item that I bought.

Do note that eero doesn’t ship to Singapore directly, and hence you have to ship it through a freight forwarder like HopShopGo.

Unboxing

eero (Pack of 3) - Box Front
eero (Pack of 3) – Box Front

eero (Pack of 3) - Box Back
eero (Pack of 3) – Box Back

eero (Pack of 3) - Box
eero (Pack of 3) – Box

eero (Pack of 3) - Box Open
eero (Pack of 3) – Box Open

eero (Pack of 3) - Box Open
eero (Pack of 3) – Box Open

eero (Pack of 3) - Box Open
eero (Pack of 3) – Box Open

eero - LAN Cable
eero – LAN Cable

eero - Power Adapter
eero – Power Adapter

Don’t worry about power because the power adapter that comes with it is 110 – 240V compatible. You just need to get a plug adapter from US 2-pin to UK 3-pin.

eero - Power Adapter - 100 - 240V
eero – Power Adapter – 100 – 240V

eero - Top
eero – Top

eero - Bottom
eero – Bottom

eero - Front
eero – Front

eero - Back
eero – Back

Setup
eero is setup using an iOS or Android app. There is no web interface for eero.

When you register for an eero account, you need a valid email address and a US/Canada mobile number. Since I am not from the US, I entered my HopShopGo telephone number that has been given to me.

Once your account has been created, you have the option to verify your account with email or mobile number. By default, it will verify with a mobile number. Obviously, for people outside of US and Canada, that will not work for us. So on the mobile verification screen, you have to re-choose verify with an email address at the top.

The eero is the gold standard for router setup. I have setup many routers before and none of them is as easy to setup as eero.

Throughout the setup process, the app tells you what the eero is doing. This subtle feedback gives me an assurance that everything is ok and on track.

Because the app detects and connects to your eero via Bluetooth, it is able to give you an update in the app on what the eero is doing, even when the eero is being restarted.

eero iOS App - Setup - #1eero iOS App - Setup - #2
eero iOS App – Setup

eero iOS App - Setup - #3eero iOS App - Setup - #4
eero iOS App – Setup

eero iOS App - Setup - #5eero iOS App - Setup - #6
eero iOS App – Setup

eero iOS App - Setup - #7eero iOS App - Setup - #8
eero iOS App – Setup

eero iOS App - Setup - #9eero iOS App - Setup - #10
eero iOS App – Setup

eero iOS App - Setup - #11eero iOS App - Setup - #12
eero iOS App – Setup

eero iOS App - Setup - #13eero iOS App - Home
eero iOS App – Setup Done

The speed test is done on the eero app itself. It seems that the test server is in the US (which makes sense) as the eero is not meant to be used outside of US.

Hence, you will never be able to see good speeds if you are in Singapore.

This review is based on eero v2.0 firmware.

Bridge Mode
By default, the eero is set up to replace your router. However, if you want to use your existing router for managing your DHCP and eero for wi-fi, you need to disable the wi-fi feature in your router.

Once that is done, you have to set the eero to be in bridge mode. Menu -> Network Settings -> Advanced Settings -> DHCP & NAT.

eero iOS App - Menueero iOS App - Settings
eero iOS App – Settings

eero iOS App - Settings - Advanced Settingseero iOS App - Settings - Advanced Settings - DHCP & NAT
eero iOS App – Settings – Advanced Settings – DHCP & NAT

Coverage
eero said that a set of 3 will cover the average US home (2,000 to 4,000 sqft). But in the US, most houses have wooden walls and wi-fi signals can penetrate wooden walls.

However, in Singapore, our walls are concrete and that makes it more difficult to penetrate.

My house is a new 5-room BTO flat which is 113sqm or 1,216 sqft in size.

Like all new BTOs, the Internet point is always near the door which is not very strategically located. Hence, I think a 3-pack eero will work better for us.

You can checkout the heatmap that I did for the 2.4GHz and 5.0GHz band of my existing Asus RT-AC88U router:

Asus RT-AC88U - 2.4GHz - Heatmap
Asus RT-AC88U – 2.4GHz – Heatmap

Asus RT-AC88U - 5.0GHz - Heatmap
Asus RT-AC88U – 5.0GHz – Heatmap

As you can see from the heat map above, after Bedroom 2, the signal starts to get weaker.

Here is eero heatmap for the 2.4GHz and 5.0GHz band:

eero - 2.4GHz- Heatmap
eero – 2.4GHz- Heatmap

eero - 5.0GHz- Heatmap
eero – 5.0GHz- Heatmap

With eero, there is no more bluish area around my house and three eeros are more than enough to cover my whole house (though I think a fourth eero one can be placed in the kitchen).

I placed one eero at the Internet point (near the Ramp), one in Bedroom 2 and the last one in Main Bedroom.

All my eeros are connected via Ethernet as I have LAN points in every room. If you need help, check out this eero’s blog post: How should I configure my eero network?

I did a speed test while walking around my house, and the transition between the eeros is quite seamless. The handing over to different eeros is about three seconds.

Speed
Wireless speed wise, it doesn’t seem to be faster than my Asus RT-AC88U or the Linksys EA9500.

eero manages to obtain about 350Mbps down and 164Mbps up whereas for RT-AC88U, it is able to achieve 466Mbps down and 378Mbps up on the 5GHz band.

If you think it might not be a fair test because I did the tests on different days, well, I tried running the tests once in a while since December, but the speed always hovers about 300+Mbps down and 150+Mbps up.

Location eero EA9500 (5GHz) RT-AC88U (5GHz)
Living Room (Download) 349.69Mbps 444.58Mbps 465.90Mbps
Living Room (Upload) 164.14Mbps 282.32Mbps 377.75Mbps

eero - Speed TestAsus RT-AC88U - 5.0GHz - Living Room
Speed Test (eero vs Asus RT-AC88U)

Conclusion
Wi-fi mesh will be the next big thing for consumer networking companies in 2017 as people come to realize that the range extender solution sometimes just doesn’t work well and it can be cumbersome to setup.

If you need good wi-fi coverage while relying on your current router to handle DHCP and routing, the eero is definitely for you. That is because you can disable the wireless feature of your router and run eero in bridge mode as mentioned earlier.

The seamless routing feature of the Linksys EA9500 and Linksys RE7000 is a good alternative to the eero because it has better speeds but it comes at a higher price.

A EA9500 + 2x RE7000 will set you back about S$539 + 2 * S$199 = S$927 whereas a 3-pack eero with Black Friday pricing will set you back US$399 + US$33 (shipping) + US$32 (GST) = US$464 (S$671).

I would recommend you to wait for the eero price to drop back to US$399 or lower as I think that is a more reasonable price to pay rather than the normal price of US$499.

Google Wi-Fi is another alternative to eero, but Google Wi-Fi doesn’t support bridge mode and hence you have to use it as your main router.

Personally, I don’t have faith in Google hardware except for Chromecast. They tend to kill it eventually or have no directions for the product at all. Just look at Chromebooks and Android Tablets.

Whereas for eero, it is their core product. You can be sure they will make it the best or they will not be able to survive in such a competitive market with players like Cisco/Linksys, D-Link, TP-Link, Asus.

eero
eero

Network Cabinet
Network Cabinet

This post eero Wi-Fi System Review appeared first on lesterchan.net.
Viewing all 62 articles
Browse latest View live